Bass Trap Placement: Where to Put Them for Better Low End
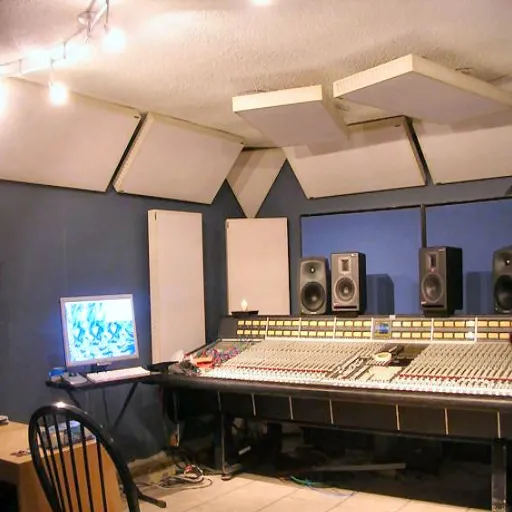
Bass trap placement starts in the corners. More specifically, it starts where two walls meet the floor or ceiling, the tri-corners where low-frequency pressure piles up most. Get this right and the boominess, muddiness, and one-note bass that plague home studios, podcast rooms, and theaters start to disappear.
Most people treat bass like an afterthought. They hang foam tiles on the walls. They add a few panels behind the speakers. Then they wonder why the kick drum still sounds like a thud.
The problem isn’t the panels.
Bass energy doesn’t behave like midrange or treble. It gathers in corners. It builds up along boundaries. It creates standing waves called room modes.
Until you put absorption where that energy actually lives, the room won’t sound balanced.
This guide shows you exactly where to place bass traps, how many you need, and the mistakes that waste money. Whether you’re treating a bedroom studio, a podcast closet, or a home theater, the same principles apply. We’ll also explain how bass traps in corners fit alongside WPC slat wall panels, so you can solve the low end without turning the room into an ugly foam cave. For the full room-treatment strategy, see our complete acoustic panel placement guide.
Key Takeaways
- Tri-corners (wall-wall-ceiling/floor junctions) deliver the biggest bass control per trap.
- Start with the front vertical corners behind your speakers, then treat rear corners and wall-ceiling junctions.
- Use 4+ inch thick porous traps and leave an air gap for absorption below 100 Hz.
- Don’t sit in the exact center of the room; that’s often a bass null.
- Pair corner bass traps with wall panels to control both low frequencies and reflections.
Why Bass Trap Placement Starts in Corners
Low-frequency sound waves are long. A 100 Hz wave is roughly 3.4 meters (11 feet) from peak to peak.
In a typical room, those waves bounce off the walls, floor, and ceiling. They interfere with themselves. Some spots end up with too much bass. Others end up with almost none.
These peaks and nulls are called room modes.
Room modes are strongest where pressure is highest. Pressure is always highest at boundaries. The most intense buildup happens in trihedral corners, the junctions where two walls meet the floor or ceiling. That’s why a room doesn’t have four corners; it has twelve:
- 4 vertical wall-to-wall corners
- 4 wall-to-ceiling corners
- 4 wall-to-floor corners
A bass trap placed in a tri-corner intercepts energy from three surfaces at once. The same trap on a flat wall would only see one surface’s worth of pressure. Corners are the acoustic equivalent of a pressure valve.
That’s why every serious placement guide puts them first.
The physics behind this is sometimes called the 1/4 wavelength rule. Sound pressure is highest at boundaries. Particle velocity, the actual motion that porous absorbers need, is highest a quarter wavelength away from the boundary. By straddling a corner, a trap can intercept those velocity maxima for frequencies much lower than it could reach on a flat wall.
Thicker traps and air gaps extend that reach.
Bass Trap Placement Priority Order
Not every corner is equal. If your budget is limited, follow this bass trap placement sequence.
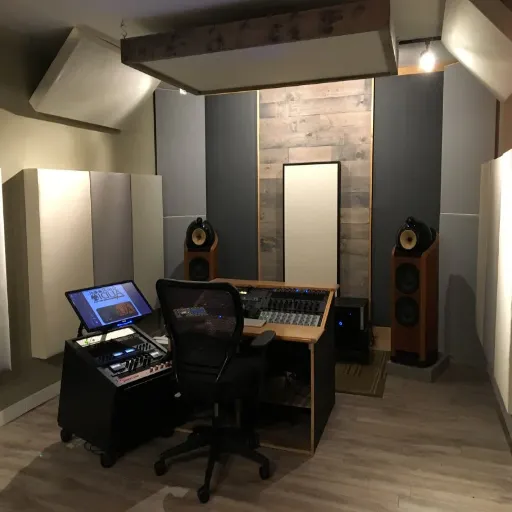
1. Front Vertical Corners Behind the Speakers
Start here. The corners behind your speakers are where bass radiates forward, hits the front wall, and reflects into the room. Treating these corners reduces boundary interference. It clears up the low end at the listening position.
If you can only afford two traps, put them in the front corners. Floor-to-ceiling coverage is best. Even a single thick trap in each front corner will make a noticeable difference. For mixing and mastering rooms, this is non-negotiable.
2. Rear Vertical Corners
After the front corners, move to the rear corners behind the listener. Bass energy wraps around the room and gathers here, too. Rear corner traps reduce the reflections that come back and smear the stereo image.
They also help even out the bass response across the room. That matters if more than one person is listening.
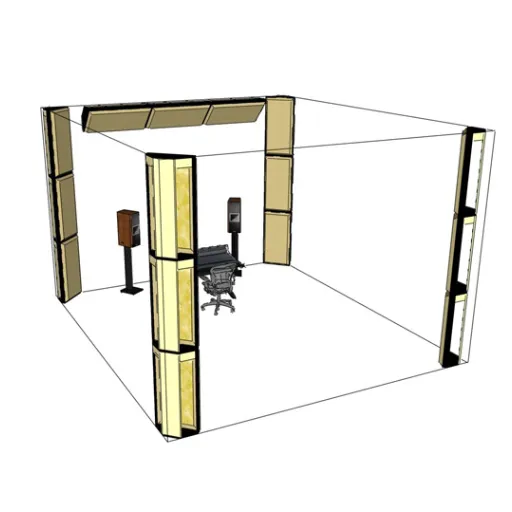
3. Wall-Ceiling Junctions
The junctions where walls meet the ceiling are tri-corners, just higher up. They’re especially useful in rooms where floor space is limited or where vertical corners are blocked by doors, windows, or furniture. Ceiling-mounted traps along the front and rear wall-ceiling junctions give you more bass control without taking up wall real estate. For help deciding whether to prioritize walls or overhead surfaces, read our ceiling vs wall acoustic panels comparison.
Cloud panels can do double duty here. A thick absorptive cloud panel mounted above the listening position can help with both vertical room modes and early ceiling reflections.
4. Wall-Floor Corners
Floor corners are tri-corners too, but they’re often the least practical to treat. Furniture, equipment racks, and speakers get in the way. If you can place traps here without blocking walkways, they help. Otherwise, prioritize vertical and wall-ceiling corners first.
5. Midpoints of Back and Side Walls
Some room modes have pressure maxima at the center of a wall, not just the corners. If you’ve treated all the tri-corners and still have a problem at a specific frequency, place a trap at the midpoint of the wall associated with that dimension. This is most useful when you’ve measured the room and identified a stubborn mode.
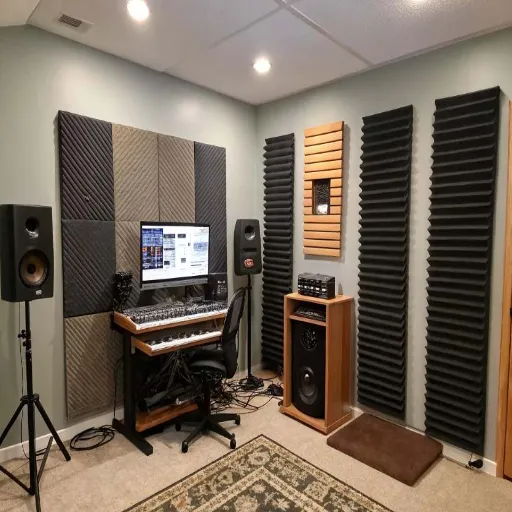
Types of Bass Traps and When to Use Each

Not all bass traps work the same way. The right type depends on your problem frequencies, budget, and room size.
Porous Broadband Traps
These are the most common. They’re made from fiberglass, mineral wool, rockwool, or dense cotton fiber. Sound passes through the porous material and loses energy as heat. They’re effective across a wide frequency range, but they need thickness to reach deep bass.
- 2-inch panels: mostly midrange absorption
- 4-inch panels: useful down to roughly 100–125 Hz
- 6–8 inch panels: effective well below 100 Hz
- With a 2–4 inch air gap: extends performance by another octave
Porous traps are the workhorse of home studios. They’re affordable, predictable, and easy to install. For most people, 4–6 inch porous corner traps are the right starting point.
Membrane and Diaphragmatic Traps
These traps use a flexible panel mounted over an air cavity. The panel vibrates at specific low frequencies and dissipates energy. They’re tuned to a narrower range, typically 40–120 Hz, which makes them ideal for surgically removing a stubborn room mode.
| Trap Type | Frequency Focus | Best Use Case | Trade-off |
|---|---|---|---|
| Porous broadband | Wide, down to ~50 Hz with thickness | General home studios and theaters | Needs space for deep bass |
| Membrane/diaphragmatic | 40–120 Hz tuned range | Stubborn single-mode problems | Higher cost, harder to DIY |
| Helmholtz resonator | Single precise frequency | Professional tuning of known modes | Narrow bandwidth, bulky |
Membrane traps cost more than porous traps and take up less space for the same low-frequency control. They’re worth considering when you need to control a specific boom frequency that broadband traps can’t reach.
Helmholtz Resonators
A Helmholtz resonator is a sealed cavity with a small neck or port. It absorbs one specific frequency very efficiently. Think of it as a sniper rifle for room modes.
The downside is narrow bandwidth. Unless you know exactly which frequency is causing the problem and have space for a large resonator, they’re usually overkill for home studios. They’re more common in professional control rooms and critical listening spaces.
How Many Bass Traps Do You Need?
The answer depends on room size, budget, and how flat you need the bass response to be. Here are practical starting points:
| Room Size | Traps Needed | Priority Layout |
|---|---|---|
| Small bedroom or closet studio (under 12 m² / 130 sq ft) | 4–6 traps | 2 front corners, 2 rear corners, 2 wall-ceiling junctions |
| Medium home studio or podcast room (12–20 m² / 130–215 sq ft) | 6–8 traps | All 4 vertical corners + 2–4 wall-ceiling junctions |
| Large studio or home theater (20+ m² / 215+ sq ft) | 8–12+ traps | All corners, wall-ceiling junctions, and possibly rear-wall midpoints |
In terms of budget, acoustic professionals often recommend spending 30–40% of your total treatment budget on bass trapping. Bass is the hardest part of room acoustics to fix.
Under-treating the low end is the most common reason home studios still sound uneven.
When Marcus set up his mixing room in a spare bedroom, he spent most of his budget on midrange panels and a shiny new desk. The mixes sounded fine on headphones but boomy on car speakers. After adding six 6-inch porous traps, his room finally translated.
The traps covered two front corners, two rear corners, and two wall-ceiling junctions. The upgrade cost less than one monitor. It made a bigger difference than any plugin.
Bass Trap Placement by Room Type
The same physics apply everywhere, but priorities shift based on how the room is used.
Home Recording Studio and Mixing Room
Flat bass response is the goal for any serious home studio bass trap setup. Cover all four vertical corners, floor to ceiling if possible. Add wall-ceiling junctions above the listening position. Keep the listening position away from the exact center of the room.
For dedicated studio layouts, our home studio acoustic panel placement guide covers treatment beyond the corners.
Podcast Room
Voice recordings don’t have deep bass, but room boom can make speech sound boxy and reduce clarity. Four corner traps are usually enough. Focus on the corners nearest the recording position. Then add broadband panels at first reflection points to tighten the voice.
Home Theater
Theater rooms need controlled bass for impact without one-note boom. Front corners and rear corners are the priority for ceiling bass trap placement and vertical corners alike. If the subwoofer is in a corner, treat that corner and the opposite corner first. Wall-ceiling junctions help if the room has a low ceiling.
For a deeper look at theater layouts, see our home theater acoustic panel placement guide.
When Li installed bass trap placement for a 20 m² home theater in Hangzhou, he used floor-to-ceiling corner traps plus WPC slat panels on the front wall. The client noticed the difference immediately. Explosions had weight, but dialogue stayed clear. The bass stopped sounding like a single note and started sounding like part of the mix.
Office and Conference Room
Offices rarely need pro-studio flatness, but corner bass trapping can reduce the hollow boom that makes video calls sound cheap. Two front corner traps plus a couple of wall-ceiling panels are often enough.
Common Bass Trap Placement Mistakes

Even well-meaning treatment plans fail when these bass trap placement mistakes show up.
Using thin foam “bass traps.” Foam that’s only an inch or two thick absorbs highs and some mids. It does almost nothing below 200 Hz. Real bass traps need density and thickness.
Mounting flush to the wall with no air gap. A porous trap against the wall only sees pressure, not velocity. Pulling it 2–4 inches off the surface dramatically improves low-frequency absorption.
Covering walls randomly. Random foam tile patterns might look like a studio, but they don’t target bass. Bass live in corners and along boundaries, not in the middle of flat walls.
Over-treating the room. Dead rooms sound unnatural. Aim to cover 20–30% of the wall surface with absorption, not 70%. Corners give you the most control with the least coverage.
Sitting in the room’s center. The center of a rectangular room is often a bass null for the lowest mode. Move your listening position slightly forward or back from the exact center.
Ignoring the subwoofer location. A subwoofer in a corner excites room modes aggressively. If you can’t move it, treat the corner it’s in and the diagonally opposite corner.
Stopping after two traps. Two corner traps help, but they only control part of the problem. Four to eight traps is the realistic minimum for a small room.
Measuring and Fine-Tuning
You don’t need expensive gear to get better bass, but measurement takes the guesswork out.
Use a Room Mode Calculator
Enter your room dimensions into a calculator like the HOFA-Akustik Room Mode Calculator to see which frequencies are likely to cause trouble. For a rectangular room, the first axial mode along any dimension is roughly:
- Metric: 172 ÷ dimension in meters
- Imperial: 558 ÷ dimension in feet
So a 4-meter wide room has its first width mode around 43 Hz, its second around 86 Hz, and so on.
Listen With Sine Tones
Play sine tones at the calculated mode frequencies and walk around the room. You’ll hear some spots where the tone gets louder and others where it almost disappears. Peaks are where absorption will help; nulls are where you shouldn’t sit.
Optional: Measurement Microphone and REW
Room EQ Wizard (REW) and a cheap measurement mic show you exactly what’s happening. Waterfall plots reveal which frequencies ring longest and where traps are doing the most good. This is overkill for casual listeners but valuable for studios and theaters.
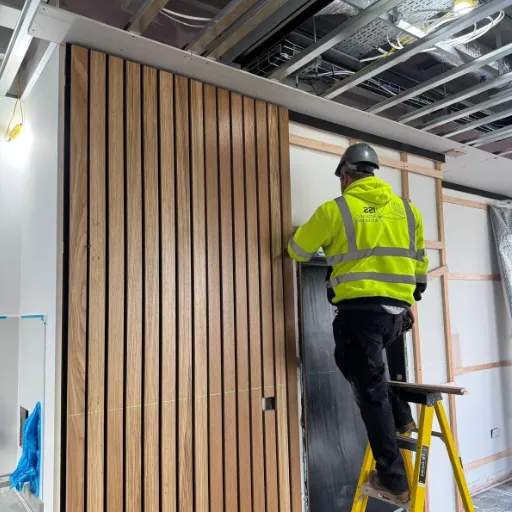
Pairing Bass Traps with WPC Acoustic Panels
Bass traps solve the low end, but they don’t fix midrange reflections or make a room look good. That’s where WPC acoustic panels come in.
A practical system uses corner bass traps for low-frequency control and WPC slat panels on the walls for midrange absorption and aesthetics. The slat panels have an acoustic felt backing and work best with a small air gap. That’s the same principle that makes bass traps more effective.
The result is a room that controls bass trap placement problems in the corners while looking intentional on the walls.
This hybrid approach works especially well in:
- Home theaters that need controlled bass but must still look like living rooms
- Podcast rooms where foam would feel unprofessional on camera
- Offices where visible treatment should match the interior design
- Recording studios where clients expect both performance and appearance
The key is to treat corners first, then add wall panels where reflection control matters. Wall panels alone won’t fix a boomy room; bass traps alone won’t fix harsh reflections. Together, they cover the full frequency range.
Conclusion
Bass trap placement is the single most important decision in low-frequency room treatment. Corners come first, especially the tri-corners where walls meet the ceiling or floor. Start with the front vertical corners behind your speakers, add rear corners, then fill in the wall-ceiling junctions. Use thick porous traps, leave an air gap, and avoid the trap of buying thin foam tiles that only absorb highs.
Don’t expect two traps to fix everything. A small room needs at least four to six; a larger room needs eight or more. Measure if you can, listen with sine tones if you can’t, and always keep the listening position out of the room’s exact center.
If you’re planning a project and want help choosing bass traps, WPC acoustic panels, or a complete layout, contact our team for support. For the bigger picture on where to place bass traps alongside your wall panels, return to our full acoustic panel placement strategy.
Good bass should feel solid, not sloppy. Put the traps in the right corners, and the room finally starts to tell the truth.
Categories:
Blog
Related Articles