How To Install Wpc Wall Panels In Bathroom: The Complete Step-By-Step Guide (2026)
To install WPC wall panels in a bathroom, test the wall for moisture first, fit a waterproof membrane where damp is possible, then fix the panels with a hybrid adhesive plus stainless steel clips over furring strips, leaving expansion gaps and sealing every edge and joint with mildew-resistant silicone. The full contractor-grade method takes seven steps and, done right, gives you a wall that lasts 15-25 years without swelling, mold, or loose panels.
Here is the thing nobody says before you start: a bathroom install follows different rules than a living room. Most WPC “failures” in wet rooms are not panel failures at all. They are installation failures. Unsealed cut edges around the shower valve. Standard steel screws that rust and stain. A skipped moisture barrier on a damp plaster wall. The general guides on how to fit WPC skip these details because they are written for dry walls.
We are Linyi Yuheng International Trading Co., Ltd., a WPC manufacturer and exporter with more than 10 years in the industry. We supply installers, contractors, and hotel developers, and we see exactly where bathroom installations fail. This guide is our factory’s wet-room install manual, written for both DIY renovators and trade fitters. You will learn the moisture testing you must do first, when a membrane is mandatory, how to frame uneven walls, how to cut around pipes and fixtures, and how big the expansion gaps need to be in a humid room.
Key Takeaways
- Test wall moisture before anything else: readings under 12% are safe to panel, 12-20% need resolving first, and above 20% means stop until the damp is fixed.
- Fit a waterproof membrane behind panels in showers, on damp or porous walls, and on ground-floor or basement bathrooms; skip it only on dry, sound, stud-frame walls.
- Use galvanized or hollow steel furring strips on uneven walls, never solid timber, which traps moisture and breeds mold behind panels.
- Fix panels with a hybrid (MS-polymer) adhesive plus stainless or galvanized clips at roughly 300 mm spacing; adhesive-only bonding degrades above about 60% relative humidity.
- Leave a 1-2 mm gap between panels, 2-3 mm at the perimeter, and seal every cut edge immediately with mildew-resistant silicone. Unsealed cut edges are the number one cause of edge swelling.
How to install WPC wall panels in bathroom, step by step:
- Test the wall moisture (under 12% to proceed) and check the substrate.
- Prepare the wall, treat mold, and fit a waterproof membrane where needed.
- Acclimate the panels for 24-48 hours and plan the layout.
- Cut the panels to size and seal every cut edge immediately.
- Choose adhesive vs. mechanical fixing for the wet zone.
- Install the panels with expansion gaps and level checks.
- Seal, trim, and finish with anti-mold silicone.
What’s Different About Installing WPC Wall Panels in a Bathroom?
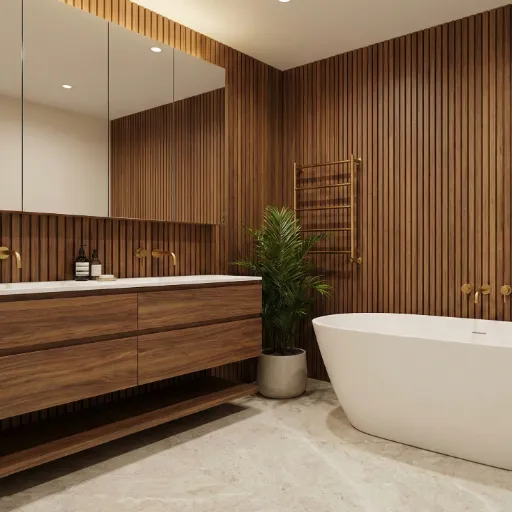
A bathroom is a wet room. Water vapor, steam, and splashes hit the walls daily, and the trapped moisture behind a panel has nowhere to go. That single fact changes almost every installation decision you make.
Five wet-room rules separate a bathroom install from a dry-room install:
- Test and manage moisture in the substrate before you panel a single sheet.
- Fit a waterproof membrane where moisture can reach the wall from behind.
- Use galvanized or hollow furring, never solid timber, on uneven or damp walls.
- Seal every cut edge and joint with anti-mold silicone, especially around fixtures.
- Size your expansion gaps for humidity, not just temperature.
Skip any of these and you are gambling the whole wall. The good news? None of them are difficult. They just need to be part of your plan before the first panel goes up. If you are still choosing your product, our complete guide to WPC wall panels for bathroom covers grades, thicknesses, and surfaces first, because the right panel makes installation far easier. For the whole range of materials, edges, and fixing profiles, the complete buyer’s guide to WPC wall panels is the best starting point.
For dry rooms, our general WPC wall panel installation for all applications covers the base method. This guide is the bathroom-specific version, so every step below adds the wet-room detail the general guide does not.
This is not a niche corner of the market: the global wood-plastic composites market keeps growing as homeowners and hotel developers swap grout and silicone for panels. Getting the installation right is what turns that product into a wall that holds up.
Tools & Materials for a Bathroom Install
Before you start, gather everything in one trip. Nothing kills momentum like a mid-project run to the hardware store.
Essential Tools
- Tape measure and pencil
- Laser level or a long spirit level
- Circular saw or jigsaw with a fine-tooth blade (80+ TPI for clean cuts)
- Hole saw set for shower heads, valves, and pipe penetrations
- Power drill with a mixer paddle and a cordless driver
- Caulking gun for adhesive and sealant
- Notched trowel (for spreading adhesive evenly)
- Rubber mallet for seating panels into the tongue-and-groove joint
- Utility knife and panel spacers (1-2 mm)
- Moisture meter (pin-type for walls)
- PPE: dust mask, safety glasses, and gloves
Bathroom-Specific Materials
- Waterproof membrane or vapor barrier (roll or liquid-applied)
- Anti-mold, neutral-cure 100% silicone sealant (never standard painter’s caulk)
- Hybrid MS-polymer panel adhesive (waterproof, flexible, mildew-resistant)
- Stainless or galvanized concealed panel clips and matching screws
- Galvanized or hollow steel furring strips (or pressure-treated timber where steel is not practical)
- Corner, edge, and capping trim profiles
- Anti-mold primer if you are treating old mildew stains
Waste Factor
Order 10-15% extra panel area for cuts, notches, and the inevitable mis-measure. A 10 m² wall means ordering roughly 11-12 m² of panels. Running short on a wet-zone wall is the worst place to wait on a restock.
Step 1: Assess the Substrate & Test Moisture
Why You Must Test First
Here is a sentence worth framing: never panel a damp wall. WPC is water-resistant, not a sealant. If moisture sits in the substrate and presses against the back of a panel, it will find the seams and the unsealed edges over time, causing swelling, mold, and adhesive failure. The test takes ten minutes. The failure takes months. Do the test.
Moisture Testing Methods
Use a pin-type moisture meter on plaster, drywall, and concrete. The thresholds matter:
| Moisture Reading | Verdict | Action |
|---|---|---|
| Under 12% | Safe to install | Proceed to prep |
| 12-20% | Resolve first | Ventilate, fix leaks, dry out, retest |
| Over 20% | Stop | Find the source; do not panel until resolved |
For a second opinion on plaster or screed, run the ASTM D4263 plastic-sheet test: tape a 450 x 450 mm square of plastic sheeting to the wall, seal the edges, and leave it for 16 hours. If condensation collects on the underside, the wall is releasing moisture and needs to dry or be addressed before you panel. That standard is the same one used to verify dryness in concrete and plaster before coatings go on.
Substrate Types and What Each Needs
- Drywall: Fine on stud walls in dry zones. In showers, fit a membrane behind it or use a cement board.
- Existing tile: Fine when sound and flat, with specific prep. See the over-tile section below.
- Plaster and render: Test for moisture and hollow areas. Repair cracks and soft patches first.
- Brick and concrete: These wick ground moisture. Test carefully and fit a membrane in any bathroom, especially at ground level.
When a Waterproof Membrane Is Mandatory
A membrane is not optional in four situations:
- Behind shower enclosures and direct-spray zones.
- Over old, porous, or previously damp walls.
- Ground-floor and basement bathrooms where rising damp is possible.
- Behind WPC over concrete block or brick in humid climates.
If you are unsure which WPC grade can handle the wet zone you are installing into, our guide to which WPC grades are safe in a bathroom wet zone explains the difference between standard, co-extruded, and solid-core panels zone by zone.
Step 2: Prepare the Wall & Install a Moisture Barrier
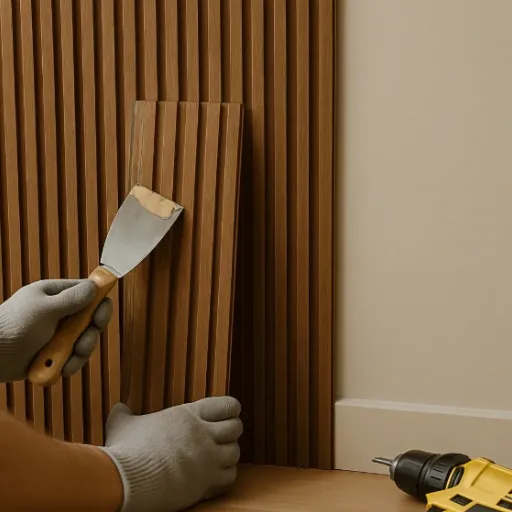
Clean, Repair, and De-Mold
Wash the wall with a bleach-based or mildewcide cleaner, scrub any black spots, and rinse. Treat stained areas with an anti-mold primer before anything else. Then fill cracks and holes with a suitable filler, sand smooth, and knock off any proud plaster. The flatter the substrate, the easier every later step becomes.
Install the Waterproof Membrane
Roll on or brush on a liquid membrane (or staple a sheet vapor barrier) across the wet-zone areas. Overlap sheet membranes by at least 100 mm, seal the seams with the manufacturer’s tape, and run a 100-150 mm up-stand onto the floor and into the corners. The goal is one continuous waterproof layer behind the panels, because the panel itself cannot be the only line of defense in a shower.
Furring Strips / Framework for Uneven or Damp Walls
On a level, dry wall you can bond panels flat. On uneven, damp, or block walls, you need a framework. Horizontal furring strips at 400-600 mm centers (16-24 inches) give you a true, level fixing surface and a ventilation cavity.
| Panel Type | Furring Center Spacing | Fixing |
|---|---|---|
| 5-7 mm standard panels | 400 mm (16″) | Galvanized screws at each strip |
| 8-9 mm high-density panels | 600 mm (24″) | Galvanized screws at each strip |
| Solid-core / co-extruded panels | 600 mm (24″) | Galvanized screws or clips |
Use galvanized or hollow steel furring, not solid timber. Solid timber in a damp wall absorbs moisture, swells, and feeds mold behind your panels. Where timber is unavoidable, use pressure-treated stock and leave a 1-2 cm ventilation cavity behind the panels so moisture can escape.
Level every strip and shim any dip. The rule: if the wall is out more than 3 mm over 2 m, shim it out before you fix anything. Panels follow the frame, and a bowed frame means a bowed wall you will stare at for years.
Step 3: Acclimate the Panels & Plan the Layout
Acclimation
WPC expands and contracts with temperature and humidity. If you hang panels straight from a cold warehouse into a steamy bathroom, they will move after fitting and can buckle or open seams. Instead, bring the panels into the bathroom, lay them flat (never on edge), and let them sit for 24-48 hours before you cut anything. This lets the material settle to the room’s conditions.
Layout Planning
Measure the wall in three places: top, middle, and bottom. Walls are rarely square, so trust the measurements, not the floor. Then plan the layout on paper:
- Start from the most visible corner and work outward, so any cut or trimmed panel lands in the least noticeable spot.
- Stagger the seams between courses so joints do not line up in a vertical line.
- Avoid aligning panel joints with plumbing runs or fixture locations, where movement is most likely to concentrate.
- Decide the orientation first: vertical panels suit shower zones and make walls look taller; horizontal panels suit long feature walls and create fewer seams.
Dry-Fit Before Fixing
Lay the panels in position without adhesive, with your 1-2 mm spacers in the joints, and confirm everything fits before you commit. This is the cheapest mistake-proofing you will do all day. If you are still weighing panel sizes, surfaces, or edge profiles, our article on how to choose the right WPC wall panels for a bathroom walks through matching the panel to the wall before you buy.
Step 4: Cut Panels to Size
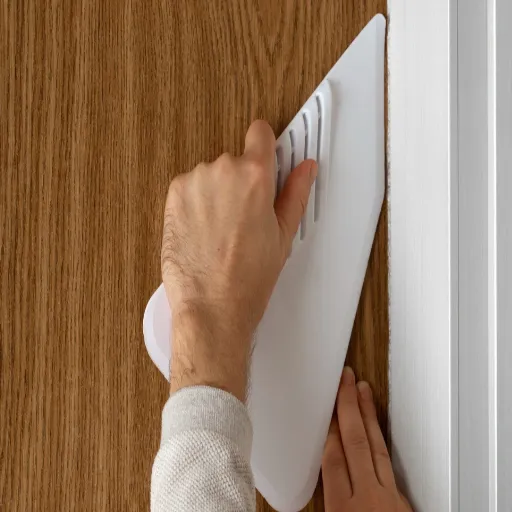
Straight Cuts
Use a fine-tooth blade with 80+ TPI (teeth per inch) in a circular saw or jigsaw for smooth, chip-free cuts on the decorative face. Support the panel on both sides of the cut so it does not snap or splinter under its own weight. Run the saw slowly, decorative face down for a circular saw (the blade exits on the face) or face up for a jigsaw with a reverse-cut blade. Lightly sand any roughness off the cut edge afterward.
Cutting Around Fixtures
Fixture cutouts are where most bathroom installs go wrong, and it is almost always the same mistake. Here is the spec:
| Cut Type | Tool | Technique |
|---|---|---|
| Shower head / valve | Hole saw | Pilot-drill, cut 2-3 mm oversize, then seal the edge |
| Pipes (floor or wall) | Jigsaw | Drill pilot holes at the corners, then jigsaw between them |
| Outlets / switches | Jigsaw | Measure twice, cut 2-3 mm oversize, leave room for the trim |
| Long panel runs | Circular saw | Cut decorative face down, support both sides |
Cut everything 2-3 mm oversize, never tight. A tight cutout will bind against the pipe or valve as the panel expands and can crack the edge. The oversize gap gets hidden by the fixture collar and filled with silicone.
Seal All Cut Edges Immediately
This is the number one hidden failure point in bathroom installs. The face of a WPC panel is protected by a co-extruded cap or dense finish, but a cut edge is raw composite. When you cut around a shower valve and leave that edge open, water creeps into the exposed wood fiber, and within a year the edge swells and lifts. Seal every cut edge the moment it is made with anti-mold silicone, before the panel goes anywhere near the wall. This one habit prevents the most common WPC bathroom complaint we hear from installers.
For panels intended for showers and wet rooms specifically, our guide to WPC panels for showers and wet rooms covers product selection and the extra sealing rules direct-spray areas demand.
Step 5: Adhesive vs. Mechanical Fixing in a Bathroom
Adhesive-Only: When It’s Acceptable
Adhesive-only fixing works on flat, sound, dry walls in dry zones. It is fast, leaves no visible fixings, and is fine for a feature wall or a powder room. In a bathroom, limit adhesive-only to flat, dry, low-moisture areas. The moment you are in a wet zone, the rules change.
Mechanical Fixing: Recommended in Wet Zones
Here is the honest science: adhesive-only bonding degrades above roughly 60% relative humidity. A bathroom sits above that for long stretches every single day. Water vapor works its way between the adhesive layer and the substrate, and over months the bond weakens until a panel can pull loose or sag.
Mechanical fixing solves this. Use stainless or galvanized concealed clips and screws at roughly 300 mm spacing along the edges and at mid-panel. Never use standard steel screws in a bathroom. Steel reacts with the moisture and the composite, rusts, and stains the panel face, and it will void most manufacturer warranties.
The Hybrid Method
The method we recommend for every bathroom wet zone combines both: hybrid (MS-polymer) adhesive plus concealed clips. The adhesive handles the broad bond and stops panels from drumming; the clips take the mechanical load and survive the humidity. On a hotel retrofit we specified this method across 200 rooms, and two years later we had zero moisture complaints and zero loose panels.
Adhesive Application
Apply hybrid MS-polymer panel adhesive in a zigzag or grid pattern with a notched trowel, keeping a minimum 2 mm adhesive thickness. Keep adhesive roughly 50 mm away from the panel edges so it does not squeeze out and stain the face. The open time is short, typically 8-10 minutes, so spread one panel’s worth at a time, not a whole wall. Add extra adhesive around cutouts and corners, where panels are most likely to be handled and stressed.
Step 6: Install the WPC Wall Panels
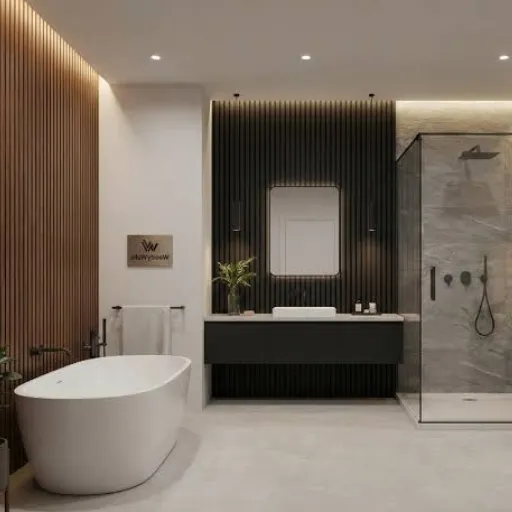
Start at your planned corner. Angle the first panel into the corner trim, then press it firmly into the adhesive or onto the clips. Wipe away any adhesive that squeezes through the joints before it skins over.
Check plumb and level every 2-3 panels, not just at the end. A small bow in panel one becomes a large, unfixable bow in panel ten. Tap panels gently into the tongue-and-groove joint with a rubber mallet and a scrap block so you do not dent the edge.
In shower areas, run a thin bead of silicone inside the groove before you join each panel. This seals the joint against the water that will run down the wall. In dry zones the mechanical interlock is enough, but in a wet zone the sealed joint is what keeps water on the surface instead of behind the panel.
Leave expansion gaps. This is non-negotiable in a bathroom. WPC moves, and a bathroom swings through temperature and humidity cycles daily. The numbers:
- 1-2 mm between panels (your spacers do this automatically).
- 2-3 mm at the perimeter, floor, and ceiling, covered by trim.
- 5-10 mm for large spans or walls near heat sources, where thermal movement is higher.
As a rule of thumb, WPC expands roughly 0.8 mm per meter over a 30°C swing. A 3 m wall can move nearly 2.5 mm between a cold morning and a hot shower. If you butt panels tight, that movement has nowhere to go and the panels will bow or the seams will open.
Work floor-to-ceiling in shower zones. Full coverage with no half-wall junctions means no ledge for water to pool on and no exposed seam at mid-height. If you are only paneling a shower surround, run the panels the full height of the enclosure, not up to a tile half-wall.
Step 7: Seal, Trim & Finish
Where to Seal
Sealing is what turns a panel installation into a waterproof one. Go through this checklist and do not skip a line:
- Corners: internal and external corners, filled with silicone before the trim goes on.
- Fixture penetrations: around the shower valve, shower head, taps, and pipe collars.
- Floor and ceiling transitions: a silicone bead along the full length where panels meet the floor, ceiling, or bath rim.
- Panel joints: already sealed in the groove in wet zones; add a surface bead on any butt joint.
- Screw heads in wet areas: cover every fixing head with silicone.
Sealant Spec
Use anti-mold, neutral-cure 100% silicone. Do not use standard painter’s caulk or acrylic sealant; neither is water-resistant enough for a bathroom and both can feed mold. Neutral-cure silicone is mildew-resistant and stays flexible, which matters because the panels move and the seal has to move with them.
Trim Profiles
Fit inside and outside corner profiles, edge trims, and capping profiles rather than butting panels bare at corners. Trim does three jobs: it covers the expansion gap, it gives a clean finished edge, and it protects the panel edge from water ingress. A bare butt joint at a corner is a water entry point and an unfinished look.
Curing
Hybrid MS-polymer adhesive and silicone need time. Handling strength arrives in roughly 2-4 hours, so you can gently work around the room, but wait 24 hours before heavy water use in the shower. If you soak the wall before the adhesive has cured, you push moisture into joints that are not yet sealed.
This is also a natural point to budget the whole job. If you are deciding between a full re-tile and a panel refit, our article on how much WPC bathroom wall panels cost vs tiling gives you a realistic side-by-side including installation labor.
Installing WPC Wall Panels Over Existing Tile
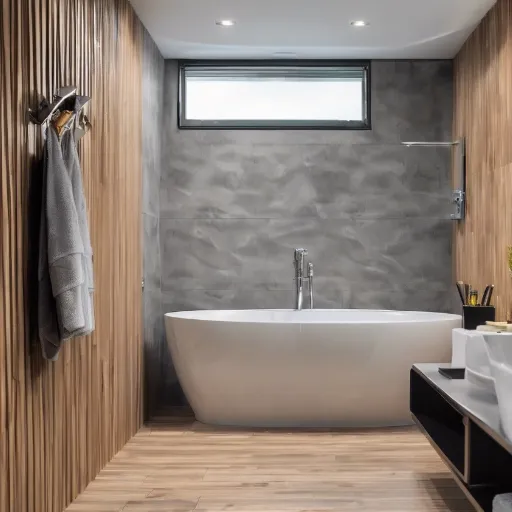
Here is the question we get more than any other: can you install WPC wall panels over existing tiles? Yes, provided the tile is sound, flat, and free of hollow areas. No demolition required. That is the biggest renovation shortcut WPC offers, and it is why so many weekend bathroom makeovers happen without a skip hire.
Condition Checks First
Before you bond anything to tile, run these checks:
- Tap test: tap every tile with a plastic handle or coin. A hollow, drumming sound means a loose tile that will take the panel down with it.
- Cracks: hairline cracks are fine after filling; structural cracks or movement need investigation first.
- Grout: repair missing or crumbling grout so there is a solid base.
- Loose tiles: replace or re-bond any tile that rocks.
Prep
Clean the tile thoroughly to remove soap scum and oils. Glazed tile is slick, so sand the surface lightly (120-grit) to give the adhesive something to grip, then wipe off the dust. Repair hollows and grout, let repairs dry, and run a small adhesion test on an offcut before committing to the full wall.
Thickness Impact
A panel over tile adds thickness: typically 14-20 mm depending on the panel and the adhesive bed. Around doors, windows, and fixtures that can matter. For small bathrooms where every millimeter counts, thin 5 mm panels add far less bulk while still covering the tile cleanly.
When to Tear Out Instead
If tiles are hollow, mushrooming, or loose across a large area, or if there is moisture behind the tile, tear out and start from the substrate. Paneling over a failing tile surface just moves the failure behind an expensive panel. And if you are weighing the long-term trade-offs between the two materials, our comparison of WPC bathroom panels vs ceramic tile cost and maintenance lays out both sides honestly.
Bathroom Wet Zones & Installation Rules
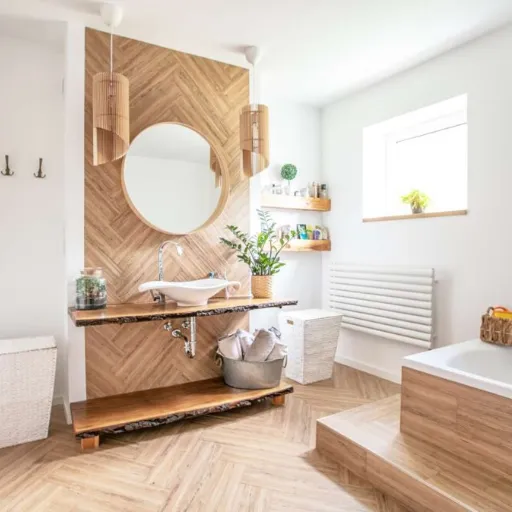
The UK and EU bathroom zone system is the most useful framework for deciding how strict your installation needs to be, and it applies directly to how you fit panels.
- Zone 0: inside the shower tray or bath. Panel a backsplash here only with a dedicated waterproof solid-core grade, fully sealed.
- Zone 1: above the bath and within 1.2 m horizontally and 2.25 m vertically of the showerhead. Direct spray and steam. Fit panels floor-to-ceiling, seal the groove joints, membrane behind, and never stop the panels at a half-wall.
- Zone 2: within 600 mm of Zone 1, where splashes reach. Standard sealed panels are fine.
- Outside zones: vanity walls and the rest of the room. Any grade, standard installation.
Orientation matters in wet zones. Fit shower walls vertically so water runs down the face and the joints, rather than pooling along a horizontal seam. Horizontal seams in a direct-spray zone are an invitation for water to sit and wick.
For commercial and compliance work, remember that moisture barriers, ventilation requirements, and fire-rated assemblies are usually specified by the project’s building regulations, not left to judgment. If you are specifying panels for a hotel or apartment project and want an honest material comparison, our WPC vs SPC comparison for wet zones is the place to start before you commit to a system.
Common Bathroom Installation Mistakes to Avoid
A short list of the failures we see repeated in bathrooms, and the one-line fix for each:
- Skipping the moisture test on a damp wall. Test first; under 12% to panel, 12-20% to resolve, over 20% to stop.
- Butting panels tight with no expansion gap. Spacers at every joint; 2-3 mm at the perimeter.
- Using standard steel screws. Stainless or galvanized only, or accept rust stains and a voided warranty.
- Not sealing cut edges around fixtures. Seal the moment you cut, before the panel touches the wall.
- Using the wrong adhesive. Non-panel-rated, non-waterproof glue fails in humidity; use hybrid MS-polymer panel adhesive.
- Sealing before the adhesive cures. Wait 24 hours before heavy water use.
- Ignoring ventilation in a waterproofed room. An extractor fan or a window routine stops the room from turning into a sauna that stresses the panels and the sealant.
- Using solid timber furring in a damp wall. Galvanized or hollow steel, or pressure-treated timber, with a ventilation cavity.
Troubleshooting: When Things Go Wrong
Edge Swelling at Seams or Around Fixtures
The most common WPC bathroom problem, and almost always caused by unsealed cut edges or missing expansion gaps. Fix by drying the area, re-cutting or re-sealing the affected edge with anti-mold silicone, and checking that the panel has its proper gap. If swelling is severe, replace the single panel (see below).
Mold Behind Panels
If you can smell mustiness or see staining through the seams, moisture is trapped behind the panels. It is usually the combination of no membrane, solid timber furring, and poor ventilation. Remove the affected panels, treat and dry the wall, fit a membrane, and refit with sealed edges and a ventilation cavity.
Loose Panels / Adhesion Failure
Adhesive-only fixings give up in high humidity. Remove the loose panel, clean both surfaces, and refit with the hybrid method: adhesive plus concealed stainless clips. Check the surrounding panels for the same failure while you are at it.
Sealant Lifting or Cracking
Sealant fails when it was applied over a damp or dirty surface, or when the panel moved before the sealant cured. Cut the old bead out cleanly, let the joint dry completely, and re-apply anti-mold neutral silicone. Do not caulk over the old bead; it will not bond.
How to Remove and Replace a Single Panel
To replace one damaged panel without disturbing its neighbors, cut the panel vertically down its center with a sharp utility knife, then work a thin pry bar behind the cut to release the adhesive. Slide the two halves out of the tongue-and-groove joints. Clean the cavity, apply fresh adhesive to the back of the new panel, and slide it into place. Seal the new cut edges before you fit them.
DIY vs. Professional Installation in a Bathroom
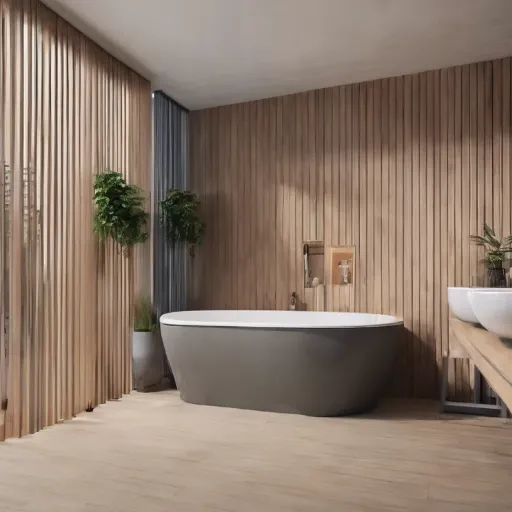
A straight, dry, tiled bathroom wall is a realistic weekend DIY job. Plan for 4-8 hours per roughly 100 sq ft of wall, more once you add wet-zone sealing and fixture cutouts. If you have a clear plan and the right tools, WPC is one of the most forgiving wall finishes a capable DIYer can fit.
Hire a professional when:
- The room needs a wet-zone membrane and you have never fitted one.
- You have complex plumbing cutouts, a freestanding bath, or a steam shower enclosure.
- The project is commercial or subject to building regulations and compliance sign-off.
- The walls are seriously out of true and need a framework.
There is also a warranty angle to be honest about. Most manufacturers, including us, warrant the panel against material defects. Whether a DIY install holds that warranty depends on following the installation rules: moisture testing, the right fixings, sealed edges, and expansion gaps. If you are unsure, get the technical spec before you start rather than after a failure. You can request a technical consultation or samples directly from our team, and we will talk you through the installation requirements for your exact wall.
Post-Installation Care
Keep the wall in good shape with a light routine:
- Weekly: wipe panels with a damp cloth and mild detergent. Avoid abrasive pads and bleach-heavy cleaners, which can dull the surface.
- Monthly: run a finger along the sealant lines at the floor, corners, and fixtures. Re-caulk any bead that lifts before water gets behind it.
- Annually: check the whole wall for swelling, loose panels, or mold, especially around the shower valve.
Ventilate the room after hot showers, even though the walls are sealed. A waterproofed bathroom is also a sealed bathroom, and an extractor fan keeps humidity from loading the seams year after year. Our full routine is in our guide on how to clean and maintain WPC wall panels in a bathroom.
Frequently Asked Questions
Can WPC wall panels be installed over tiles?
Yes, provided the tile is sound, flat, and free of hollow areas. Sand glazed tile lightly, repair hollows and grout, and use panel-rated adhesive or furring strips. No demolition is needed. Tear out only if tiles are loose, hollow, or there is moisture behind them.
Do you need a moisture barrier behind WPC wall panels?
Not behind every wall. You need one behind showers, on damp or porous walls, and in ground-floor or basement bathrooms. On dry, sound, stud-frame walls, a membrane is optional. When in doubt, fit one; it is cheap insurance against wall rot and mold.
What is the best adhesive for WPC wall panels?
A hybrid MS-polymer panel adhesive. It is waterproof, flexible, mildew-resistant, and bonds to most substrates including tile. In bathroom wet zones, combine it with concealed stainless or galvanized clips, because adhesive-only bonding degrades above roughly 60% relative humidity.
Do WPC wall panels need furring strips?
Only on uneven, damp, or block walls. On a flat, dry, level wall you can bond panels flat. Where you do fur, use galvanized or hollow steel strips at 400-600 mm centers, shimmed level, with a ventilation cavity. Never use solid timber in a damp wall.
What size expansion gap do WPC wall panels need in a bathroom?
Leave 1-2 mm between panels and 2-3 mm at the perimeter. Use 5-10 mm for large spans or walls near heat sources. WPC expands roughly 0.8 mm per meter over a 30°C swing, and a bathroom cycles through that daily.
How do you cut WPC wall panels around pipes and outlets?
Drill pilot holes at the corners of the cutout, then jigsaw between them. Cut 2-3 mm oversize so the panel does not bind as it expands. For shower heads and valves, use a hole saw. Seal every cut edge with anti-mold silicone immediately.
Can WPC panels be installed in a shower?
Yes, with the right grade and installation. Use a premium sealed co-extruded or solid-core grade in Zone 1, fit a membrane behind it, seal the groove joints with silicone, and seal every cut edge. For Zone 0 (inside the tray) choose a dedicated waterproof product or PVC, SPC, or tile.
Do you need screws for WPC wall panels?
Not if you use panel adhesive on a flat, dry wall. In bathroom wet zones, we recommend concealed stainless or galvanized clips at roughly 300 mm spacing alongside adhesive. Never use standard steel screws; they rust and stain.
Should WPC panels be installed vertically or horizontally?
Either works, but fit shower and wet-zone walls vertically so water runs down the face instead of pooling along a horizontal seam. Vertical panels also make a room feel taller. Horizontal panels suit long feature walls and produce fewer seams.
Can you install WPC panels over drywall?
Yes. On dry, sound drywall in dry zones, bond panels directly with hybrid adhesive. In showers or on damp walls, fit a cement board or a membrane first, then panel. Test the drywall for moisture before you start.
Conclusion & Next Steps
Installing WPC wall panels in a bathroom is not complicated, but it is unforgiving of shortcuts. The five rules that protect your wall: test the moisture, fit a membrane where it matters, use galvanized furring, seal every cut edge, and leave your expansion gaps. Follow them and you get a wall that shrugs off steam and splashes for 15-25 years. Skip them, and you will be peeling swollen panels off a damp wall in 18 months, exactly like every failed install we see on support calls.
You now have the complete contractor-grade method for how to install WPC wall panels in bathroom, from the moisture test to the final silicone bead. The difference between a weekend project and a recurring repair is entirely in the preparation.
If you are planning a bathroom renovation, we would love to help you get it right the first time. Request free bathroom-grade samples, a bulk quote, or a technical consultation from our team at Linyi Yuheng International Trading Co., Ltd., and we will confirm the right panel grade and installation spec for your exact wall before you spend a dollar on materials.
Categories:
Blog
Related Articles