WPC Wall Panel Installation: Complete Step-by-Step Guide
The installation of WPC wall panels requires workers to prepare the surface for the installation process. The workers need to set up a support framework or use adhesive systems. The workers need to use the correct blade for cutting, and they need to maintain 5–10mm expansion gaps at all edges. Most DIY installers can complete a standard 200-square-foot accent wall in one weekend, while professional crews finish the same job in 4–6 hours.
But here is what most guides won’t tell you: one skipped step can turn a beautiful wall into a warped, buckled mess within months. The contractor Marcus from Miami took on wpc wall cladding installation work for his client in August 2022. He skipped the 48-hour acclimation period to meet a tight deadline. The panels pulled away from the wall because temperature swings occurred between November and December, which created visible gaps that cost him $1,800 in rework and a frustrated customer. His mistake was entirely preventable.
At Linyi Yuheng International Trading Co., Ltd., we produce wood plastic composite wall panels, which we sell to wholesale buyers, contractors, and architects from more than 30 countries. We have seen what works and what fails. The WPC wall panel installation guide shows the complete installation process that our professional installers use and the troubleshooting steps that other sources do not provide.
Key Takeaways
- A 24–48 hour acclimatization time for WPC panels is advisable before installation to prevent warping(and no text alteration)
- Building a batten framework is effective when walling, with 400–600mm spacings for inside walls and 350–400mm for outside walls
- It should be a 5–10mm expansion achieved because of ceilings, floors, and corners.
- Use an 80-tooth carbide blade for cutting from the back to completely prevent chipping
- For exterior or heavily-trafficked areas, use adhesive in conjunction with mechanical fasteners
- DIY, except for labor cost, saves 40–60% of the total amount spent on hiring a professional
What Are WPC Wall Panels and Why Choose Them?

Wood-plastic composite or WPC is an engineered substance. It is developed by combining wood fibers and thermoplastics to offer characteristics such as waterproofing and strength in the field of waterproof wall panels. The arrangement is what differentiates WPC from wood because WPC prevents moisture, termite, and decomposition attack. WPC resembles natural wood grain, as opposed to PVC, which gives the panel an absolute wood-like look.
The WPC wall panels market worldwide grew to 4.5 billion dollars in 2025 and is expected to fetch 7.2 billion dollars by 2033, according to Verified Market Reports. The WPC materials market is anticipated to have a total of 14.57 billion dollars through 2031, exhibiting a CAGR of 8.64%, according to Mordor Intelligence. Growing populations are watching contractors realize a simple truth: WPC delivers long-term value with minimal maintenance.
You should choose WPC panels when you want:
- A waterproof surface for bathrooms, kitchens, or outdoor walls
- The aesthetic of natural wood without the maintenance headaches
- An eco-friendly option made from recycled materials
- A lightweight panel that installs faster than tile or traditional siding
- An indoor wall finish that resists moisture and termites
Tools and Materials You Will Need
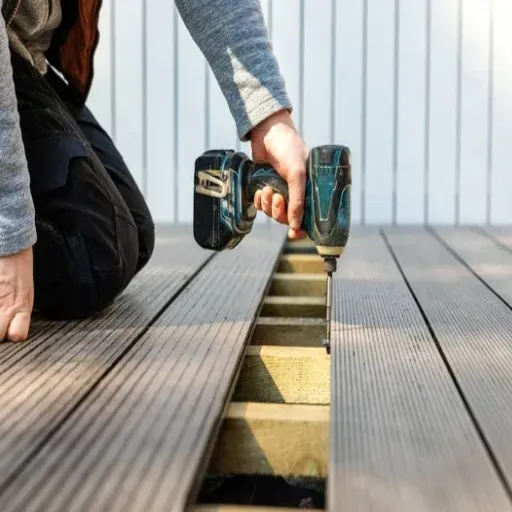
Before you touch a single panel, gather everything on this list. Running to the hardware store mid-install breaks your rhythm and invites mistakes.
Essential Tools
- Tape measure and carpenter’s pencil
- Laser level or 4-foot spirit level
- Circular saw with an 80-tooth carbide-tipped blade
- Electric drill with driver bits
- Rubber mallet and scrap wood tapping block
- Safety glasses and a dust mask
- Caulk gun (for adhesive method)
Materials Checklist
- Wood plastic composite panel (Order 10% extra for cutting waste or ornamental constructions)
- Starter clips and concealed fastening clips with fasteners
- Rusted screws (Screws for Exterior-High Grade Stainless Steel)
- Wood battens, galvanized steel channels, or aluminum furring strips
- Adhesive explicitly unites WPC compatibility (Polyurethane or hybrids)
- Edge trims, corner profiles, and end caps to match your panel style
- Plastic spacers for consistent expansion gaps
Optional but Recommended
- Moisture meter for wall surface testing
- Jigsaw for outlet and fixture cutouts
- 120-grit sandpaper for smoothing cut edges
- Construction chalk line for layout marking
Pre-Installation Preparation
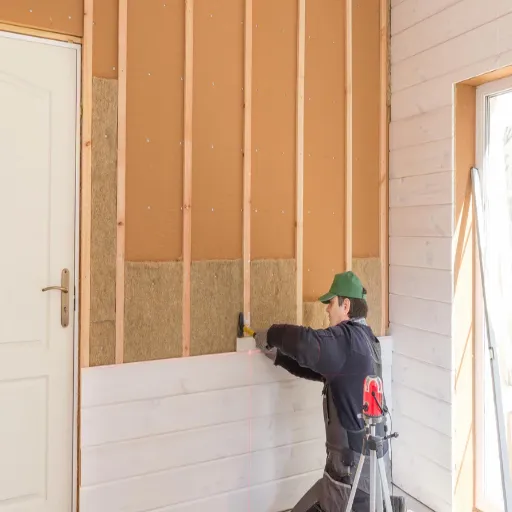
If not executed in the way intended for sophisticated outcomes, this could merely lift your finished wall from amateur status. Do not haste it.
Surface Preparation
The wall should be clean, dry, and, above all, structurally sound. Apply a remover for loose paint, wallpaper, plaster, fill in crannies, and voids. Test for flatness using a long level: if more than 3mm deviation is noticed in a two-meter range, it should be corrected.
Use a moisture meter anywhere it is necessary, as well as in particularly exposed areas over time. Readings exceeding 12% indicate the requirement of some kind of moisture barrier or enhanced ventilation before moving on to installing the panels. In failing to follow this, moisture will eventually penetrate the panels and erode any structure, ending up in mold damage that cannot be covered under warranty.
Acclimation: The Step Most People Skip
Lay the panels flat before cutting or installing for 24-48 hours in the installation environment in order to acclimatize the material to the temperature and humidity of the locality. This would prevent warping and buckling and destroy Marcus’s model.
Stack the panel horizontally on a clean, flat area. Do not place at the wall what may cause it to sag. Keep away from direct sunlight or heat sources while acclimating. Acclimate for 72 hours in unconditioned spaces.
Layout Planning and Measurement
Measure the wall height and width in several places: top, middle, and bottom. Walls are highly unlikely to square exactly. Take the shortest height you’ve measured for your calculations.
Make a plan for its setup in such a way that there will be no narrow sliver cuts at room corners. You should place your layout in such a way that the cut panels at the two end scores are of equal widths. Calculate the number of boards, considering the overlap with the tongue-and-groove joint to be taken into account. Then snap a chalk line for horizontal guidelines, or tiny chalk marks to plan the location of outlets, switches, windows, and doors before you cut anything.
For standard wall orders, provide 10 % extra material to cover, and for walls with a larger number of fixtures or corners, supply 15 % excess. Always order panels from the same batch to achieve uniform color density, particularly for large, very visible installations.
Step-by-Step WPC Wall Panel Installation Process
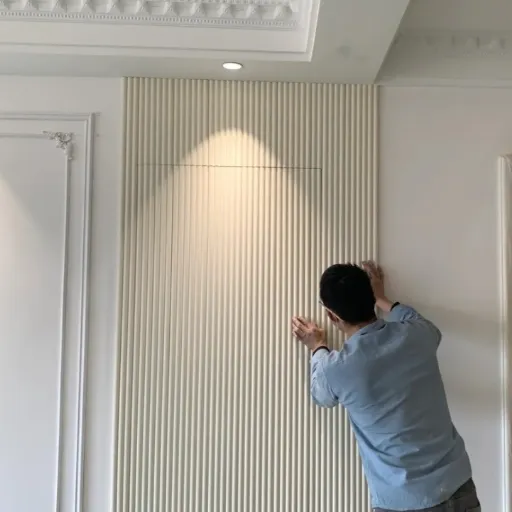
Follow these seven steps in order to install wpc wall panels step by step. Each one builds on the last. This wpc wall panel installation process works for both indoor accent walls and outdoor cladding projects.
Step 1: Build the Support Framework
For most installations, a batten framework creates a level mounting surface and a ventilation cavity behind the panels. This cavity prevents moisture buildup and extends panel life.
Attach horizontal or vertical battens to the wall using appropriate anchors for your wall type. Maintain these spacing standards:
| Application | Batten Spacing | Material Recommendation |
|---|---|---|
| Interior walls | 400–600mm | Treated wood or aluminum |
| Exterior walls | 350–400mm | Galvanized steel or aluminum |
| High-wind areas | 300–350mm | Galvanized steel |
| Ceiling applications | 300mm max | Galvanized steel |
Use shims to ensure the framework is perfectly flat. A crooked frame produces crooked panels, no matter how carefully you work.
Step 2: Cut Panels to Size
Cutting once is more important than measuring twice. Mark the cutting lines on the back of the panel with the use of a carpenter’s pencil.
Using a circular saw with an 80-tooth Carbide-tipped blade set at a shallow depth, a through-cut should be done on the back side. Definite laser-cuts will keep any potential visible chipping of the decorative face or a rough edge where the cut is made. For outlet cutouts, drill a shallow pilot hole and through-cut with the jigsaw. A light touch with 120-grit sandpaper helps even out rough cut edges.
Step 3: Attach the First Panel
The first panel will determine the alignment of everything that follows it, so take your time.
Set the starter clips along the lower batten spaced according to manufacturer instructions (usually every 400 to 600 mm). Hang the first panel in the clips and then ascertain the horizontal and vertical alignment using a laser level. Then, adjust and align before screwing in.
Drill small pilot holes in your deck screws, smaller than the screw size, before installation. This is where cracking typically starts with WPC materials. Just remember always to “enough is enough” and stop when the head of the screw is level with the panel of the deck.
Step 4: Install Subsequent Panels
The lateral connection of WPC panels occurs using an angular-and-groove, as well as the click-lock systems, which are of the most modern connection type. Slide the groove of the next while the tongue of the first is inserted into that of the already installed one. Cautiously use the average tapping sound on the faces of the panel, making sure that the edges are secured and mated without damaging the surface.
Do it row by row to avoid getting disoriented yourself. Every 3-4 panels, give a glance, check to ensure leveling. If the slight drift is seen, immediately stop and rectify, since a slight shift becomes very large when multiplied across the whole wall.
Step 5: Secure with Mechanical Fasteners or Adhesive
You have two primary attachment methods. Choose based on your application:
| Method | Best For | How It Works | Pros | Cons |
|---|---|---|---|---|
| Mechanical (screws/clips) | Exterior, large walls, high-traffic areas | Hidden clips screwed into battens through the panel tongue | Strongest hold, removable, works in all climates | Slightly slower, requires a framework |
| Adhesive | Interior accent walls, smooth substrates | Construction adhesive applied in an S-pattern on the panel back | Faster, no visible fasteners, no framework needed | Weaker hold over time, harder to remove |
For the best results, many professionals use both methods together. Apply adhesive to the panel back, then secure with hidden clips. This belt-and-suspenders approach provides maximum durability, especially for exterior walls and ceilings.
Step 6: Leave Expansion Gaps
WPC materials expand and contract with temperature changes. Without proper gaps, panels warp, buckle, or crack.
Leave these expansion gaps:
- 5–10mm at top, bottom, and sides where panels meet floors, ceilings, and adjoining walls
- 3–6mm between panel ends in long runs
- 10–15mm for exterior installations in climates with extreme temperature swings
Use plastic spacers during installation to maintain consistent gaps. Remove spacers after the wall is complete.
Step 7: Install Edge Trims and Finishing Profiles
Edge trims serve two purposes: they cover expansion gaps and exposed cuts, and they give the installation a clean, professional appearance.
Install these profiles as needed:
- Starter/U-trim: Along the bottom edge where panels meet the floor
- L-trim: Along the top edge and outer vertical edges
- Internal corner trim: Where two walls meet at an inside corner
- External corner trim: Where two walls meet at an outside corner
- End cap: Where a panel run terminates mid-wall
Match trim color and finish to your panels for a seamless look. Secure edge trim profiles with color-matched screws or adhesive, depending on the profile design.
Interior vs. Exterior WPC Wall Panel Installation
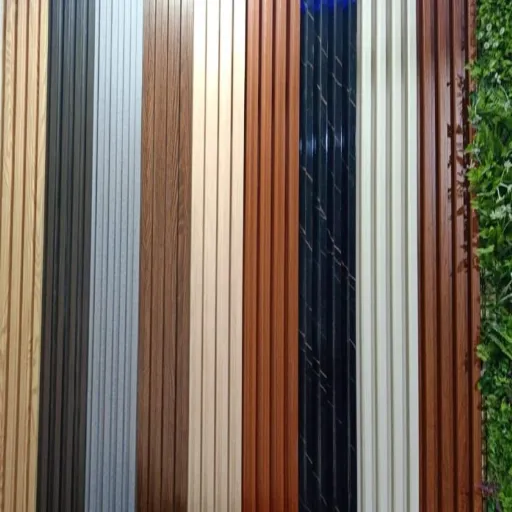
Exterior installation demands stricter standards. Here is what changes:
| Factor | Interior | Exterior |
|---|---|---|
| Framework spacing | 400–600mm | 350–400mm |
| Fasteners | Standard corrosion-resistant | Stainless steel required |
| Ventilation gap | Moderate | Minimum 12mm, critical |
| Drainage | Not required | Weep holes and flashing are needed |
| UV resistance | Low priority | Must use UV-stabilized panels |
| Moisture barrier | Sometimes needed | Often required |
| Expansion gaps | 5–7mm standard | 10–15mm recommended |
Never let the exterior panels touch the ground directly. A minimum clearance of at least 50mm must be maintained for water and pests.
Allow more ventilation gap sizes for tropical and high humidity conditions or consider anti-microbial qualities for your panel gradings. Maintain good hold of paths year-round; expanding the expansion gaps provides a benefit for freeze-thaw conditions.
Common WPC Wall Panel Installation Mistakes

Avoid these errors and you will already be ahead of most installers.
Skipping acclimation. Panels installed straight from the pallet will shrink or expand after mounting. The 24–48 hour wait prevents costly rework.
Incorrect batten spacing. Wide-spaced battens cause panels to sag between supports. Follow the spacing table above for your application.
Forgetting expansion gaps. This is the number one cause of post-installation failure. WPC expands up to 0.8mm per meter with temperature changes. Gaps are not optional.
Using the wrong fasteners. Standard steel screws rust and stain exterior panels. Interior drywall screws lack the grip strength for WPC. Use fasteners rated for your application.
Poor layout planning. A dry fit takes 30 minutes and saves hours of frustration. Lay out your first row on the floor before attaching anything.
Over-tightening screws. This strips the material and cracks the tongue. Tighten until flush, then stop.
Cutting from the front face. Visible chips ruin the finish. Always cut from the back.
Ignoring moisture barriers. Damp walls destroy panel adhesion and promote mold. Test moisture levels and install barriers where needed.
Mixing production batches. Color and texture vary slightly between batches. For large walls or concealed door systems, order all panels from the same batch number.
Troubleshooting: When Things Go Wrong
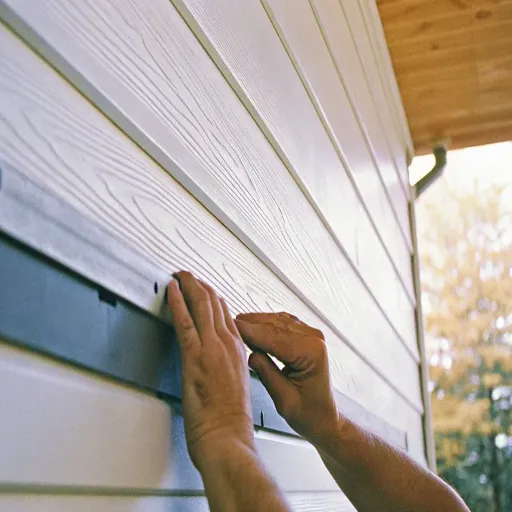
Even zealous installers run into a bump now and then. Here are the most popular remedies we propose.
Warped or buckled panels. This generally implies inadequate expansion distance, or due to a lack of an acclimation period. Remove all such panels, and then check the moisture damage in the framework. Install with proper distances and change all roles, ensuring they have no damage.
Misaligned rows. Stop. Get your first panel and check with a laser level; if it is off, remove and reset. If your first panel is fine and the next one veers off, you are probably dealing with an uneven batten spacing because of an irregularity in the wall. Now shim up the framework and proceed.
Uneven gaps between panels. Use use of a tile spacer for proper size intervals, and press the panels into position using a rubber mallet and holding a scrap block behind. Never try to force a joint shut that does not want to budge; look into possible debris or a damaged tongue.
Loose panels. The wall would be too dusty and not smooth before application. The adhesive’s bonding would be affected when either the area is infected with laser or cannot be evened out. For mechanical issues, check that the clips are fully set and the screws are tightened. For what may be necessary, put up certain items.
Door or window fit issues. Check out the thickness of the window when trim depths are adjusted. By adjusting the depth of the frame or using adjustable hinges in concealed door systems, pieces can be made flush with the frame.
How to replace one damaged middle sheet on either wall. Remove that edge trim at the row’s end. Remove/unlock the panel unit until reaching the injured one, from the side note. Replace it, then put back all the removed panels with framing. This is why fastening systems have a mechanical preference for areas that have many pressurized situations.
DIY vs. Professional Installation: Cost and Time Breakdown

Should you hire a professional or handle WPC wall panel installation yourself? Consider the numbers:
| Cost Factor | DIY | Professional |
|---|---|---|
| Material cost per sq ft | $5–$15 | $5–$15 |
| Labor cost per sq ft | $0 | $3–$8 |
| Total cost per sq ft | $5–$15 | $8–$23 |
| 200 sq ft project total | $1,000–$3,000 | $1,600–$4,600 |
| Time for 200 sq ft | 8–12 hours | 4–6 hours |
DIY installation saves approximately 40–60% on total project cost, according to Angi. WPC panels install faster than tile and require less specialized skill, making them genuinely approachable for motivated homeowners learning how to install WPC wall panels on their own.
Sarah, a homeowner in Portland, watched two online tutorials and decided to tackle her 150-square-foot basement wall herself. She spent $680 on materials and finished on Saturday. The result looked professional because she followed each prep step carefully. “The hardest part was waiting 48 hours for the panels to acclimate,” she told us. “Actually, installing them took maybe five hours.”
However, hire a professional if your project involves exterior walls, complex layouts with many fixtures, or surfaces requiring significant prep work. The warranty coverage and finished quality often justify the added cost for commercial clients.
Need a quote for your next project? Contact our team for competitive wholesale pricing on WPC wall panels and accessories delivered to your location.
Post-Installation Care and Maintenance
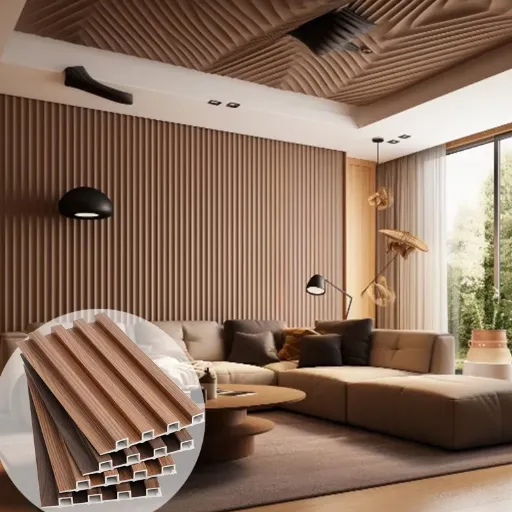
WPC sheets require maintenance, not maintenance-free. With simple care, they can continue to look like new for years.
Monthly cleaning: Wipe surfaces with a soft cloth and a cleaner that uses pH neutrality. Avoid any bleach, ammonia, or abrasive cleaning fluids because they are bound to affect the protective surface layer.
Annual inspection: Inspect the fasteners, corner profiles, and edge trims for tightness that contains threads. Any loose screws can be tightened. Clear weep holes and drainage paths on exterior installations.
Stain removal: Removal of most marks captured in soap and water would likely need a non-abrasive ink. Always try the cleaner on a small, invisible portion before using it.
Long-term protection: Give the outside panels an annual run with a pressure washer on low setting. Reapply sealant to caulked joints that have cracked or separated.
Following this maintenance schedule protects your investment and keeps your warranty valid. Most manufacturer warranties require proper installation and reasonable care to remain in force. For a deeper dive into long-term care, see our WPC wall panel maintenance guide.
Conclusion
WPC wall panel installation is a straightforward procedure as long as the right things are done. Success is all about preparing the panels well acclimated, setting up a flat framework, measuring cutouts from behind the board, maintaining regular expansion gaps, and finishing with proper moldings.
Whenever the panels look like wood, last like plastic, and install much faster than almost any other possible alternative, the global market of WPC continues to expand a larger one. Whether you are a contractor managing a hotel renovation, or a homeowner who simply wants to refresh a single accent wall. This WPC wall panel installation guide can be applied to most humans.
Take your time with preparation, go through the process methodically step by step, and keep the small things at bay, which others overlook.
Linyi Yuheng International Trading Co., Ltd. manufactures and distributes WPC wall panels, PVC wall panels, and decorative building materials to wholesale buyers worldwide. Contact us for custom orders, bulk pricing, and technical support.
Categories:
Blog
Related Articles