Podcast Room Acoustic Panels: Complete Placement Guide for Clear Voice Recording
Podcast room acoustic panels control the reflections that make your voice sound distant, echoey, or unprofessional. For most home podcast studios, 6-12 strategically placed panels outperform 30 panels scattered randomly across walls. The key is treating the five priority zones: behind the microphone, side-wall first reflection points, ceiling cloud above the recording position, rear wall, and corners.
Most new podcasters buy panels before they understand placement. They cover every wall with foam and wonder why their voice still sounds like it was recorded in a bathroom. The problem is placement, not panel count.
This guide covers podcast room acoustic panel placement for solo hosts, dual-host setups, and video podcasts. You’ll learn the five priority zones, how podcast treatment differs from music studios, which materials work best for voice recording, and why WPC wood slat panels are an ideal choice for on-camera studios. For a complete overview of acoustic panel placement across all room types, see our acoustic panel placement guide.
Key Takeaways
- Podcast rooms need voice-frequency treatment (200 Hz – 8 kHz), not full-spectrum studio absorption.
- The zone behind your microphone is the highest priority because direct reflections enter the mic capsule.
- Acoustic panels treat reflections and reverb; they don’t soundproof a room from outside noise.
- Video podcast studios benefit from WPC and wood slat panels because they absorb reflections while looking intentional on camera.
- A 6-panel starter setup at the right positions usually beats a 20-panel setup spread evenly across every wall.
Why Podcast Rooms Need Different Treatment Than Music Studios
A music studio is designed for flat frequency response across the full audible spectrum. Engineers need an accurate reproduction of every instrument, from kick drums to cymbals. Podcast rooms have a much narrower job: make the human voice clear, present, and easy to understand.
The human voice fundamental range sits between 85 Hz and 255 Hz for most adults. Intelligibility, the part of the voice that helps listeners understand words, lives mostly between 1 kHz and 4 kHz. Podcast studio acoustic panels should target this midrange region rather than trying to absorb every frequency equally.
Close-mic speaking creates another podcast-specific challenge called the proximity effect. When you speak within 6 inches of a microphone, the bass frequencies below 200 Hz become exaggerated. This makes untreated rooms sound boomy or muddy, even when the higher frequencies seem fine.
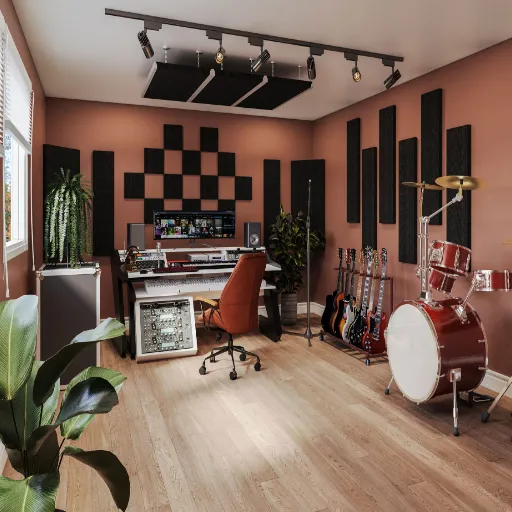
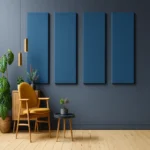
Video podcasts add a visual requirement that music studios rarely face. Foam squares can look like an afterthought on camera. Many podcasters now use WPC wood slat panels as feature walls that improve audio while elevating production value.
Soundproofing vs. Acoustic Treatment for Podcasters
This distinction trips up more podcasters than any other concept in room audio. Soundproofing stops sound from entering or leaving a room. Podcast room sound treatment controls how sound behaves after it is already there.
Acoustic panels can’t block traffic noise, barking dogs, or HVAC hum. They absorb reflections that create echo, reverb, and flutter. If your voice bounces off the wall behind your mic and creates a slap-back delay, panels solve that problem.
Soundproofing solutions include:
- Sealing gaps around doors and windows
- Adding mass to walls with additional drywall
- Using decoupled construction for floors and ceilings
- Recording during quiet hours
Acoustic treatment solutions include:
- Absorption panels at first reflection points
- Ceiling clouds to reduce floor-to-ceiling flutter
- Bass traps to control low-frequency buildup
- Diffusers to scatter reflections without removing energy
Most home podcasters should start with acoustic treatment. It is more affordable, renter-friendly, and solves the most common audio problem: room sound.
The 5 Placement Zones for Podcast Room Acoustic Panels
Correct placement depends on treating five zones in priority order. Where you place panels matters more than how many you own.
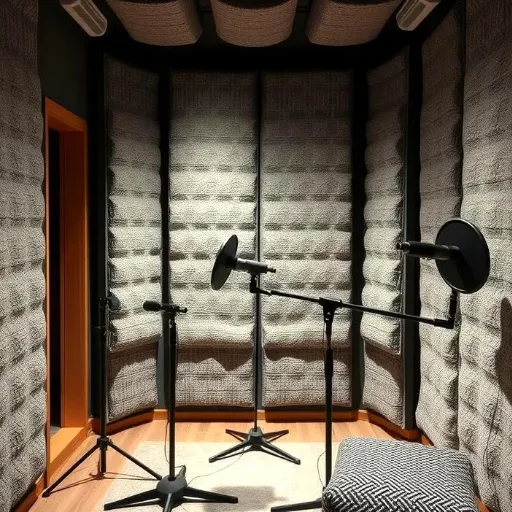
Zone 1: Behind the Microphone
This is the highest-priority surface in any podcast room. Your voice travels forward, hits the wall in front of you, and bounces directly back into the microphone. That reflection arrives milliseconds after your direct voice and smears clarity.
Place one or two 2×4-foot panels directly behind the microphone position. The center of the panels should align with the microphone height. For most seated setups, this is 40-48 inches from the floor.
If you record in a closet or small room, the wall behind your mic may be close. A single panel 2-3 feet behind the microphone can make a dramatic difference. GIK Acoustics offers a room setup calculator to estimate coverage based on your exact dimensions.
Zone 2: Side Wall First Reflection Points
Side-wall reflections are the second-biggest source of coloration in podcast audio. Use the mirror trick to find them: sit in your recording position and have someone slide a mirror along each side wall. Where you see your microphone reflected, mark the spot and center a panel.
In a typical bedroom or home office, these reflection points are usually 3-5 feet to each side of the microphone. Two panels, one per side wall, are usually sufficient for solo podcasters. For guidance on panel density across larger walls, see our guide on how far apart to space acoustic panels.
Zone 3: Ceiling Cloud Above the Recording Position
Hard ceilings create a floor-to-ceiling flutter echo that microphones pick up clearly. A 2×4-foot or 4×4-foot ceiling cloud directly above the microphone position solves this problem.
Ceiling clouds are especially important in rooms with 8-foot or lower ceilings because the reflection path is shorter and the echo more pronounced.
Zone 4: Rear Wall
The rear wall matters more for dual-host and interview setups than for solo podcasters. In a solo setup, your back is to this wall, and your body blocks some reflections. In a dual-host setup, each host faces the other, and the rear wall behind each person becomes a reflection source.
Treat the rear wall lightly if you record alone. Add 2-4 panels if you regularly have co-hosts or guests. WPC wood slat panels work well here for video podcasts because they treat reflections while creating an attractive background.
Zone 5: Corners
Corners accumulate low-frequency energy from the proximity effect and room modes. A 2-inch foam panel does almost nothing below 500 Hz. Floor-to-ceiling bass traps in vertical corners absorb the bass buildup that makes voices sound muddy.
For podcasters, bass traps are helpful but not always the priority. Start with the zones behind the mic and at the first reflection points. Add corner treatment if your voice sounds boomy even after those areas are covered.
Podcast Setup Types and Panel Placement
Solo Podcaster Setup
Solo recording is the simplest scenario for home podcast studio acoustic treatment. The microphone faces one direction. Your body blocks some rear wall reflection. Side walls and the front wall do most of the damage.
Minimum effective setup (4-6 panels):
- 2 panels behind the microphone
- 2 panels at the side-wall first reflection points
- 1 ceiling cloud above the recording position
- 1 bass trap in the nearest corner if the budget allows
When Elena started her business podcast from a spare bedroom in Chicago, she followed this exact arrangement with six panels. Before treatment, her voice had a slight “boxiness” that made her sound like she was recording in a cubicle. After treatment, listeners began asking what microphone she used. The room had changed, not the microphone.
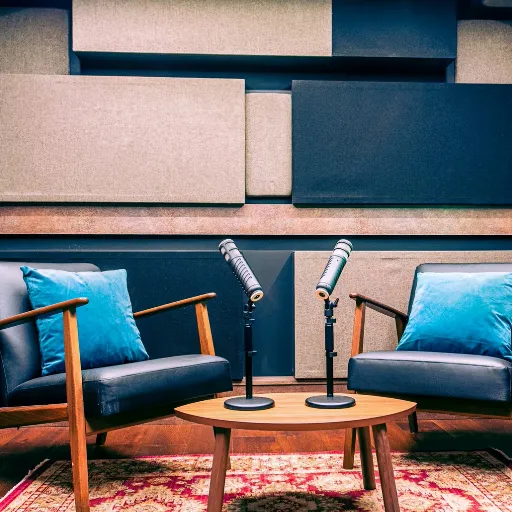
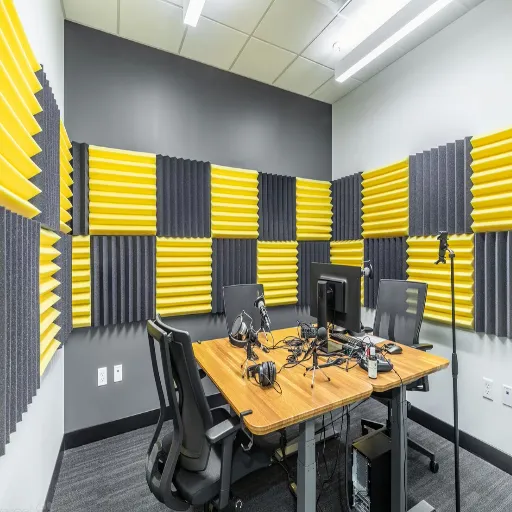
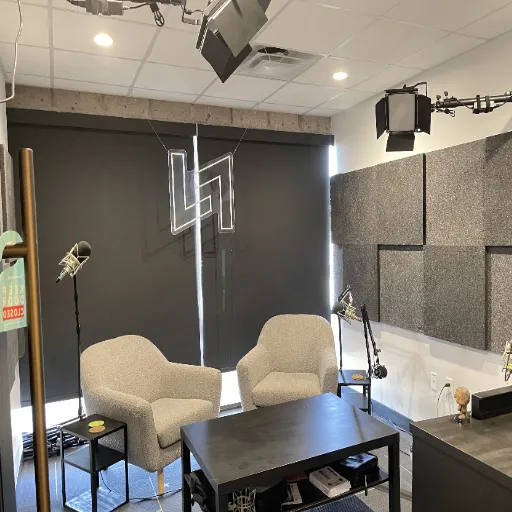
Dual-Host or Interview Setup
Two voices create twice the reflection paths. Each host hears the other host’s voice bouncing off the walls. Cross-reflections between hosts can make conversation sound thin or distant.
Recommended setup (8-14 panels):
- 2 panels behind each microphone position
- 2 panels at the side wall, first reflection points for each host
- 1 ceiling cloud covering both positions
- 2-4 panels on the rear wall between hosts
- 2 bass traps in front corners
Position the hosts so they face each other across a 4-6 foot gap. Treat the surfaces directly behind each microphone first, then the shared rear wall.
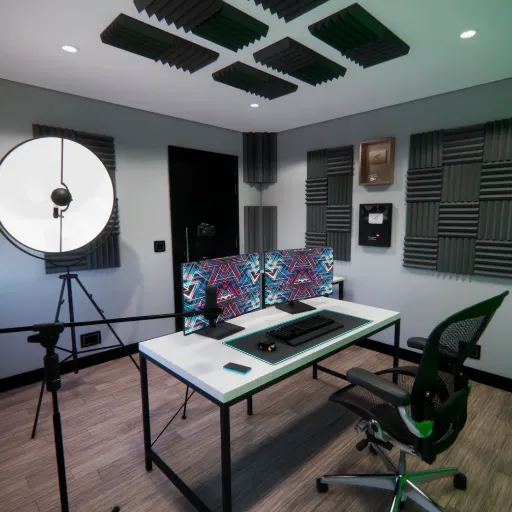
Video Podcast / On-Camera Setup
Video podcasts have an aesthetic requirement that audio-only recordings don’t. Your background is part of the brand. Random foam squares send a message of amateur production.
WPC and wood slat panels solve both problems. Their NRC rating of 0.50-0.80 provides moderate absorption that treats reflections without making the room sound dead on camera. Their structured surface looks like an intentional set design.
For video podcasts, treat the wall visible behind the host first. Add side-wall panels outside the camera frame. Keep ceiling clouds above the recording position even if they aren’t visible on camera.
| Setup | Panel Count | Rear Wall Priority | Ceiling Cloud | Best Material Accent |
|---|---|---|---|---|
| Solo | 4-6 | Low | Small 2×4 ft | Fiberglass |
| Dual-host | 8-14 | Medium | 4×4 ft | Fiberglass + WPC |
| Video podcast | 10-16 | High | 4×4 ft | WPC feature wall |
Budget Tiers for Podcast Acoustic Treatment
Budget Tier: $150-400 (6-10 Panels)
This is where most home podcasters should start. Do not try to cover every wall.
- 2 panels behind the microphone
- 2 panels at the side-wall first reflection points
- 1 small ceiling cloud
- 1 bass trap if the room sounds boomy
This configuration treats the three highest-priority zones. Use our acoustic panel calculator to confirm your exact panel count before buying.
Standard Tier: $500-1,000 (12-18 Panels)
With 12-18 panels, you can cover all five priority zones comprehensively.
- 4 panels in the front wall / behind microphones
- 4 panels at the side-wall first reflection points
- 1 larger ceiling cloud
- 4 panels on the rear wall
- 2-4 bass traps in vertical corners
This tier achieves balanced treatment for solo, dual-host, and occasional guest setups. Dialog becomes crisp, and the room supports longer recording sessions without fatigue.
Premium Tier: $1,500+ (20-30+ Panels)
At this level, treatment becomes about refinement, not coverage.
- All standard tier panels
- Additional ceiling coverage for larger rooms
- Diffusion panels on the rear wall
- Bass traps in all vertical corners
- Measurement-guided fine-tuning with Room EQ Wizard
Premium setups often include WPC feature walls for visual branding.
Best Materials for Podcast Room Acoustic Panels
The best acoustic panels for podcast room use balance absorption, durability, and visual appeal. The right acoustic panels for podcasting depend on whether you record audio-only or on camera.
Acoustic Foam
Foam is the cheapest and most widely available option. It absorbs high frequencies effectively but does very little below 500 Hz. For voice work, foam can reduce harsh consonants and flutter echo but often leaves low-mid muddiness untouched. Most podcasters outgrow it within a year.
Fiberglass and Fabric-Wrapped Panels
Fiberglass panels with NRC ratings of 0.85-0.95 remain the standard for voice recording. They absorb across the frequency range that matters for speech, including the 200-500 Hz region where foam fails.
Use fiberglass panels behind the microphone, at first reflection points, and in ceiling clouds. Their high absorption is what you need, where direct reflections cause the most damage.
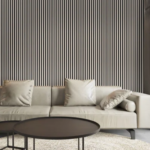
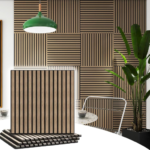
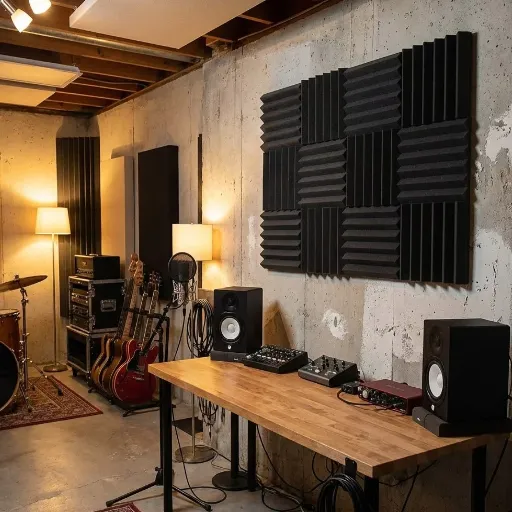
WPC and Wood Slat Panels
WPC acoustic panels are ideal for podcasters who record on camera. They provide mid-to-high frequency absorption with NRC ratings of 0.50-0.80, sufficient for voice work. They also transform a plain wall into an intentional design feature.
WPC panels need wider spacing (3-4 feet apart) than fiberglass because their absorption is lower. They also require a 1-2 inch air gap behind the panel to perform at their rated NRC. Mounted flush, they lose 30-40% of their effectiveness. Follow proper WPC wall panel installation practices to ensure the correct air gap and mounting height.
For video podcast studios, a hybrid approach works best. Fiberglass panels handle the critical front wall and side reflection points. WPC panels cover the rear wall as a visible feature. The result is professional audio with a background that looks designed, not improvised.
| Material | NRC Rating | Best For | Spacing | Air Gap |
|---|---|---|---|---|
| Fiberglass (2″) | 0.85-0.95 | Behind mic, first reflections, ceiling | 2-3 ft | 2-4″ |
| WPC/Wood Slat | 0.50-0.80 | Rear wall feature panels for video | 3-4 ft | 1-2″ min |
| Acoustic Foam | 0.40-0.70 | Budget starter setup | 1-2 ft | Flush |
| Mineral Wool Bass Trap | 0.90-1.00 | Corners and low-frequency control | Contact | N/A |
Common Mistakes with Podcast Room Acoustic Panels
Even experienced podcasters make errors that waste money and leave audio sounding average.
Buying foam and expecting studio sound. Foam panels are better than nothing, but they cannot address the low-mid frequencies that make home recordings sound boxy. Plan to upgrade within your first year if audio quality is a priority.
Covering every wall. A completely dead room sounds unnatural for podcasts. The human voice needs a small amount of controlled reflection to sound present and engaging. Over-treated rooms produce voices that seem disconnected from the space.
Ignoring the ceiling. Bedroom podcasters often cover walls and forget the ceiling. Hard ceilings create a strong flutter echo that reaches the microphone from above. A single ceiling cloud above the recording position is one of the highest-impact upgrades.
Placing panels too high or too low. Acoustic panels should align with the microphone height. A panel mounted near the ceiling doesn’t intercept the reflections that reach a microphone positioned at mouth level.
Confusing soundproofing with treatment. Panels won’t stop outside noise. If you can hear traffic, air conditioning, or family members through the walls, you need soundproofing, not more acoustic panels.
How to Test Your Podcast Audio
Acoustic treatment should be verified with listening tests, not just by looking at the walls.
The clap test is the fastest check. Stand in your recording position and clap loudly once. In an untreated room, you’ll hear a sharp ringing or flutter after the clap. In a well-treated room, the clap dies out almost immediately.
Record a reference track. Read the same 30-second script before and after treatment. Listen specifically for:
- Boxiness or muddiness in the low mids
- Echo or slap-back delay after words
- Harshness on consonants like “s” and “t.”
- Whether the voice sounds close and present or distant
The headphone walk-around test checks consistency. Put on headphones, start recording, and turn slowly in a circle while speaking. If your voice quality changes as you face different walls, your treatment is uneven.
When to adjust placement:
- Voice sounds distant: add panels behind the microphone
- Boxy or muddy low end: add bass traps in corners
- Harsh or sharp consonants: add panels at first reflection points
- Echo after words: check ceiling and rear wall coverage
- Voice sounds too dead: remove 1-2 panels from non-priority walls
Audioholics offers a detailed guide to room acoustics measurement for podcasters who want to measure results with Room EQ Wizard.
Frequently Asked Questions
How many acoustic panels for a podcast room?
Most home podcast studios need 6-12 panels for balanced treatment. A solo podcaster can start with 4-6 panels focused behind the mic and at side reflections. Dual-host setups benefit from 10-14 panels. Use our acoustic panel calculator for a count based on your room size.
Where should acoustic panels go in a podcast studio?
Prioritize five zones in this order: behind the microphone, side-wall first reflection points, ceiling cloud above the recording position, rear wall, and corners. The area behind the microphone is the highest priority because direct reflections enter the mic capsule.
Are foam panels good enough for podcasting?
Foam panels are acceptable for beginners but are limited. They absorb high frequencies but do very little below 500 Hz. Most podcasters eventually upgrade to fiberglass for fuller voice-frequency control.
What is the best material for podcast room acoustic panels?
Fiberglass panels (NRC 0.85-0.95) offer the best broadband absorption for podcasting. WPC wood slat panels are excellent for video podcasts because they provide moderate absorption plus on-camera aesthetics. Avoid foam for professional-sounding results.
How far from the wall should podcast acoustic panels be?
Mount panels 2-4 inches from the wall for improved low-frequency absorption. WPC and wood slat panels need a 1-2 inch minimum air gap. See our acoustic panel spacing guide for detailed spacing rules by material.
Can acoustic panels soundproof a podcast room?
No. Acoustic panels control reflections inside a room. They don’t block sound from entering or leaving. For outside noise like traffic or HVAC, you need door seals, window plugs, or additional wall mass.
Conclusion
Podcast room acoustic panels aren’t about covering walls. They’re about controlling the specific reflections that make your voice sound distant, muddy, or unprofessional.
Start with the zone behind your microphone because that’s where the most damaging reflections originate. Add side-wall first reflection points to clean up the midrange. Put a ceiling cloud above the mic to eliminate flutter echo.
Treat the rear wall if you have co-hosts or record video. Add corner bass traps if your voice sounds boomy after the priority zones are covered.
A 6-panel setup in the right positions outperforms a 20-panel setup spread randomly across every surface. Placement beats coverage every time.
For a complete overview of acoustic panel placement across all room types, visit our acoustic panel placement guide.
Categories:
Blog
Related Articles