How Far Apart Should Acoustic Panels Be Spaced? The Complete Spacing Guide
How far apart should acoustic panels be spaced? The answer depends on priority zones, not wall coverage percentage. First reflection points need panels centered exactly on the mirror-identified spot, typically 2-4 feet apart on side walls. Ceiling clouds cover a 4×6-foot area above the listening position. Bass traps go floor-to-ceiling in all four corners with no gaps.
The 25-30% wall coverage rule is a starting point. Strategic spacing based on reflection geometry delivers far better results than even distribution. For a complete overview of placement strategies, see our acoustic panel placement guide.
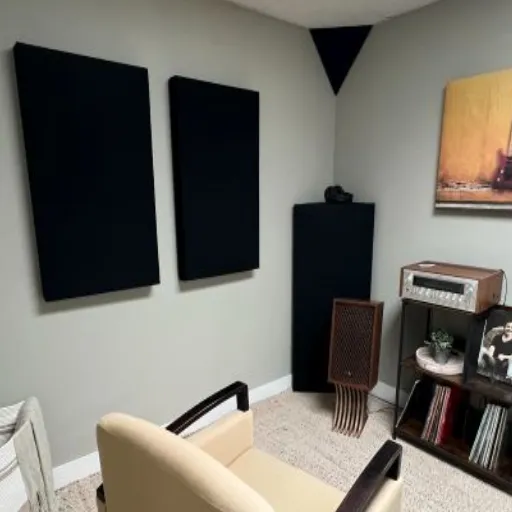
Most people get this wrong. They buy a pack of twelve panels, divide their wall into equal sections, and mount them like decorative tiles. The room looks treated. It sounds barely different.
When Marcus set up his home studio in Berlin, he covered 30% of his wall area with fiberglass panels spaced exactly 18 inches apart. The grid pattern looked professional. His mixes still sounded muddy. After repositioning just four panels to his first reflection points and adding corner bass traps, his RT60 dropped from 1.2 seconds to 0.5 seconds. Same panels. Different spacing. Completely different result.
This acoustic panel spacing guide explains how far apart to space acoustic panels based on room type, panel material, and budget. You will learn a repeatable spacing framework that works for studios, offices, home theaters, and podcast rooms.
Key Takeaways
- First reflection points are the highest-priority spacing decision: place panels exactly at mirror-identified points, not evenly across the wall.
- Ceiling clouds should span 4×6 feet above the listening position, not be scattered across the ceiling.
- Bass traps must extend floor-to-ceiling in corners with no gaps for maximum low-frequency absorption.
- WPC and wood slat panels need wider spacing with air gaps; fiberglass panels can be placed closer together.
- A budget-tier spacing strategy with 8-12 panels prioritizes first reflections and corners over full-wall coverage.
The Core Spacing Rule: Coverage Percentage vs. Strategic Placement
The most common acoustic panel spacing mistake is treating coverage percentage as the primary metric. Online calculators and basic guides tell you to cover 25-30% of your wall surface area. They rarely tell you which 25-30% matters most.
A panel at a first reflection point absorbs 8-12 dB of reflected sound energy. The same panel mounted two feet away absorbs 2-3 dB. The coverage percentage is identical. The acoustic result is completely different. This is why the question of how far apart acoustic panels should be spaced cannot be answered with a single number.
Strategic placement follows reflection geometry. Not aesthetics. Sound travels in straight lines from your speakers to your ears. It bounces off walls, ceilings, and floors. The points where these reflections hit surfaces are your targets. Everything else is secondary.
The coverage percentage rule works as a rough estimate for total panel count. For a 150-square-foot room, 25-30% coverage means 12-18 panels, depending on panel size. But the spacing of those panels, which walls they go on, and how close they are to reflection points, determines whether your room sounds professional or just dampened. GIK Acoustics provides a useful acoustic panel calculator for estimating total coverage needs.
How Far Apart Should Acoustic Panels Be Spaced by Room Type
Room function changes spacing priorities. A mixing studio needs symmetrical side-wall treatment. An open-plan office needs distributed ceiling panels. A home theater needs rear-wall absorption and controlled side reflections.
| Room Type | Wall Spacing | Ceiling Spacing | Corner Priority | Target RT60 |
|---|---|---|---|---|
| Home Studio | First reflection points first, then the rear wall | 4×6 ft cloud above mix position | All 4 vertical corners | 0.3-0.5s |
| Office / Open Plan | Even distribution on the facing walls | Grid pattern across the ceiling | Optional (if noise is an issue) | 0.5-0.8s |
| Home Theater | Rear wall full coverage, side walls at reflection points | 4×4 ft cloud or scattered | 2-4 corners | 0.4-0.6s |
| Podcast / Voice Room | Behind the mic and on the side walls | Small cloud above recording position | 2 rear corners minimum | 0.3-0.5s |
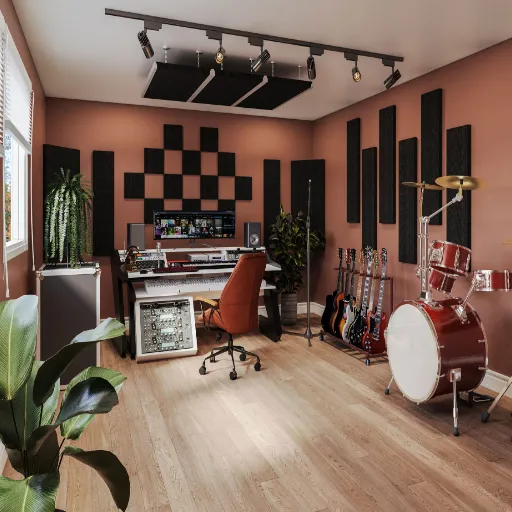
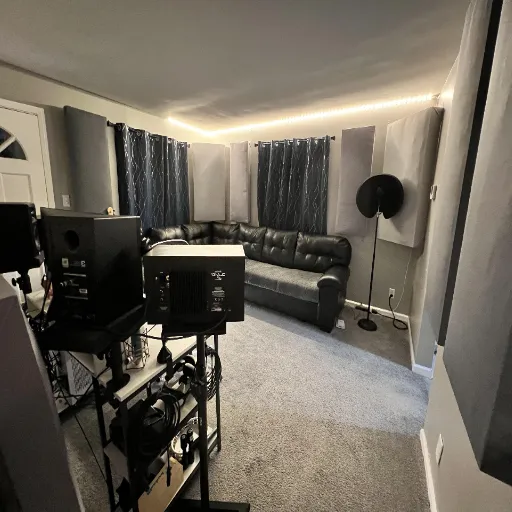
Home Studio Spacing
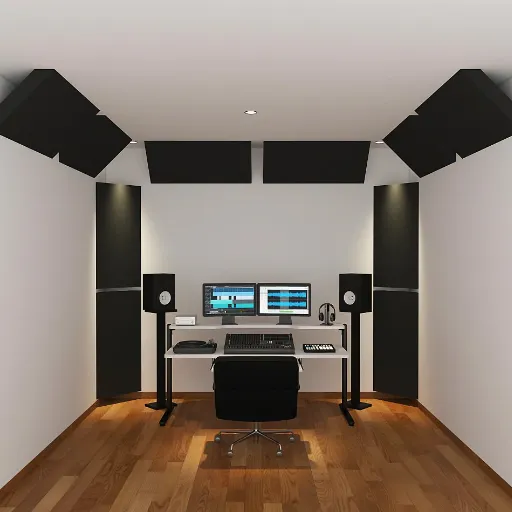
In a home studio, spacing is dictated by the mixing position. Start with the side walls. Use the mirror trick: sit in your listening position and have someone slide a mirror along each side wall. Where you see the speaker tweeter in the mirror, center a panel.
These two points are typically 3-5 feet apart. Room width and speaker placement determine the exact distance.
The rear wall behind the listening position should have panels spaced to cover the full width at ear height. A 4×2-foot panel every 2-3 feet across the rear wall is typical for small studios. The front wall behind the monitors benefits from one panel per monitor, centered behind each speaker.
Office and Open Plan Spacing
Offices need different acoustic panel spacing than studios. How far apart should acoustic panels be spaced in an open plan? The goal is speech intelligibility, not precise stereo imaging. Panels should be spaced evenly on facing walls to reduce reverberation across the room.
For open plans, ceiling panels are often more effective than wall panels because walls are far apart. Suspended ceiling baffles spaced 4-6 feet apart in a grid pattern work well.
Home Theater Spacing
Home theaters prioritize the rear wall and first side reflections. The rear wall should have the densest panel spacing because sound from the surround speakers hits this surface directly. Space panels 2-3 feet apart across the full rear wall width.
Side walls need panels at the first reflection points for the main speakers, similar to a studio. The ceiling benefits from a cloud above the primary seating row.
First Reflection Points: The Most Critical Spacing Decision
First reflection points are where sound from your speakers first bounces off a wall before reaching your ears. These points are the highest-priority locations for acoustic panel placement spacing because early reflections arrive within 15 milliseconds of the direct sound, smearing detail and reducing clarity.
The mirror trick finds these points precisely. Sit in your primary listening position. Have someone hold a mirror flat against the side wall and slide it slowly. When you can see the tweeter of the nearest speaker in the mirror, mark that spot. Center your panel on that mark.
How close should the panel be to the exact reflection point? Within 6 inches is ideal. A panel centered within a foot of the reflection point still performs well. Beyond 18 inches, effectiveness drops sharply.
Both side walls must have symmetrical spacing. If the left wall panel is centered at 42 inches from the front wall, the right wall panel must also be at 42 inches. Asymmetry shifts the stereo image and creates an unbalanced soundstage.
Our detailed first reflection points guide covers the mirror technique, optimal panel sizing, and how to handle asymmetrical rooms.
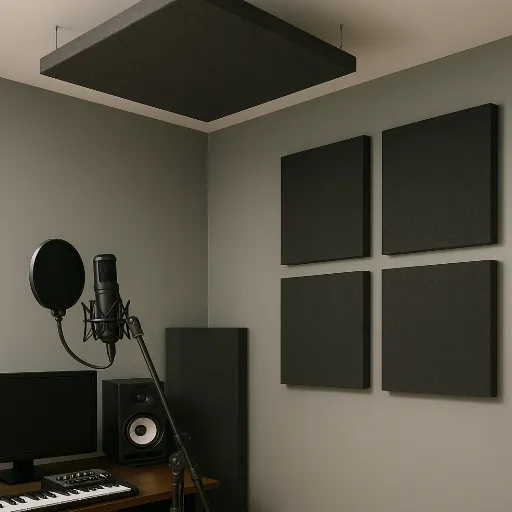
Ceiling Panel Spacing Guidelines
Ceiling panels require different spacing logic than wall panels because vertical reflections are harder to identify by ear.
A ceiling cloud is a group of panels suspended horizontally above the listening position. The standard size is 4×6 feet, positioned 2-4 feet above the listener’s head. This coverage should extend from slightly in front of the listening position to slightly behind it.
For rooms where a full cloud is not practical, individual ceiling panels should be spaced 2-3 feet apart in a grid above the primary listening area. Do not scatter ceiling panels randomly. Concentrate them where the listener sits.
Rooms with flat drywall or concrete ceilings need more ceiling treatment than rooms with drop ceilings. Standard drop ceiling tiles have some absorption (NRC 0.50-0.65), but they are usually not enough on their own. Add dedicated panels in a cloud formation above the main work area.
For a full comparison of when to prioritize ceiling versus wall treatment, see our ceiling vs wall acoustic panels guide.
Bass Trap Spacing: Corners and Beyond
Bass traps follow the simplest spacing rule: no gaps. But how far apart should acoustic panels be spaced from bass traps? They can be placed directly adjacent with no acoustic penalty. A bass trap that does not extend floor-to-ceiling leaves an exposed corner area where bass energy still accumulates.
The four vertical corners of the room are the priority. Place corner bass traps in all four corners if possible. If your budget limits you to two, choose the two corners behind the listening position. These corners receive the most low-frequency energy from the rear radiation of your speakers.
Ceiling-wall corners are the second priority. These trihedral corners (where two walls meet the ceiling) concentrate bass energy even more intensely than vertical corners. Add bass traps here when you have eight or more total panels dedicated to low-frequency treatment.
How far apart should bass traps be from other panels? Bass traps operate independently of wall panel spacing. They can be placed directly adjacent to wall panels with no acoustic penalty. In fact, extending bass trap placement along the wall from the corner (straddling the corner with a panel on each adjacent wall) increases low-frequency absorption by 20-30%.
How Material Affects Panel Spacing
Panel material changes how closely panels can be spaced while remaining effective. High-absorption materials like fiberglass can be spaced farther apart because each panel provides more sound absorption per square foot. Lower-absorption materials need denser spacing to achieve the same result.
| Material | NRC | Recommended Panel Spacing | Gap from the Wall | Notes |
|---|---|---|---|---|
| Fiberglass (2″) | 0.85-0.95 | 2-3 ft apart on priority walls | Flush or 1″ gap | Highest absorption, most flexible spacing |
| Fiberglass (4″) | 0.90-0.95 | 2-4 ft apart, fewer panels needed | 2-4″ gap for bass | Extended low-frequency absorption |
| PET Felt (0.4″) | 0.75-0.85 | 1.5-2.5 ft apart | Flush | Mid-to-high frequency focus |
| WPC/Wood Slat | 0.50-0.80 | 3-4 ft apart, air gap essential | 1-2″ minimum gap | Lower absorption, wider spacing acceptable |
| Acoustic Foam (2″) | 0.40-0.70 | 1-2 ft apart, dense coverage needed | Flush | Only effective above 300 Hz |
Fiberglass panels with an NRC rating of 0.85-0.95 are the most forgiving for spacing. A 2-inch fiberglass panel at a first reflection point performs effectively even if the next nearest panel is 6 feet away. This is why fiberglass is the industry standard for studios.
WPC and wood slat panels have lower NRC ratings (0.50-0.80) but serve a dual aesthetic purpose. Their spacing can be wider (3-4 feet apart) because they function as feature walls as well as acoustic treatment. The critical factor is the air gap behind the panel. WPC panels mounted flush against the wall perform 30-40% worse than panels with a 1-2 inch air gap. For proper mounting techniques, see our WPC wall panel installation guide.
Acoustic foam has the most demanding spacing requirements. With an NRC of 0.40-0.70 and almost no low-frequency absorption, foam panels need dense spacing (1-2 feet apart) to achieve meaningful results. Even then, foam cannot replace fiberglass or mineral wool for bass treatment.
Spacing by Budget Tier
Your panel count determines how far apart acoustic panels can be spaced. More panels mean you can cover more priority zones. Fewer panels mean you must concentrate spacing on the highest-impact locations.
Budget Tier: 8-12 Panels ($200-500)
With 8-12 panels, spacing must be ruthless. Do not try to cover all walls. Use our acoustic panel calculator to confirm how many panels your room actually needs before deciding on spacing.
- 2 panels at the side-wall first reflection points
- 4 corner bass traps in vertical corners (or 2 if using thicker 6-inch traps)
- 2-4 panels for rear wall or front wall behind monitors
This configuration spaces panels only in priority zones. The gaps between treated areas are large, but the treated areas are precisely where they matter most.
Standard Tier: 16-24 Panels ($500-1,500)
With 16-24 panels, spacing can expand to cover all six priority zones.
- First reflection points on both side walls
- Ceiling cloud (4-6 panels)
- Bass traps in all four vertical corners
- Rear wall coverage (4-6 panels spaced 2-3 feet apart)
- Front wall behind monitors (2 panels)
This tier achieves balanced spacing across the room. No wall is fully covered, but all major reflection paths are addressed.
Professional Tier: 24-40+ Panels ($1,500-3,000+)
With 24-40+ panels, spacing becomes about optimization rather than coverage.
- All standard tier panels
- Diffusion on the rear wall (replacing some absorption panels)
- Bass traps in all eight corners (four vertical, four ceiling-wall)
- Additional side wall treatment beyond the first reflection points
- Full ceiling grid in addition to the cloud
At this level, panel spacing is fine-tuned based on measurement. Room EQ Wizard identifies specific frequencies and locations that need treatment, allowing you to adjust spacing for your exact room acoustics and build a complete panel spacing acoustic treatment plan.
When Sarah upgraded her voiceover studio in Austin, she moved from a budget-tier 10-panel setup to a standard-tier 20-panel arrangement. The additional panels let her space treatment across all six priority zones instead of concentrating on just reflections and corners. Her clients immediately noticed the difference in vocal recordings, commenting that her booth sounded “like a professional studio.” The spacing, not just the quantity, created that impression.
Common Spacing Mistakes to Avoid
Even experienced builders make spacing errors that waste panels and leave acoustic problems unsolved.
Spacing panels too evenly across walls. Even distribution looks organized but ignores reflection geometry. A panel between two reflection points treats neither effectively. Always prioritize exact reflection points and reflection geometry over visual symmetry.
Leaving gaps in the corner bass trap coverage. A bass trap that stops 12 inches from the floor leaves a concentrated bass zone untouched. Bass traps must extend from floor to ceiling with no exposed corner area.
Mounting ceiling panels too far from the listening position. Ceiling panels scattered across the entire ceiling dilute their impact. Concentrate the ceiling treatment in a cloud directly above the primary listening position.
Using the same spacing for all materials. Fiberglass panels at 3-foot intervals perform very differently from foam panels at the same spacing. Adjust spacing based on your material’s NRC rating and absorption profile.
Ignoring the rear wall in small rooms. In rooms under 150 square feet, the rear wall is close to the listening position. Strong rear reflections muddy the sound. Space 2-4 panels across the rear wall, even if it means fewer panels on other surfaces.
How to Verify Your Panel Spacing Works
Spacing decisions should be verified with measurement, not just by ear.
RT60 measurement is the most reliable verification. Use Room EQ Wizard with a calibrated microphone to measure reverberation time before and after treatment. Target 0.3-0.5 seconds for studios and 0.5-0.8 seconds for offices.
The clap test is a quick check for flutter echo. Stand in your listening position and clap sharply. If you hear a ringing or buzzing decay, your panel spacing has gaps that allow reflections to bounce between parallel surfaces. Add panels at the midpoint between existing panels on the affected walls.
When to adjust spacing:
- RT60 is still above target after treatment: add panels or tighten spacing on priority walls
- Stereo imaging is unbalanced: check for asymmetrical side-wall spacing
- Bass is still boomy: verify bass traps extend floor-to-ceiling in all corners
- Room sounds too dead: panels are spaced too densely; remove 1-2 panels from non-priority walls
Frequently Asked Questions
How far apart should acoustic panels be on a wall?
Place the first panels exactly at the first reflection points, typically 3-5 feet apart on side walls. Use the mirror trick to find these points: sit in your listening position and have someone slide a mirror along the wall until you see the speaker tweeter. Additional panels should be spaced 2-3 feet apart on priority walls (rear wall, front wall behind monitors). Non-priority walls can have wider spacing or no panels at all.
How many acoustic panels per square foot?
Most rooms need coverage equivalent to 25-30% of the total wall and ceiling surface area. A 150-square-foot room with 8-foot ceilings has roughly 420 square feet of wall surface, requiring 105-130 square feet of panel coverage. This translates to 10-16 standard 2×4-foot panels depending on thickness and material.
Should acoustic panels be evenly spaced?
No. Even spacing is a common mistake. Panels should be spaced based on reflection geometry, not visual symmetry. First reflection points, corners, and the rear wall behind the listening position need concentrated spacing. The gaps between these priority zones are intentional.
How close should acoustic panels be to each other?
Panels at first reflection points should be centered within 6 inches of the exact reflection location. On rear walls, panels can be spaced 2-3 feet apart. Ceiling cloud panels should be adjacent or slightly overlapping. Bass traps in corners should touch or overlap with no gaps.
How far from the wall should acoustic panels be mounted?
Fiberglass and foam panels can be mounted flush against the wall. For improved low-frequency absorption, mount panels 2-4 inches from the wall using spacers or impaling clips. WPC and wood slat panels require a 1-2 inch air gap to achieve their rated NRC. The air gap behind a panel can increase its effective absorption by 15-25%.
Do acoustic panels need to cover the whole wall?
No. Full wall coverage is unnecessary and can make a room sound unnaturally dead. Strategic spacing at reflection points, corners, and the rear wall delivers better acoustic results than covering entire surfaces. Most professional studios treat 25-40% of wall surfaces, concentrated in priority zones.
How far apart should ceiling acoustic panels be?
Ceiling panels in a cloud formation should be adjacent or slightly overlapping, covering a 4×6-foot area above the listening position. For grid-style ceiling treatment in offices, space panels 4-6 feet apart across the ceiling. Do not scatter individual ceiling panels randomly; concentrate them above work areas.
Conclusion
How far apart should acoustic panels be spaced? The answer depends on your room, your budget, and your materials. First reflection points get panels centered exactly on the mirror-identified spot. Corners get floor-to-ceiling bass traps with no gaps. Ceilings get concentrated clouds above the listening position, not scattered tiles.
The 25-30% coverage rule tells you how many panels to buy. The spacing framework in this guide tells you where to put them. A 10-panel setup spaced strategically at priority zones outperforms a 20-panel setup spread evenly across every wall.
Start with the first reflection points and corners. Add ceiling treatment when your budget allows. Verify with measurement after each phase. The difference between evenly spaced panels and strategically spaced panels is the difference between a treated room and a transformed room.
For a complete overview of acoustic panel placement across all room types, visit our acoustic panel placement guide. If you need help calculating the right panel count and spacing for your specific room, use our acoustic panel calculator.
Categories:
Blog
Related Articles