Acoustic Panel Placement: Complete Room-by-Room Guide for Studios, Offices & Home Theaters (2026)
The best acoustic panel placement follows a simple rule: treat the first reflection points before adding panels anywhere else. Start with the side walls at ear height, then the ceiling above your listening or working position, and finally the rear wall and corners.
One panel at the right location outperforms four panels on the wrong wall.
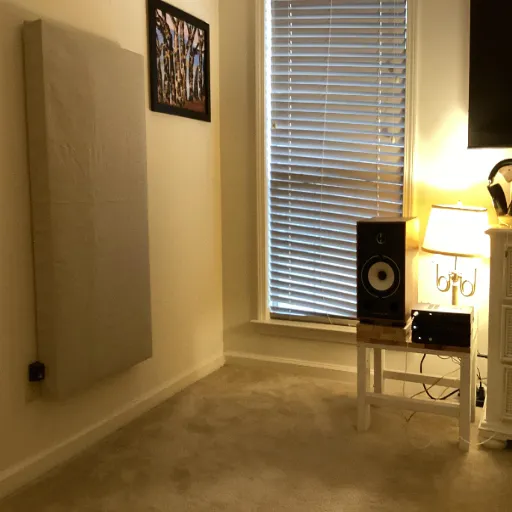
When James set up his home studio in Denver last year, he bought sixteen premium acoustic panels and mounted them in a neat grid across his back wall. Two months later, flutter echo still ruined his vocal recordings. The problem wasn’t the panels. It was the placement.
Once he moved half of them to the side-wall first reflection points, his RT60 dropped from 0.8 seconds to 0.35 seconds. Same panels, different wall.
If you’ve already bought acoustic panels and wondered why the room still echoes, you’re not alone. Most people focus on how many panels to buy and forget that acoustic panel placement matters just as much as panel quality. Where you put them, how far apart you space them, and what material you choose all change the result.
By the end of this guide, you will know exactly where to place panels for your specific space. We will cover the five priority zones every room needs, how to calculate the right number of panels, spacing rules that improve absorption by up to 25%, and why panel material should change your placement strategy. Whether you are treating a home studio, podcast room, home theater, office, or commercial space, this room-by-room guide gives you a clear plan.
Key Takeaways
- Treat first reflection points on side walls before any other surface for the biggest clarity improvement.
- Cover 25-50% of total wall and ceiling surface area for balanced acoustic control without deadening the room.
- Space panels one to two panel widths apart and leave a 2-4 inch air gap behind them for 15-25% better absorption.
- WPC acoustic panels need 20-30% more coverage than fiberglass for equivalent absorption but offer superior durability and design flexibility.
- Corners need bass traps, not standard thin panels, because low-frequency energy accumulates where walls meet.
What Acoustic Panel Placement Actually Does

Acoustic panels absorb sound energy. They do not block sound from leaving a room. That distinction matters because placement strategy changes depending on whether you want to reduce echo inside a space or stop sound from leaking out.
When sound leaves a speaker or a person’s mouth, it travels in all directions. It hits walls, ceilings, floors, and furniture. Each hard surface reflects some of that energy into the room. Those reflections create reverberation, flutter echo, and standing waves.
Too much reverberation makes speech hard to understand and music sound muddy. Strategic acoustic panel placement captures those reflections at key points before they bounce around the room.
The goal is not to eliminate all reflection. A completely dead room feels unnatural. The goal is to control the timing and intensity of reflections so that direct sound arrives clearly and early reflections arrive in a balanced way.
Panel material changes how much sound gets absorbed and which frequencies get treated. A two-inch fiberglass panel with an NRC rating of 1.0 absorbs most mid and high frequencies. A one-inch foam panel absorbs highs but leaves midrange and bass untouched. A 25mm WPC acoustic panel absorbs a broader spectrum because of its composite density, but typically needs more surface coverage to match fiberglass performance.
Many people assume that more panels always mean better acoustics. That is not true. Over-treating a room kills the natural liveliness that makes speech and music feel present. It also wastes budget. Strategic placement beats random coverage every time.
Want to see how different panel materials affect placement strategy? Our complete guide to WPC wall panels breaks down density, NRC ratings, and where each type performs best.
The 5 Priority Zones for Acoustic Panel Placement
Place acoustic panels at first reflection points on side walls first, then add a ceiling cloud above the listening position, treat the rear wall for echo control, absorb the front wall behind speakers, and install bass traps in all corners. This priority order addresses the most problematic reflections before fine-tuning.
1. First Reflection Points (Side Walls)
First reflection points are the spots on your side walls where sound bounces directly from the speaker to your ear. These reflections arrive milliseconds after the direct sound and create comb filtering. Comb filtering smears stereo imaging, masks detail, and makes mixing or listening fatiguing.
Use the mirror trick to find these spots exactly. Sit in your normal listening or working position. Have a helper move a mirror along the side wall. When you can see the speaker in the mirror from your seat, mark that spot.
That is your first reflection point. Repeat on both sides for symmetry. Place a panel centered on each mark at ear height.
Primacoustic has documented this mirror trick methodology as an industry standard for decades. GIK Acoustics provides additional measurement-based techniques for rooms where the mirror trick alone is insufficient. It remains the most reliable DIY method for locating reflection points without measurement microphones.
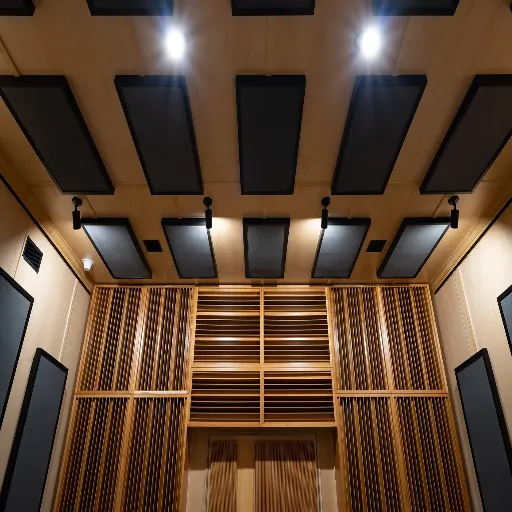
2. Ceiling Cloud (Above Listening/Working Position)
Vertical reflections from the ceiling interfere with clarity just as side-wall reflections do. A ceiling cloud is a panel or cluster of panels mounted directly above the listening position. In offices, this zone often gets ignored because panels feel intrusive overhead. But ceiling reflections are a major cause of speech intelligibility problems in conference rooms and open plans.
Size your ceiling cloud to match the width of your listening area. For a desk or mixing position, a 4-foot by 4-foot cloud works well. In larger conference rooms, run a strip of panels down the center of the ceiling above the table.
3. Rear Wall
Sound that hits the rear wall behind the listener bounces back toward the ears with a longer delay than side reflections. This creates slap echo and muddies the soundstage. Treating the rear wall with absorption panels reduces this echo. In some rooms, especially home theaters, diffusion panels work better than absorption on the rear wall. Diffusion scatters sound instead of absorbing it, which maintains a sense of spaciousness.
4. Front Wall (Behind Speakers/Monitors)
Sound wraps around speakers and reflects off the front wall behind them. Those reflections recombine with the direct sound and cause comb filtering. A panel or two behind each speaker reduces this interference. In home studios, front-wall treatment is essential for accurate monitoring. In offices, front-wall treatment behind video conferencing displays improves microphone clarity.
5. Corners (Bass Traps)
Corners accumulate low-frequency energy. Where two walls meet, bass frequencies build up and create standing waves. Standard thin panels cannot absorb these long wavelengths. You need bass traps. Bass traps are thick absorbers, usually 4-6 inches deep, designed to sit in trihedral corners where two walls and the ceiling meet. If you cannot treat trihedral corners, start with wall-to-wall floor corners.
Learn more about locating these critical spots in our deep dive into first reflection points. For low-frequency control, read our bass trap placement guide. If you are deciding between ceiling and wall treatment, our ceiling vs wall guide breaks down the priority framework by room type.
How Many Acoustic Panels Do You Need?
The standard formula starts with your room’s total wall and ceiling surface area. Calculate the square footage of all four walls plus the ceiling. Do not include the floor. Then target 25-50% coverage, depending on the room’s use and current reverberation.
Here is a quick-reference table by room type:
| Room Type | Target Coverage | Panel Thickness | Example (12′ × 14′ Room) |
|---|---|---|---|
| Home Studio | 40-50% | 2-4 inches | 14-18 panels (2′ × 4′) |
| Podcast Room | 30-40% | 2-3 inches | 10-14 panels |
| Home Theater | 25-35% | 2 inches | 9-12 panels |
| Office/Conference | 30-40% | 1-2 inches | 10-14 panels |
| Restaurant/Commercial | 20-30% | 1-2 inches | 7-11 panels |
For a 12-foot by 14-foot room with 8-foot ceilings, the total wall and ceiling surface area is 560 square feet. At 40% coverage, you need to treat 224 square feet. A standard 2-foot by 4-foot panel covers 8 square feet. That means 28 panels.
But you do not need to cover every square foot continuously. Spaced panels distributed across priority zones perform better than a solid block of coverage on one wall.
Thickness matters. Two-inch panels absorb frequencies down to about 250 Hz. Four-inch panels reach down to 125 Hz. If you are recording music or mixing audio, use thicker panels. If you are treating an office for speech clarity, one-inch or two-inch panels usually suffice. Second Skin Audio recommends 40% coverage as a practical starting point for most home studios and offices.
For a complete walkthrough with a three-tier framework, see our dedicated guide on how many acoustic panels you need.
Acoustic Panel Spacing Guidelines
Space acoustic panels between one and two panel widths apart. For standard 2-foot by 4-foot panels, maintain 2-4 feet between panel edges. This spacing distributes absorption evenly without creating dead spots or live strips.
Symmetry matters in any room where you listen in stereo. If you place a panel on the left side wall at the first reflection point, place an identical panel at the mirror position on the right wall. Asymmetrical treatment skews the stereo image and makes one side of the room sound different from the other.
Leave a 2-4 inch air gap behind panels for 15-25% better absorption. The air gap acts as an extension of the panel thickness. A two-inch panel mounted with a four-inch air gap performs similarly to a six-inch panel mounted flush.
Use standoff mounts, impaling clips, or furring strips to create the gap. In offices where panels must sit flush for fire code or aesthetic reasons, choose thicker panels instead.
Wall panels should mount at ear height for seated occupants. That usually means centering panels 42-52 inches from the floor. Ceiling clouds should sit directly above the primary listening or working position. In rooms with 14-foot or higher ceilings, consider lowering clouds on drop wires to bring them closer to the sound source.
For WPC acoustic panels installed on a keel framework, rail spacing typically runs 400-600mm apart, depending on panel size and weight. The keel itself creates a natural air cavity, which improves low-frequency absorption. Seal panel edges with elastic gaskets to prevent sound leaking around the perimeter.
Get the full technical breakdown in our acoustic panel spacing guide.
Placement by Room Type
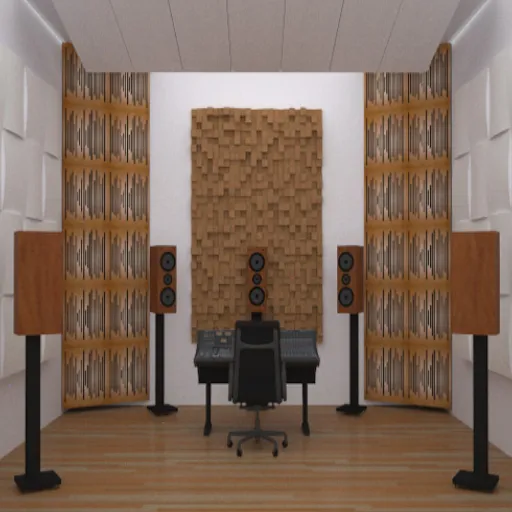
Home Recording Studios & Music Rooms
Home studios demand the most precise acoustic panel placement because every frequency matters. Start with the mirror trick on both side walls. Add a ceiling cloud above the mixing position. Treat the front wall behind the monitors. Put diffusion or absorption on the rear wall, depending on the room depth. Install bass traps in all four vertical corners and both front trihedral corners.
If your studio doubles as a live room, create a reflection-free zone around the mixing position and leave the back half of the room slightly more live for recording. This gives you control during mixing and character during tracking.
For a detailed studio layout, read our home studio acoustic panel placement guide.
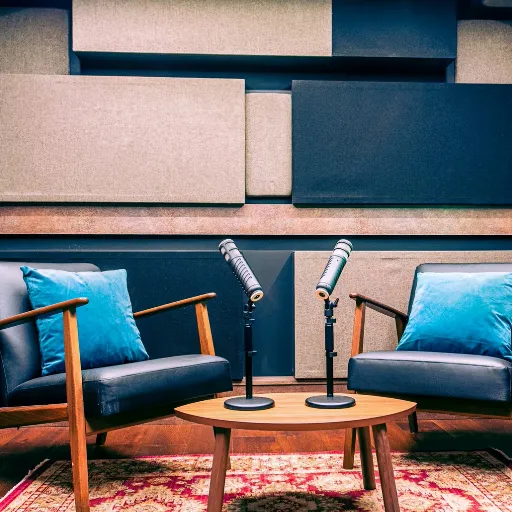
Podcast & Vocal Recording Spaces
Podcast rooms prioritize voice frequencies, typically 85 Hz to 255 Hz for male voices and 165 Hz to 255 Hz for female voices. That means you need less bass trapping than a music studio, but more midrange absorption behind the microphone.
Place absorption directly behind the speaker’s head to catch reflections before they hit the mic. Treat the ceiling above the recording position. Add side-wall panels at first reflection points.
If the room is small, like a converted closet, use one-inch foam or PET felt panels to avoid over-deadening. For video podcasts, consider decorative WPC panels that look like wood slats on camera while absorbing sound.
See our podcast room acoustic panel placement guide for budget-friendly setups.
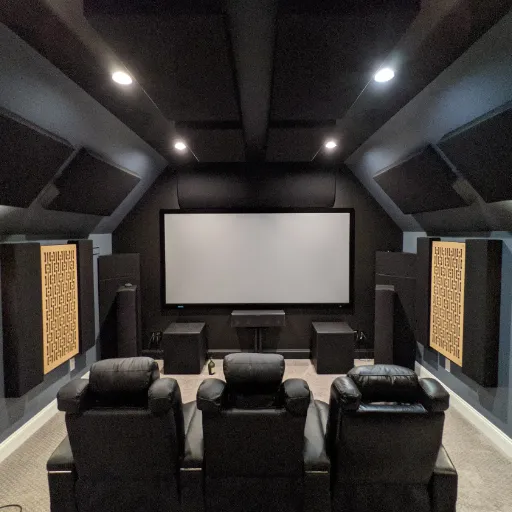
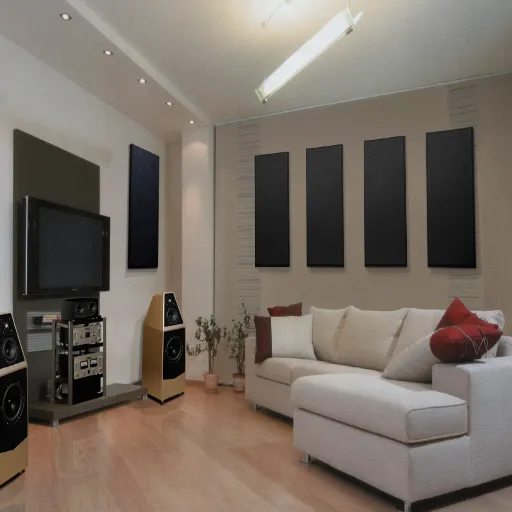
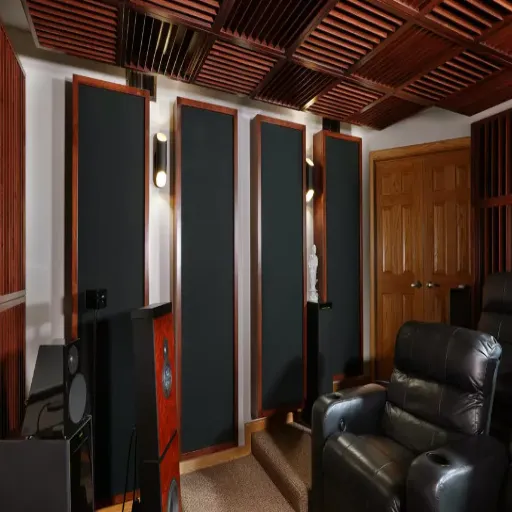
Home Theaters
Home theaters need controlled reflection for dialogue clarity and some liveliness for surround-sound immersion. Absorb the front wall behind the screen and speakers. Treat the ceiling above the primary seating row. Use diffusion on the rear wall to scatter surround-channel reflections and maintain a sense of space. Bass traps in corners reduce the rumble that makes explosions sound boomy and dialogue hard to hear.
If your theater has multiple rows of seating, extend ceiling treatment to cover the front two rows. Side-wall treatment should start at ear height for seated viewers.
Get room-specific layout maps in our home theater acoustic panel placement guide.
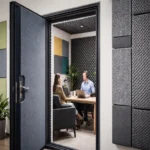
Offices & Conference Rooms
Offices present a unique challenge because acoustic treatment must balance performance with open sightlines and professional aesthetics. In conference rooms, start with the ceiling. A ceiling cloud or full ceiling treatment above the table reduces the flutter echo that makes video calls sound hollow. Then treat the wall behind the video conferencing display to prevent sound from bouncing back into the microphone.
In 2024, a 40-person marketing firm in Austin installed ceiling clouds and wall panels across its open floor plan. They skipped the parallel glass walls entirely. Noise complaints dropped by only 15%. After an acoustic audit relocated panels to the first reflection points near those glass surfaces and added three strategic bass traps in corners, employee satisfaction scores related to the ability to concentrate jumped 47% within one quarter.
For open-plan offices, ceiling baffles often work better than wall panels because they do not take up vertical workspace. WPC ceiling panels with perforated designs offer both absorption and a clean architectural look that fits modern office design.
Read our office acoustic panel placement strategy for B2B-specific guidance.
Hotels, Restaurants & Commercial Spaces
Commercial spaces need acoustic control at scale. Hotel lobbies, restaurant dining rooms, and retail spaces often have hard floors, glass windows, and high ceilings. These surfaces create long reverberation times that make conversation difficult.
In restaurants, focus on the ceiling and upper walls. Diners do not want panels at eye level. In hotel lobbies, use decorative WPC wall panels that match the interior design while reducing echo. For KTV rooms and private dining spaces, full coverage on all walls plus corner bass traps creates an intimate, controlled environment.
Contractors treating multiple rooms should develop a phased placement strategy. Treat priority zones first, measure the results, then add panels if needed. This approach avoids over-treating and keeps material costs predictable.
Material-Smart Placement: Why Panel Type Changes Your Strategy
Not all acoustic panels absorb sound the same way. Density, thickness, and porosity change which frequencies get treated and how much surface area you need. Your placement strategy should match your panel material.
Fiberglass & Mineral Wool Panels
Fiberglass and mineral wool panels offer the highest NRC ratings, often reaching 1.0 or higher. They absorb efficiently across mid and high frequencies. Because they perform so well per square foot, you can follow standard coverage percentages.
A 2-inch fiberglass panel at a first reflection point does more work than a foam panel of the same size. These panels work best in studios, critical listening rooms, and any space where maximum absorption per panel matters.
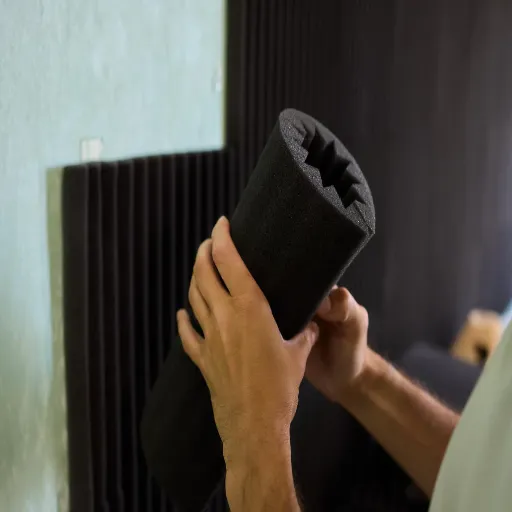
Acoustic Foam
Foam is lightweight and affordable. It absorbs high frequencies well but struggles below 500 Hz. That means foam can make a room sound dull without actually controlling bass buildup. If you use foam, treat the upper walls and ceiling for flutter echo, but do not rely on it for corner bass control. Foam suits temporary setups, podcast booths, and budget home studios where low-frequency precision is not critical.
PET Felt Panels
PET feels between foam and fiberglass in performance. It offers moderate absorption, typically NRC 0.35 to 0.85, depending on thickness. Its real advantage is design flexibility. PET felt comes in dozens of colors and can be cut into shapes or patterns. It works well in offices, modern homes, and any space where aesthetics matter as much as acoustics. Plan for standard coverage percentages with PET felt.
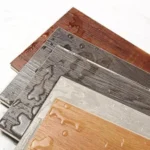
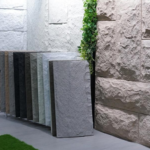
WPC (Wood Plastic Composite) Panels
WPC acoustic panels behave differently from soft porous absorbers. Their composite density, typically 1.3-1.5 g/cm³, gives them mass that helps with both absorption and insulation. A 20mm WPC panel with a perforated or grooved face absorbs sound through the surface openings while the core mass blocks transmission. When mounted on a keel framework with an air cavity and backing insulation, WPC panels can achieve sound reduction indexes up to 25 dB.
Because WPC panels are less porous than fiberglass, you need 20-30% more coverage area for equivalent absorption. If a studio calls for 200 square feet of fiberglass, plan for 240-260 square feet of WPC.
The tradeoff is durability. WPC panels resist moisture, cleaning chemicals, and UV exposure. They work exceptionally well in humid climates, high-traffic commercial spaces, and anywhere that fabric panels would stain or degrade.
Maria, a procurement manager for a hotel chain, specified standard fabric-wrapped panels for a 200-seat conference center. Within eighteen months, the panels showed staining and edge wear from cleaning cycles. When she switched to WPC acoustic panels with UV-resistant and wipeable surfaces for the next three properties, maintenance costs fell by 60%, and the acoustic performance remained consistent after two years of heavy use.
WPC placement also requires specific installation techniques. Mount panels on a keel or aluminum framework, not directly to the wall. Leave a 25-50mm air cavity behind the panel. Fill the cavity with acoustic wool or insulation for maximum performance. Seal panel edges with elastic gaskets to prevent flanking sound.
Planning a commercial project? Linyi Yuheng supplies custom-sized WPC acoustic panels with NRC ratings up to 0.85, fire-rated cores, and global shipping direct from our Linyi manufacturing facility. Request a wholesale quote and receive material samples within 5 business days.
For installation specifics, see our WPC acoustic panel installation guide.
Common Acoustic Panel Placement Mistakes
Even experienced installers make these errors. Avoid them to get the most from your treatment.
- Treating only one wall. Sound reflects off every hard surface. A full wall of panels on the back wall does nothing for side-wall flutter echo or ceiling bounce. Distribute panels across priority zones.
- Mounting too high or too low. Panels mounted near the ceiling or baseboard miss the primary reflection paths that travel at ear height. Center wall panels at seated ear level unless you have a specific reason to vary height.
- Ignoring corners. Corners are where low-frequency energy gathers. Thin panels in corners waste space. Use proper bass traps instead.
- Over-treating the room. Too much absorption creates a dead, unnatural space. Speech sounds muffled. Music loses life. Stick to 25-50% coverage and adjust by ear.
- Using thin panels for bass control. A one-inch panel cannot absorb a 100 Hz wave, which is over 11 feet long. Use four-inch panels or bass traps for low-frequency problems.
- Leaving gaps unsealed. In WPC installations, unsealed edges let sound leak around the panel rather than passing through it. Always seal perimeter joints with a gasket or acoustic caulk.
- Forgetting symmetry in stereo rooms. Asymmetrical treatment distorts the stereo image. Mirror your left-side treatment on the right.
Installation Tips for Long-Term Performance
Mount wall panels with the center 42-52 inches from the floor for seated listening. In standing environments like restaurants or retail, raise the center line to 60-72 inches. Ceiling clouds should hang 6-12 inches below the finished ceiling for optimal performance.
Air gaps improve absorption but require secure mounting. Use impaling clips for fiberglass panels, Z-clips for rigid panels, and keel frameworks for WPC installations. In seismic zones or high-traffic commercial spaces, add safety wires or mechanical locks.
For multi-room projects, create a standard placement template. Mark priority zones on floor plans before material arrives. This keeps installers consistent across dozens of rooms and prevents costly rework. Photograph each completed room for your portfolio and quality records.
When to hire a professional? If the room has unusual geometry, if you need to meet specific RT60 targets, or if the project involves more than twenty rooms, an acoustic consultant pays for itself in material efficiency.
Frequently Asked Questions
Where should acoustic panels be placed for the best results?
Start with the first reflection points on the side walls at ear height. Add a ceiling cloud above the listening position. Treat the rear wall next, then the front wall behind the speakers.
Finish with bass traps in corners. This sequence addresses the reflections that cause the most audible problems before you fine-tune less critical zones.
How many acoustic panels do I need for my room?
Calculate your total wall and ceiling surface area. Multiply by 0.25 to 0.50, depending on room use. Studios need 40-50% coverage. Offices need 30-40%.
Restaurants need 20-30%. Divide your target coverage area by the square footage of one panel to get your panel count.
Should I put acoustic panels behind my speakers or behind me?
Do both if possible, but prioritize the rear wall behind you if you must choose. Rear-wall reflections create a slap echo that arrives milliseconds after the direct sound and smears clarity. Front-wall treatment behind speakers prevents comb filtering but is slightly less audible in most rooms.
Do acoustic panels go in corners?
Standard acoustic panels do not belong in corners. That is where bass traps go. Corners accumulate low-frequency energy that thin panels cannot absorb. Use thick bass traps, 4-6 inches deep, or superchunk corner fills in trihedral corners for effective low-frequency control.
Can you put too many acoustic panels in a room?
Yes. Over-treating a room absorbs too much high-frequency energy and leaves the bass untouched. The result sounds muffled, dull, and unnatural.
Most experts recommend covering no more than 50% of the total wall and ceiling surface area. Treat priority zones first, listen, then add more only if needed.
Should acoustic panels be on the wall or the ceiling?
Both surfaces matter. Start with walls because they contain the first reflection points that most damage to clarity. Add ceiling treatment once side walls are covered. In offices with limited wall space, ceiling panels or baffles are often the better first choice.
How far apart should acoustic panels be spaced?
Space panels one to two panel widths apart. For standard 2-foot by 4-foot panels, leave 2-4 feet between edges. Symmetrical spacing on left and right walls preserves stereo imaging.
Do acoustic panels help with soundproofing?
No. Acoustic panels improve sound quality inside a room by absorbing echoes. They do not stop sound from leaving the room or entering from outside.
Soundproofing requires mass, such as dense drywall, decoupled walls, or specialized insulation. WPC panels mounted with cavity insulation do provide some sound insulation because of their mass, but they are not a substitute for full soundproofing construction.
What is the best material for acoustic panels in offices?
PET felt and WPC are the best office materials. PET felt offers design flexibility and moderate absorption. WPC offers durability, moisture resistance, and a premium architectural finish that withstands cleaning and heavy use.
For conference rooms where speech clarity matters most, pair WPC wall panels with a fabric or fiberglass ceiling cloud.
How do I place WPC acoustic panels differently from fabric panels?
WPC panels need a keel framework with an air cavity behind them. Do not mount them flush to the wall. Space framework rails 400-600mm apart.
Fill the cavity with acoustic insulation. Seal all edges to prevent flanking. Plan for 20-30% more surface coverage than you would with fiberglass because WPC absorbs slightly less per square foot.
Conclusion
Acoustic panel placement is not guesswork. It is a priority-driven process. Treat the first reflection points first. Add ceiling clouds above the listening position.
Control the rear wall, then the front wall. Finish with bass traps in corners. Follow the coverage formula. Space panels evenly. Match your material choice to your environment.
Strategic placement always beats random coverage. James proved it when he moved eight panels from his back wall to his side walls and fixed his studio. The Austin marketing firm proved it when they relocated panels to glass first reflection points and saw concentration scores jump 47%. Maria proved it when she switched to WPC panels and cut maintenance costs by 60% across three hotel properties.
The panels you choose matter. Where you put them matters more.
At Linyi Yuheng International Trading Co., Ltd., we manufacture high-density WPC acoustic panels for commercial installations worldwide. Our panels ship in custom sizes, thicknesses from 20mm to 50mm, and fire-rated options for code compliance. Whether you are treating one conference room or one hundred hotel rooms, we deliver consistent quality direct from our Linyi facility.
Request Your Wholesale Quote Today. Get custom sizing, material samples, and bulk pricing within one business day.
If you are outfitting an office, see our complete office acoustic panels buyer’s guide.
Categories:
Blog
Related Articles