How to Calculate Acoustic Panels for an Irregular Room: A Step-by-Step Guide (2026)
To calculate acoustic panels for an irregular room, break the space into simple geometric sections, measure the total surface area and volume, then use the Sabine formula to find how much absorption you need. If the average absorption coefficient exceeds 0.20, switch to the Eyring formula for better accuracy. Then divide the required absorption area by your panel’s NRC rating and panel size to get the final count.
Most online calculators force your room into a rectangle. That works for a basic box, but real spaces have vaulted ceilings, angled walls, alcoves, and open floor plans. Those shapes change how sound reflects, and a one-size-fits-all formula can leave you with too many panels in the wrong places.
This guide shows you how to calculate acoustic panels for an irregular room without guessing. You will learn how to measure odd shapes, choose the right formula, account for existing materials, and place panels where they actually matter.
Key Takeaways
- Break irregular rooms into simple shapes to measure total surface area and volume accurately.
- Use Sabine’s formula for a quick estimate; switch to Eyring when average absorption is above 0.20.
- Target 20–30% wall and ceiling coverage for general echo reduction, and 40–50%+ for critical listening spaces.
- Always subtract existing absorption from carpet, curtains, furniture, and soft furnishings before ordering panels.
- In irregular rooms, placement matters as much as quantity: treat first reflection points, corners, and angled ceilings first.
The Fast Answer: How to Calculate Panels for Irregular Rooms
If you want the shortest possible method, follow these five steps:
- Break the room into simple sections, rectangles, triangles, or cylinders.
- Measure total surface area and volume for each section, then add them together.
- Choose a target RT60 based on room use (0.4–0.6 s for speech, 0.2–0.4 s for studios).
- Apply Sabine’s formula to find required absorption, or use Eyring if average absorption is high.
- Convert absorption area to panel count by dividing by panel NRC and panel size.
For a typical irregular home office or meeting room, you can also use the coverage shortcut: treat 25–35% of total wall and ceiling area with NRC 0.80+ panels. That usually gets you close to a comfortable RT60 without heavy math.
For rectangular rooms or room-by-room coverage targets, our guide on how many acoustic panels do I need for an office gives a faster baseline. If your main challenge is ceiling treatment, see our acoustic panel coverage calculator for ceiling-specific spacing.
Why Irregular Rooms Need a Different Approach
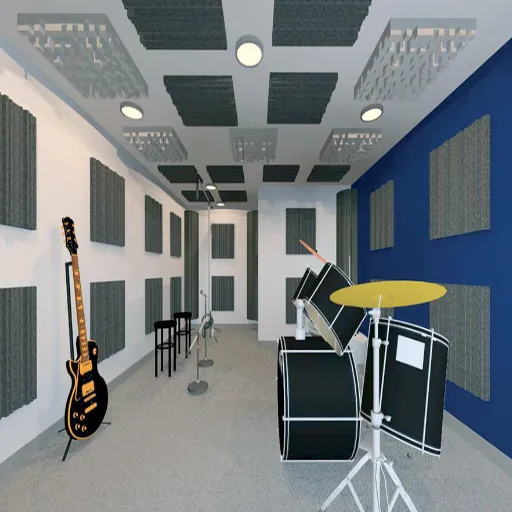
A rectangular room has predictable reflections. Sound bounces between parallel walls and creates a relatively even reverb pattern. Irregular rooms do not behave that way.
Vaulted ceilings can focus sound toward one wall. Angled walls can scatter reflections unevenly. Alcoves create small pockets of echo. Open floor plans let sound leak into adjacent spaces. All of this means the standard length × width × height shortcut can mislead you.
The good news is that the underlying physics does not change. Sound still reflects off hard surfaces and gets absorbed by soft or porous materials. The challenge is measuring the space correctly and distributing panels so they treat the problem areas, not just the easy ones.
Lena, an architect in Berlin, learned this while designing a triangular meeting pod for a coworking space. She used a standard rectangular calculator and ordered 18 panels based on an estimated volume. After installation, the room still sounded harsh. A quick clap test showed the angled rear wall was creating a focused reflection toward the presenter. She added six panels on that wall, and the space finally felt balanced.
Step 1: Measure the Room by Breaking It Into Simple Shapes
The first rule for irregular rooms is: do not try to measure everything at once. Split the room into shapes you already know how to calculate.
Common Irregular Shapes
- L-shaped rooms: Two rectangles joined together.
- Vaulted or cathedral ceilings: A rectangle with a triangular prism on top.
- Angled walls: A rectangle plus one or more triangles.
- Alcoves and bay windows: Small rectangular projections.
- Open-plan with partial partitions: Treat each functional zone separately.
Calculate Volume
For each section, use the right volume formula:
| Shape | Volume Formula |
|---|---|
| Rectangular section | length × width × height |
| Triangular prism | 0.5 × base × height × depth |
| Cylinder | π × radius² × height |
Then add the volumes of all sections to get the total room volume.
If the ceiling is roughly flat but varies in height, you can use average ceiling height as a shortcut:
Volume = floor area × average ceiling heightThis is less precise than summing sections, but it is accurate enough for most panel estimates.
Calculate Surface Area
Measure every wall, ceiling section, and floor section separately. Use the same shape breakdown. Then subtract large openings such as:
- Windows and glass walls
- Doors and doorways
- Large whiteboards or screens
- Built-in furniture that blocks the surface
You only need to treat the exposed hard surfaces. Covering a window with an acoustic panel is neither practical nor necessary for sound absorption.
Step 2: Choose Your Acoustic Target
Before you calculate how many panels you need, decide what result you want. The most common target is reverberation time, or RT60.
Target RT60 by Room Use
| Room Type | Target RT60 | Why |
|---|---|---|
| Recording studio/home theater | 0.2–0.4 s | Tight, controlled sound |
| Home office/classroom | 0.4–0.6 s | Clear speech, low fatigue |
| Conference room | 0.5–0.7 s | Natural conversation |
| Restaurant / open workspace | 0.6–0.8 s | Lively but not harsh |
If you do not want to calculate RT60, use the coverage shortcut instead. For most irregular rooms:
- General echo reduction: 20–30% of exposed wall and ceiling area
- Speech clarity: 25–35%
- Critical listening: 40–50% or more
The lower the NRC of your panels, the higher the coverage percentage needs to be.
Step 3: Use the Sabine Formula (and When to Use Eyring)
Once you have volume and surface area, you can calculate exactly how much absorption the room needs.
Sabine Formula
- Metric:
RT60 = 0.161 × V / A - Imperial:
RT60 = 0.049 × V / A
Where:
V= room volumeA= total absorption in sabinsA = Σ (surface area × absorption coefficient)
To find the absorption you need for your target RT60, rearrange:
A = 0.161 × V / RT60 (metric)
A = 0.049 × V / RT60 (imperial)
Then subtract the absorption already provided by walls, floors, furniture, and other materials. What remains is the additional absorption your panels must provide.
Eyring Formula
Sabine works well when average absorption is low to moderate. When the room is already fairly treated, or when absorption is concentrated on one surface, Sabine tends to overestimate RT60. In those cases, use Eyring:
- Metric:
RT60 = 0.161 × V / [−S × ln(1 − α_avg)] - Imperial:
RT60 = 0.049 × V / [−S × ln(1 − α_avg)]
Where:
S= total surface areaα_avg= average absorption coefficient of all surfacesln= natural logarithm
A practical rule of thumb: switch to Eyring when α_avg exceeds about 0.20.
Absorption Coefficients for Common Materials
| Material | Absorption Coefficient |
|---|---|
| Painted drywall | 0.05 |
| Concrete or tile floor | 0.02 |
| Carpet | 0.30 |
| Heavy curtains | 0.50 |
| Upholstered furniture | 0.40–0.60 |
| Glass window | 0.03 |
| Acoustic panel, NRC 0.85 | 0.85 |
| Wood slat panel, NRC 0.65 | 0.65 |
These numbers are averages. Manufacturers publish more precise coefficients for specific products.
Step 4: Convert Required Absorption to Panel Count
Now that you know how much additional absorption you need, convert it into panels.
Formula
Panel area needed = Additional absorption required / Panel NRC
Panel count = Panel area needed / Area of one panel
Common Panel Sizes
| Panel Size | Area per Panel |
|---|---|
| 2 ft × 2 ft | 4 sq ft |
| 2 ft × 4 ft | 8 sq ft |
| 4 ft × 4 ft | 16 sq ft |
| 1.2 m × 0.6 m | 0.72 m² |
Example:
You need 15 additional sabins of absorption. Your panels have an NRC of 0.85. Each panel is 2 ft × 4 ft, or 8 sq ft.
Panel area needed = 15 / 0.85 = 17.6 sq ft
Panel count = 17.6 / 8 = 2.2 panels
Round up to 3 panels.
Keep in mind that lower-NRC decorative panels require more coverage. A WPC or wood-slat panel with NRC 0.65 would need roughly 30% more surface area than an NRC 0.85 fabric panel to deliver the same acoustic result.
Worked Examples
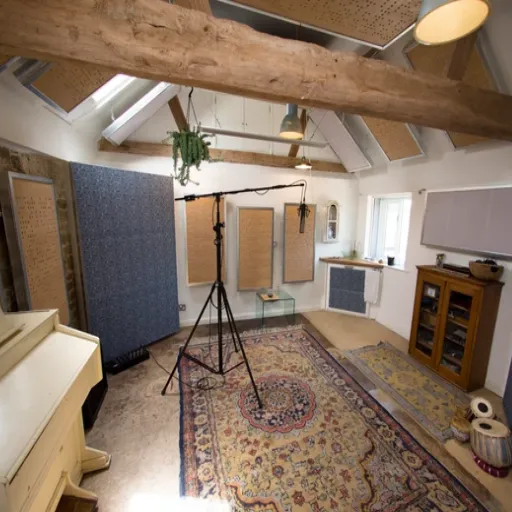
Example 1: Vaulted-Ceiling Home Office
A freelance audio editor in Austin has a 12 ft × 14 ft office with a vaulted ceiling that peaks at 12 ft. The side walls are 8 ft tall.
- Floor area: 12 × 14 = 168 sq ft
- Rectangular volume below 8 ft: 12 × 14 × 8 = 1,344 cu ft
- Triangular prism volume above 8 ft: 0.5 × 12 × 4 × 14 = 336 cu ft
- Total volume: 1,344 + 336 = 1,680 cu ft
- Total surface area: approximately 560 sq ft
- Existing absorption from carpet, desk, and curtains: about 4 sabins
- Target RT60 for home office: 0.5 s
Using Sabine:
A = 0.049 × 1,680 / 0.5 = 164.6 sabins
Additional absorption needed = 164.6 − 4 = 160.6 sabins
With NRC 0.85 panels:
Panel area = 160.6 / 0.85 = 189 sq ft
Using 2×4 ft panels: 189 / 8 = 24 panels
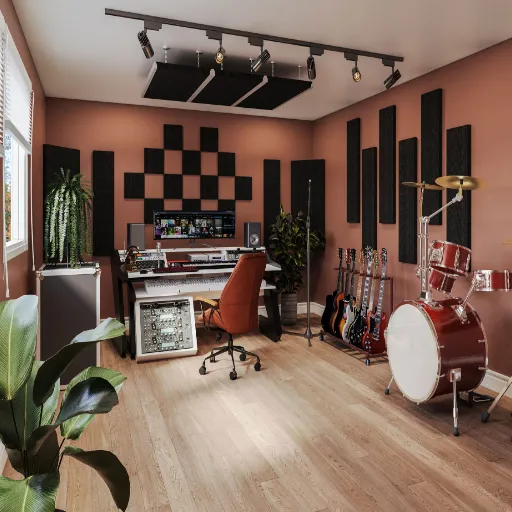
Because the ceiling is vaulted, he places 14 panels on the ceiling and upper walls, and 10 panels on the side walls at first reflection points. The room now measures close to 0.5 s RT60.
Example 2: L-Shaped Podcast Studio
A podcaster in Toronto rents an L-shaped studio: one arm is 10 ft × 12 ft, the other is 8 ft × 10 ft, with 9 ft ceilings.
- Volume of first arm: 10 × 12 × 9 = 1,080 cu ft
- Volume of second arm: 8 × 10 × 9 = 720 cu ft
- Total volume: 1,800 cu ft
- Total surface area: about 620 sq ft
- Existing absorption from rug, sofa, and curtains: about 6 sabins
- Target RT60 for podcast studio: 0.35 s
Using Sabine:
A = 0.049 × 1,800 / 0.35 = 252 sabins
Additional absorption needed = 252 − 6 = 246 sabins
With NRC 0.80 panels:
Panel area = 246 / 0.80 = 308 sq ft
Using 2×4 ft panels: 308 / 8 = 39 panels
She adds 24 panels on the ceiling, 10 panels on the walls at reflection points, and 5 corner bass traps for low-frequency control. Recordings come out cleaner, with less post-processing needed.
Where to Place Panels in Irregular Rooms
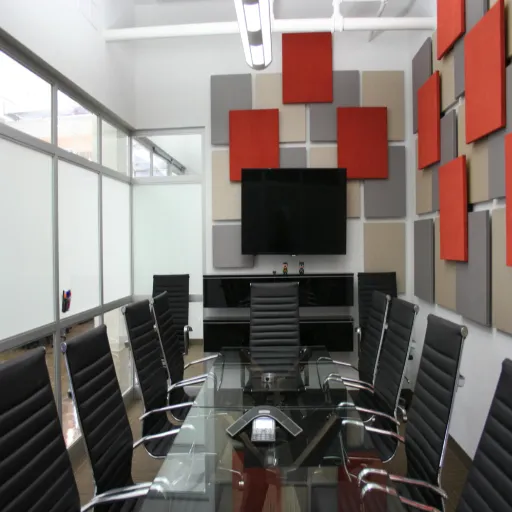
Quantity is only half the battle. In irregular rooms, placement is often more important than exact panel count.
Treat First Reflection Points
Use the mirror technique. Sit in the main listening position and have someone slide a mirror along each wall. Where you can see the speaker or sound source in the mirror, place a panel. This works in rectangular and irregular rooms alike.
Use Corners for Bass Traps
Corners collect low-frequency energy. In rooms with angled walls or alcoves, every corner becomes a potential bass buildup zone. Place thick panels or dedicated bass traps in these locations.
Treat Vaulted Ceilings at the Peak and Sides
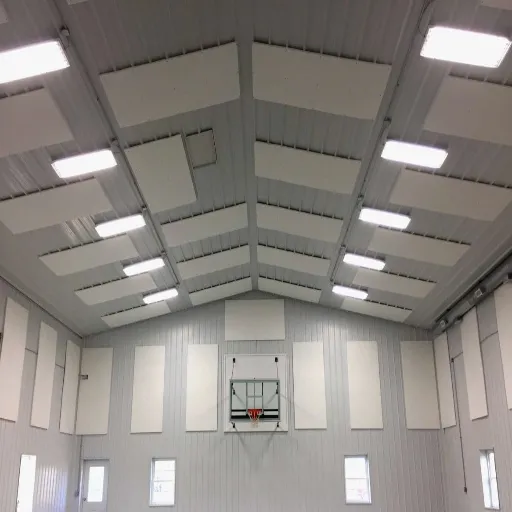
Vaulted ceilings create a large, angled reflection path. Place panels along the slope and near the peak, especially above the listening or speaking area. Flat ceiling clouds hung horizontally can also help.
Turn Alcoves Into Absorbers
Small recessed areas often create flutter echo. Line the back wall of an alcove with a panel or two. This turns a problem area into an acoustic asset.
Spread Panels Across Multiple Surfaces
Do not stack all your absorption on one wall. Distribute panels across at least two walls and the ceiling. In asymmetrical rooms, you may need more panels on one side than the other to create a balanced sound.
Tools to Verify Your Calculation
You do not need expensive equipment to check your work.
Clap Test
Stand in the middle of the room and clap sharply. Listen for a ringing tail. A well-treated room produces a short, dull thud. If you hear a metallic ring or a long decay, you need more absorption.
Smartphone Apps
Apps such as RTA, Decibel X, or Sound Meter can give you a rough idea of reverberation. They are not laboratory accurate, but they are enough to compare before and after treatment.
Room EQ Wizard (REW)
REW is free software that measures RT60, frequency response, and impulse response. It runs on a laptop with a basic measurement microphone. For irregular rooms, take measurements from several positions to spot problem areas.
Professional Acoustic Modeling
For high-stakes spaces such as recording studios, auditoriums, or conference centers, use software like EASE, CATT-Acoustic, or ODEON. These tools use ray tracing or wave-based modeling to account for complex geometry.
If the budget allows, hire an acoustical consultant for complex shapes. Their fee is often less than the cost of ordering the wrong panels twice.
Common Mistakes When Calculating for Irregular Rooms
- Using length × width × height for non-rectangular rooms. This overestimates or underestimates volume.
- Ignoring existing absorption. Carpet, curtains, and furniture already absorb sound.
- Using Sabine in heavily treated rooms. Switch to Eyring when average absorption exceeds 0.20.
- Clustering panels on one wall. Spread absorption across surfaces.
- Forgetting about corners. Bass buildup is common in irregular rooms.
- Choosing the wrong panel size for the space. Large panels in small alcoves may not fit.
- Skipping the clap test. Measurement confirms whether your calculation worked.
FAQ
Do acoustic panels work in irregular rooms?
Yes. The same absorption principles apply. The difference is that irregular rooms need more careful measurement and placement because reflections are less predictable.
Can acoustic panels be cut to fit angled walls?
Many fabric-wrapped fiberglass and PET felt panels can be cut on site. For complex angles, order custom-sized panels from the manufacturer.
What if my room has a vaulted ceiling?
Treat vaulted ceilings as a rectangular base plus a triangular prism when measuring volume. Place panels along the slope and near the peak, and consider ceiling clouds if hanging hardware allows.
How accurate is the Sabine formula for irregular rooms?
Sabine is accurate enough for most panel estimates, but it assumes a diffuse sound field. For very irregular shapes or highly absorbent rooms, use Eyring or acoustic modeling software.
Should I use absorption or diffusion in an irregular room?
Most irregular rooms need more absorption than diffusion, especially for speech and recording. Diffusion can help in larger spaces where the room sounds too dead after treatment.
How do I know if I need an acoustician?
If the room is a commercial studio, auditorium, or has severe acoustic problems, hire a professional. For home offices, podcast studios, and small meeting rooms, DIY calculation plus a clap test is usually enough.
Conclusion
Learning how to calculate acoustic panels for an irregular room comes down to three things: accurate measurement, the right formula, and smart placement. Break the room into simple shapes, measure total surface area and volume, then use Sabine or Eyring to find the absorption you need. Convert that into panel count based on your panel’s NRC and size.
For most irregular home offices, studios, or meeting rooms, targeting 25–35% wall and ceiling coverage with NRC 0.80+ panels will get you close to a comfortable RT60. Always subtract existing absorption from carpet, curtains, and furniture, and place panels at first reflection points, corners, and angled surfaces before filling in the rest.
If your room is more conventional, start with our guide on how many acoustic panels do I need for an office for faster baseline numbers. For ceiling-specific layouts, try our acoustic panel coverage calculator.
Need custom-sized panels for an irregular space? Send us your dimensions and room photos, and we will recommend a panel quantity and layout that fits your project.
Categories:
Blog
Related Articles