Home Theater Acoustic Panel Placement: Complete Guide
Home theater acoustic panel placement follows five priority zones: front wall behind the screen, side-wall first reflection points, rear wall for surround sound, ceiling clouds above the seating row, and floor-to-ceiling bass traps in all four corners. For a typical 200-square-foot home theater, start with 12-16 panels concentrated at these zones rather than spread evenly across walls.
The biggest mistake home theater builders make is treating the room like a music studio. Studios prioritize stereo imaging and precise frequency response. Home theaters prioritize dialog clarity, surround immersion, and controlled bass. The same panels placed in the wrong zones will leave the dialog muddy and the explosions boomy.
When David finished his basement theater in Minneapolis, he installed fourteen premium acoustic panels in a symmetrical grid across all four walls. The room looked like a professional cinema.
But during the opening scene of Blade Runner 2049, the dialogue sounded distant, and the subwoofer rattled the drywall. After repositioning half the panels to the rear wall and adding corner bass traps, his RT60 dropped to 0.45 seconds. The difference was not subtle. It was transformative.
This guide covers home theater acoustic panel placement for every speaker configuration, budget, and room size. You will learn how to treat the five priority zones, how speaker layout changes your strategy, and why WPC wood slat panels can solve both acoustic and aesthetic challenges in theater rooms. For a complete overview of placement strategies across all room types, see our acoustic panel placement guide.
Key Takeaways
- Home theaters need rear-wall absorption more than studios because surround speakers fire directly at the back wall.
- Side-wall first reflection points still matter but are narrower in focus than in a music studio.
- Corner bass traps control subwoofer room modes that no wall panel can address.
- WPC and wood slat panels work exceptionally well as rear-wall feature panels in home theaters.
- A budget-tier setup with 10-14 panels should prioritize rear wall, side reflections, and two corner bass traps.
Why Home Theaters Need Different Placement Than Studios
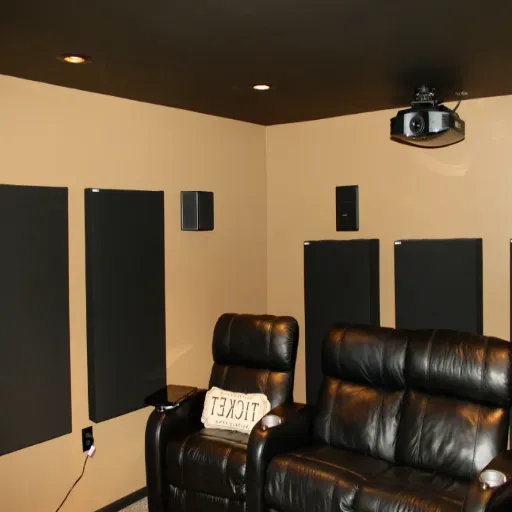
A mixing studio is designed for critical listening. Engineers need flat frequency response, controlled decay, and precise stereo imaging. A home theater is designed for emotional impact. Viewers need clear dialogue, immersive surround channels, and powerful but controlled bass.
These different goals change acoustic panel placement in three fundamental ways.
Dialog clarity is the primary metric. If you cannot understand what the actors are saying, nothing else matters. Dialog sits in the 1-4 kHz range, where first-reflection points cause the most damage. A single reflection arriving 15 milliseconds after the direct sound smears consonants and reduces intelligibility by 30-40%.
Surround speakers create rear-wall problems that studios do not face. In a studio, the rear wall is behind the listener and receives minimal direct sound. In a home theater, surround speakers fire directly at the rear wall. Untreated, those reflections create an echo and blur directional cues.
Your brain needs clean surround signals to place sounds behind you. A muddy rear wall destroys that illusion.
Subwoofers excite room modes that panels alone cannot fix. Bass frequencies below 100 Hz have wavelengths longer than most rooms. A 40 Hz tone has a wavelength of 28 feet. No 2-inch wall panel absorbs that energy effectively.
Corner bass traps are essential because corners are where all room modes intersect.
Room function changes placement priorities in ways that affect every zone in the room.
The Five Priority Zones for Home Theater Acoustic Panel Placement
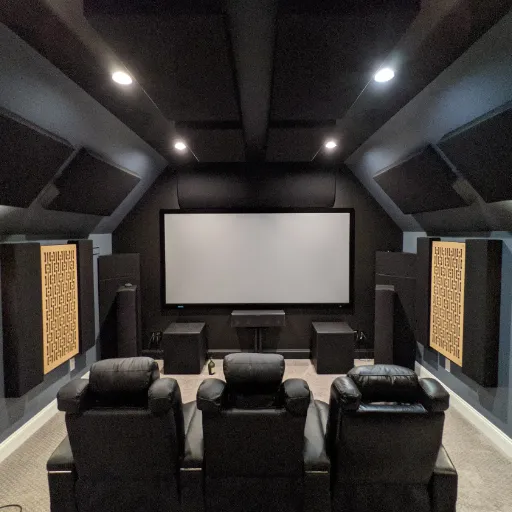
Correct home theater acoustic panel placement depends on treating five zones in priority order. Where you place panels matters more than how many you buy. GIK Acoustics offers a home theater room setup calculator to estimate coverage based on your exact dimensions.
Front Wall and Screen Area
The front wall behind your screen is the quietest surface in the room. Speakers face away from it, and the screen itself blocks some reflections. But this wall still matters for two reasons.
If you have an acoustically transparent projection screen, place absorption panels directly behind the left, center, and right speaker positions. This prevents sound from bouncing off the front wall and returning to the listening position out of phase.
If you have a flat-panel TV mounted on the wall, place one panel behind each main speaker. For most rooms, two 2×4-foot panels flanking the screen are sufficient. The front wall rarely needs dense coverage unless the room is extremely shallow.
Side Walls and First Reflections
Side-wall first reflection points in a home theater are treated similarly to a studio, but with one key difference. Use the mirror trick: sit in your primary seat and have someone slide a mirror along each side wall. Where you see the tweeter of the nearest main speaker, mark the spot and center a panel.
In a home theater, these points are typically closer together than in a studio because seating is usually 8-12 feet from the screen. Two panels per side wall are usually enough. Unlike a studio, symmetrical placement matters less here because home theater listening is about immersion, not precise stereo imaging.
Rear Wall and Surround Reflections
The rear wall is the highest-priority surface in a home theater that most people ignore. Surround speakers, especially dipole or bipole designs, radiate sound directly toward the back wall. Without absorption, those reflections arrive at your ears 10-20 milliseconds after the direct sound, smearing directional cues.
Space panels 2-3 feet apart across the full rear wall width at ear height. For a typical room, this means 4-6 panels. If your rear wall is close to the seating (under 4 feet), treat it heavily. See our acoustic panel spacing guide for detailed spacing rules by material and room type.
The rear wall is also an excellent place for WPC or wood slat panels. Because they absorb less than fiberglass, they treat the reflections without over-deadening the room. This preserves the natural liveliness that makes surround sound immersive.
Ceiling Clouds
Ceiling clouds in home theaters serve two purposes. They manage reflections from Atmos or height speakers, and they reduce floor-to-ceiling flutter echo in rooms with hard ceilings.
Position a 4×6-foot ceiling cloud directly above the primary seating row. If you have a second row on a riser, add a smaller cloud above that row, too. Do not scatter panels randomly across the ceiling. Concentrate them where people sit.
Corners and Bass Management
Bass traps are non-negotiable in home theaters. Subwoofers generate enormous low-frequency energy that accumulates in corners. A 2-inch fiberglass wall panel absorbs almost nothing below 200 Hz. A floor-to-ceiling bass trap in a corner absorbs across the full bass spectrum.
Place bass traps in all four vertical corners if possible. If your budget limits you to two, choose the two front corners where the subwoofer typically sits. Ceiling-wall corners are the next priority when you have eight or more bass-dedicated panels.
Our bass trap placement guide covers corner treatment strategies in depth.
Where to Place Acoustic Panels in Home Theater by Speaker Configuration
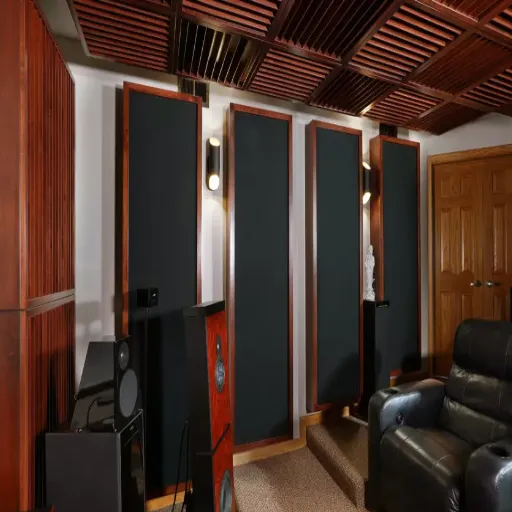
Where to place acoustic panels in a home theater changes based on your speaker layout. A 5.1 system creates different reflection paths than a 7.1 or Atmos setup. Each configuration shifts which walls receive the most direct sound and, therefore, which zones need treatment first.
5.1 Setup
A 5.1 system has five main speakers and one subwoofer. The surround speakers are at the sides or slightly behind the listener. Home theater acoustic panel placement for 5.1 should prioritize:
- Side-wall first reflection points from the main speakers
- Rear-wall absorption behind the seating area
- Two front corner bass traps
- Minimal front wall treatment
With 5.1, the rear wall is the biggest acoustic challenge because the surround speakers fire directly at it.
7.1 Setup
A 7.1 system adds two rear surround speakers. This makes rear-wall treatment even more critical. The back wall now receives direct sound from dedicated rear surrounds, not just reflected side surround energy.
For 7.1, extend rear-wall coverage to the full width. Add ceiling clouds if your room height is under 9 feet, because the additional speakers create more vertical reflections.
Atmos and Height Channels
Dolby Atmos adds overhead speakers or upward-firing modules. These height channels create ceiling reflections that standard setups do not produce.
For Atmos, ceiling clouds are no longer optional. Place a 4×6-foot cloud above the primary seating row and consider additional panels between the front speakers and the seating area to catch early height-channel reflections.
| Setup | Rear Wall Priority | Ceiling Priority | Bass Traps | Total Panels |
|---|---|---|---|---|
| 5.1 | High | Low | 2-4 corners | 10-16 |
| 7.1 | Very High | Medium | 4 corners | 16-24 |
| Atmos | Very High | Very High | 4-8 corners | 20-30+ |
Home Theater Acoustic Panel Placement by Budget Tier
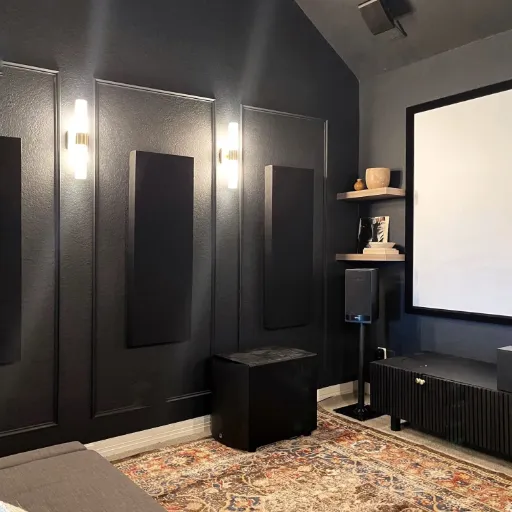
Budget Tier: 10-14 Panels ($300-800)
With a limited panel count, home theater acoustic panel placement must be ruthless. Do not try to cover every wall.
- 2 panels at the side-wall first reflection points
- 4-6 panels across the rear wall at ear height
- 2 bass traps in front corners (or 4 if using thinner 4-inch traps)
- 2 panels behind the screen or flanking a flat TV
This configuration treats the three most critical surfaces. Use our acoustic panel calculator to confirm your exact panel count before buying.
Standard Tier: 18-26 Panels ($800-2,000)
With 18-26 panels, you can cover all five priority zones comprehensively.
- First reflection points on side walls (4 panels)
- Full rear wall coverage (6-8 panels)
- Front wall behind speakers (2-4 panels)
- Ceiling cloud above seating (4-6 panels)
- Bass traps in all four vertical corners
This tier achieves balanced treatment across the room. Dialog becomes crisp, surround effects gain directionality, and bass tightens noticeably.
When Maria upgraded her family’s media room in Austin, she moved from a budget-tier 12-panel setup to a standard-tier 22-panel arrangement. The biggest surprise was not the explosions or the music. It was the dialogue.
Her husband, who had been turning on subtitles for years, stopped needing them after the rear wall was treated. The panels did not just improve sound quality. They removed a source of daily frustration.
Premium Tier: 30-50+ Panels ($2,000-5,000+)
At this level, home theater acoustic panel placement becomes about optimization, not coverage.
- All standard tier panels
- Diffusion panels on the rear wall (replacing some absorption)
- Bass traps in all eight corners
- Additional ceiling treatment between speakers and seating
- Dedicated subwoofer platform or bass isolation
Premium setups also benefit from measurement-guided placement. Room EQ Wizard identifies specific room modes, allowing you to fine-tune bass trap positioning for your exact dimensions.
Material-Specific Placement for Home Theaters
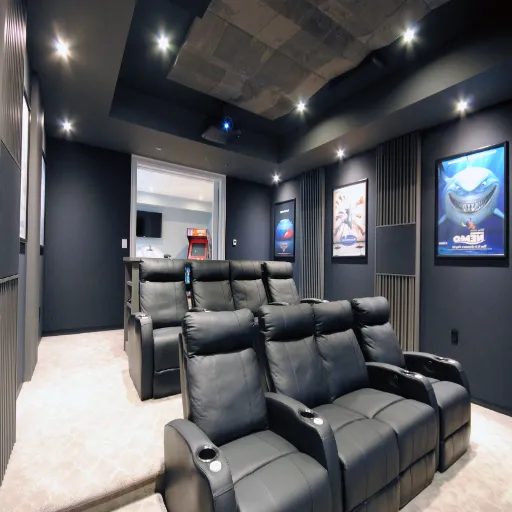
WPC and Wood Slat Panels
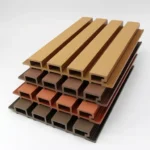
WPC acoustic panels are an ideal choice for home theaters because they solve two problems at once. They provide mid-to-high frequency absorption, and they look like intentional design features rather than afterthoughts.
WPC panels need wider spacing (3-4 feet apart) than fiberglass because their NRC rating is lower (0.50-0.80). They also require a 1-2 inch air gap behind the panel to perform at their rated absorption. Mounted flush, they lose 30-40% of their effectiveness.
The rear wall is the best place for WPC panels in a home theater. Because home theaters need less absorption than studios, the moderate absorption of WPC is an advantage. It treats the surround reflections without killing the room’s natural liveliness.
Fiberglass and Fabric Panels
Fiberglass panels remain the gold standard for broadband absorption. With NRC ratings of 0.85-0.95, they handle dialog frequencies and early reflections more effectively than any other material.
In home theaters, use fiberglass panels at first reflection points, behind the screen, and in ceiling clouds. Their high absorption is exactly what you need, where direct reflections cause the most damage.
Hybrid Approaches
Many professional home theaters use a hybrid strategy for home theater sound panels placement. Fiberglass panels handle the critical first reflection points and ceiling clouds. WPC or wood slat panels cover the rear wall as both acoustic treatment and aesthetic feature walls. Bass traps in corners use thick fiberglass or mineral wool regardless of what is on the walls.
This approach gives you the acoustic performance of fiberglass where it matters most and the design appeal of wood slats where guests actually see it.
| Material | NRC Rating | Best For | Spacing | Air Gap |
|---|---|---|---|---|
| Fiberglass (2″) | 0.85-0.95 | First reflections, ceiling clouds | 2-3 ft | 2-4″ |
| WPC/Wood Slat | 0.50-0.80 | Rear wall feature panels | 3-4 ft | 1-2″ min |
| Mineral Wool | 0.90-1.00 | Bass traps, broadband | Contact | N/A |
| Acoustic Foam | 0.40-0.70 | High-frequency only | 1-2 ft | Flush |
Common Home Theater Placement Mistakes
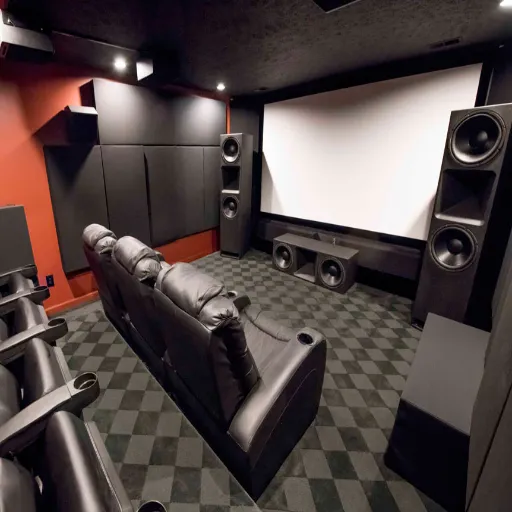
Even experienced builders make errors that waste panels and leave theaters sounding average.
Treating the room like a music studio. Studio placement prioritizes symmetrical side walls and flat response. Home theaters need rear-wall absorption and controlled bass above all else. Copying studio placement into a theater leaves the dialogue muddy and the surround effects flat.
Ignoring the rear wall. This is the most common and most costly mistake. Surround speakers fire directly at the back wall. Untreated, that surface destroys directional cues. If you only treat one wall in a home theater, make it the rear wall.
Over-treating the room. A completely dead room feels unnatural for movies. Dialog sounds disconnected from the space. Surround effects lose their spaciousness. Home theaters need some controlled reflection to maintain the sense of being in a larger environment.
Using foam panels for bass treatment. Foam absorbs high frequencies and does almost nothing below 500 Hz. It will make your room sound dull without tightening the bass. Always use proper bass traps in corners, not foam squares.
Mounting panels too high or too low. Acoustic panels should be centered at ear height in the seated position. In most home theaters, this is 36-42 inches from the floor. Panels mounted near the ceiling or baseboard treat reflections that never reach your ears.
How to Verify Your Theater Sounds Right
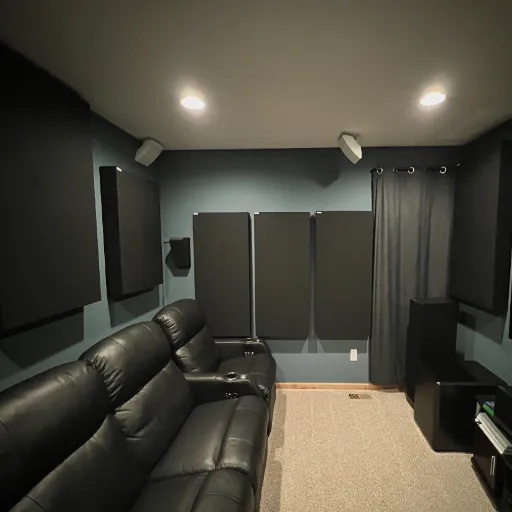
Acoustic treatment should be verified with measurement and listening tests, not just intuition.
RT60 measurement is the most objective check. Use Room EQ Wizard with a calibrated microphone to measure reverberation time before and after treatment.
Target 0.4-0.6 seconds for home theaters. Below 0.3 seconds, the room starts to sound unnaturally dead. Above 0.8 seconds, dialog clarity suffers.
The dialog clarity test is a simple listening check. Play a scene with quiet conversation from a movie you know well. If you struggle to understand words you have heard before, your first reflection points or rear wall need more treatment.
The bass uniformity test checks whether the bass sounds the same in every seat. Walk around the room while playing a bass-heavy scene. If some seats have overwhelming bass and others have almost none, your corner bass traps are insufficient, or your subwoofer placement needs adjustment.
When to adjust placement:
- Dialog still sounds distant: add panels to the first reflection points or the rear wall
- Surround effects lack directionality: check rear wall coverage and spacing
- Bass is boomy in some seats: verify bass traps extend floor-to-ceiling
- Room sounds too dead: remove 1-2 panels from non-priority walls
Frequently Asked Questions
Where should acoustic panels go in a home theater?
Prioritize five zones in this order: rear wall behind seating, side-wall first reflection points, front wall behind speakers, ceiling cloud above the seating row, and floor-to-ceiling bass traps in all four corners. The rear wall is the highest priority because the surround speakers fire directly at it.
How many acoustic panels for a home theater?
Most home theaters need 14-24 panels for balanced treatment. A budget setup with 10-14 panels can treat the rear wall, side reflections, and front corners. A standard 18-26 panel setup covers all five priority zones. Use our acoustic panel calculator to get an exact count for your room dimensions. Rooms over 300 square feet may need 30+ panels.
Should I put acoustic panels behind my TV?
If you have a flat-panel TV mounted on the wall, place one panel behind each main speaker flanking the screen. If you have an acoustically transparent projection screen, place panels behind all three front speaker positions. The front wall rarely needs dense coverage.
Do acoustic panels help with surround sound?
Yes, significantly. The rear wall behind your seating receives direct sound from the surround speakers. Without absorption, those reflections smear directional cues and reduce immersion. Treating the rear wall is the single biggest improvement you can make for surround sound quality.
Are WPC panels good for home theaters?
WPC and wood slat panels work well in home theaters, especially on the rear wall. Their moderate absorption treats reflections without over-deadening the room. They also serve as aesthetic feature walls, which matters in theater rooms where appearance is important.
How far from the wall should home theater acoustic panels be?
Mount panels 2-4 inches from the wall for improved low-frequency absorption. WPC and wood slat panels need a 1-2 inch minimum air gap to achieve their rated NRC. The air gap increases effective absorption by 15-25%.
What is the best material for home theater acoustic panels?
Fiberglass panels (NRC 0.85-0.95) offer the best broadband absorption and are ideal for first reflection points and ceiling clouds. WPC wood slat panels are excellent for rear walls where moderate absorption and aesthetics matter. Avoid foam panels for anything except very high-frequency treatment.
Conclusion
Home theater acoustic panel placement is not about covering walls. It is about controlling the specific reflections that damage dialog clarity, surround immersion, and bass response.
Start with the rear wall because surround speakers demand it. Add side-wall first reflection points for dialog clarity. Put bass traps in corners because no wall panel handles subwoofer energy.
Add ceiling clouds if you have Atmos or a hard ceiling. Treat the front wall last.
A 14-panel setup placed at these priority zones outperforms a 30-panel setup spread evenly across every surface. Placement beats coverage every time.
For a complete overview of acoustic panel placement across all room types, visit our acoustic panel placement guide. To learn how far apart to space your panels, see our dedicated spacing guide.
Categories:
Blog
Related Articles