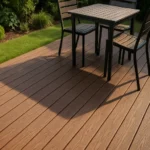
WPC Deck Tile Design Ideas: 12 Patterns & Layouts For Patios, Balconies & Gardens
The best WPC deck tile design ideas combine a smart pattern, a thoughtful color palette, and a layout that matches how you actually use the space. Whether you want a classic straight field, a bold checkerboard, or a diagonal that makes a small patio feel bigger, interlocking WPC tiles give you design freedom you don’t get with nailed-down decking boards, because you can lay them, rearrange them, and recombine colors without cutting into your substrate.
When Mia moved into a rental with a tired concrete patio, she bought a bundle of interlocking deck tiles and snapped them into a plain grid the first weekend. It looked better than the concrete, but it still read as “tiles on a slab,” not a designed space. Three weeks later she rotated every other tile and split the field with two accent colors.
The same dozen square meters suddenly looked intentional, and her landlord approved the change precisely because nothing was permanent. That’s the real power of this product category: your design ideas can change with the season.
This guide walks through 12 buildable WPC deck tile design ideas, the color and texture choices that carry them, the tile math you’ll need before you order, and the installation details that keep a pattern crisp. You’ll finish with a clear plan you can hand to any installer, or install yourself in an afternoon.
Key Takeaways
- Pattern beats color for first impressions. A simple straight or staggered layout upgrades a space more than any single tile color choice.
- Diagonal layouts make small patios and balconies feel larger, but they add roughly 10 to 15 percent more tile waste at the edges.
- Mix two or three colors for the biggest design payoff. Checkerboard, border framing, and accent runners all rely on buying at least two finishes.
- Order about 10 percent extra tiles for a straight pattern and 15 percent for diagonal, to cover cuts, mistakes, and future swaps.
- Design for maintenance. Every idea in this guide keeps drainage clear and leaves removable sections for cleaning.
What Are WPC Deck Tiles?
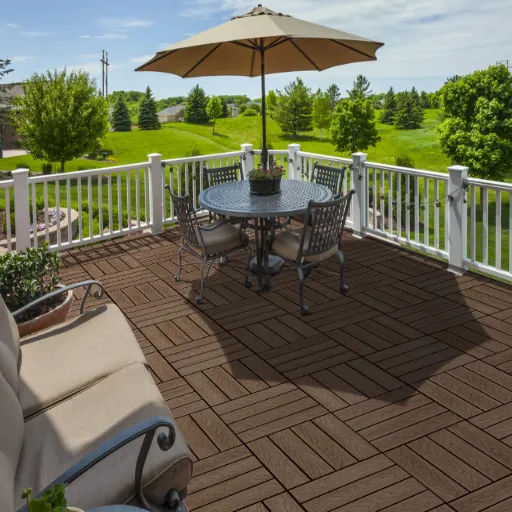
WPC deck tiles are modular outdoor flooring panels made from a wood-plastic composite, typically 50 to 60 percent recycled wood fiber fused with high-density polyethylene and a protective co-extruded cap. They sit on an interlocking plastic grid base, snap together with no nails or adhesive, and float over concrete, pavers, compacted gravel, or a roof membrane. That design makes them the easiest outdoor surface to install, remove, and redesign. For a full breakdown of the category, see our modular WPC decking buyer’s guide, or BuildDirect’s primer on deck tiles for a retailer’s view of the format.
The format is what makes good design cheap to explore. Because tiles are loose-laid, you can dry-lay a pattern on the surface, step back, and redo it until the proportions feel right. You can also lift single tiles later if you want to swap an accent color or clean the substrate underneath. This is why almost every strong WPC deck tile design idea starts with a dry run on the actual surface rather than a sketch on paper.
12 WPC Deck Tile Design Ideas That Work
Here are all 12 ideas at a glance, with the best use case for each and the extra tile waste you can expect:
| # | Design idea | Best for | Typical extra waste |
|---|---|---|---|
| 1 | Classic straight layout | Minimalist patios, pool surrounds | Under 10% |
| 2 | Diagonal layout | Small patios and balconies | 10-15% |
| 3 | Checkerboard pattern | Gardens, pool surrounds | ~10% plus accent split |
| 4 | Herringbone on a square grid | Walkways, long balcony runs | 10-15% |
| 5 | Basketweave and cross-hatch | Coastal and cottage gardens | ~10% |
| 6 | Framed border design | Large patios | ~10% plus accent |
| 7 | Mixed-grain natural wood look | Garden settings | ~10% |
| 8 | Grass-and-tile combination | Balconies, roof terraces | ~10% |
| 9 | Zoned layouts | Larger patios, rooftop terraces | ~10% |
| 10 | Accent strips and runners | Any patio | ~10% plus accent |
| 11 | Curved and organic edging | Gardens, around trees | 15% |
| 12 | Multi-level and rooftop layouts | Grade changes, stair transitions | Varies by level |
1. The Classic Straight Layout
The straight layout sets every tile in a clean grid with the wood grain running the same direction. It’s the default for a reason: it reads calm, modern, and timeless, and it’s the least wasteful pattern, usually under 10 percent.
It suits minimalist patios, pool surrounds, and spaces with strong architectural lines where a busy pattern would compete with the building. Lay rows parallel to the longest edge or the railing so the eye follows the length of the room. For the cleanest look, keep all tiles in one finish and let furniture and greenery supply the color.
2. Diagonal Layout for Small Spaces
Rotating the whole field 45 degrees turns square tiles into diamonds and pushes the eye to the corners, which makes a small patio or balcony feel wider than it is. It’s the most reliable trick in this list for tight spaces.
Plan for extra waste. A diagonal field can consume 10 to 15 percent more tiles because of angled edge cuts. Start from the most visible corner and work outward so the cut pieces land in less obvious spots. Pair a diagonal layout with a single contrasting border row to make the diamonds pop.
3. Checkerboard Pattern
Alternating two colors of tiles creates the classic checkerboard, the most recognizable two-tone design in the category. It’s playful in a garden, sharp around a pool, and easy to install because you never rotate a tile, only switch colors.
Order the two finishes in nearly equal amounts, then buy a little extra of the color you want to win the edge. Deep walnut paired with soft gray is the most popular combination we see because it reads elegant instead of gimmicky. Keep the pattern scale in mind: on a very large patio a full tile checkerboard can look busy, so some designers alternate in two-by-two blocks instead of one by one.
4. Herringbone on a Square Grid
True herringbone requires rectangular planks, but you can echo the zigzag with interlocking square tiles by alternating their grain direction in a V pattern, or by combining square and rectangular tiles where your system allows it. The result adds movement and a handcrafted feel that straight fields don’t have.
Because the eye follows the V shapes, herringbone works well in long, narrow spaces like walkways and balcony runs. It takes more attention during layout than a straight grid, so dry-lay a small section first and check that the pattern direction stays consistent.
5. Basketweave and Cross-Hatch
Rotating pairs of tiles so the grain crosses in a woven pattern creates the basketweave or cross-hatch look. Set two tiles vertically, then two horizontally, and repeat, and the surface takes on the texture of a woven mat.
It suits coastal and cottage gardens where you want a relaxed, natural feel. The design needs fewer color changes than checkerboard, so it’s a good option if you want visual interest with a single finish. Because the pattern repeats in pairs, it’s also forgiving to install, since small variations are harder to notice.
6. Framed Border Design
A framed border uses a contrasting color around the perimeter to anchor the whole space, the way a picture frame anchors a print. Lay a main field in one finish, then ring the edges with a darker or lighter accent tile.
Borders define seating zones, mark the edge of a deck over grass, and give a polished finish to cut edges without buying special trim. Decide the border width first, usually one tile wide, and order the accent finish accordingly. This is one of the most effective ways to make a large patio feel composed rather than endless.
7. Mixed-Grain Natural Wood Look
Instead of a repeating pattern, lay the tiles with deliberately random grain directions so the surface mimics a natural timber deck. The eye reads a subtle texture rather than a uniform grid, which looks more organic in garden settings.
This design works best in warm wood tones like teak and walnut. Install it by rotating each tile 90 degrees in a loose, non-repeating order. Avoid obvious clusters where three or four tiles point the same way, since that reads as a mistake instead of a deliberate mix.
8. Grass-and-Tile Combination
Combining WPC deck tiles with sections of natural or artificial grass is one of the strongest current trends in outdoor design. Lay tile in a central runway or dining platform, then surround it with grass, or cut grass strips between tile sections for a checkerboard of green and wood.
The mix softens a hard surface, cools the space, and creates that “park at home” feel popular on modern balconies and roof terraces. Over soil or a rooftop membrane, install a weed barrier and proper drainage so the grass edges stay clean; Greatmats has a useful guide to floating a deck over grass if the base is new to you. The interlocking grid makes this design reversible when you want a different balance.
9. Zoned Layouts for Dining, Lounge, and Play
A single deck doesn’t have to use one pattern. Divide the space into functional zones and signal each one with a color or layout change: a straight field under the dining set, a warmer accent tone in the lounge corner, and a contrasting border around the grill.
Zoning works especially well on larger patios and rooftop terraces where a uniform surface can feel monotonous. It also lets you spend your accent tiles where they matter most. Use the same base tile everywhere so the zones read as one deck, then vary only the accent strips between them.
10. Accent Strips and Feature Runners
Accent strips are single lines of a contrasting color that run through the field, like a runner down a hallway or a stripe across the patio. They direct the eye, break up a large expanse, and cost less than a full checkerboard because you only buy a small quantity of the accent finish.
Place a runner along the path from the door to the seating area, or frame the fire pit with a ring of accent tiles. Keep runners one tile wide and consistent in spacing so they look deliberate. This is the lowest-cost way to get a custom feel from stock colors.
11. Curved and Organic Edging
Interlocking tiles are square, but you can create curved edges by cutting tiles to follow garden bed lines, tree rings, or a circular fire pit area. The tile grid gives you a stable base while the perimeter cuts soften the hard line between deck and garden.
Expect more cutting and more waste with organic edges, and order 15 percent extra to cover the angled cuts. Use a jigsaw with a fine-tooth blade and cut face-down to minimize chipping. The payoff is a deck that blends into the landscape instead of sitting on top of it.
12. Multi-Level and Rooftop Terrace Layouts
On grade changes, stair transitions, and rooftop terraces, design each level as its own pattern zone so the change in height reads as intentional. Use a straight field on the main level, a border on the upper platform, and a runner on the step approach to tie the levels together.
Rooftop decks get the most sun and wind, so choose light colors that stay cooler underfoot and check whether your building requires perimeter fixing on elevated, exposed levels. A multi-level layout also gives you natural places to hide expansion gaps at the changes in elevation.
Choosing WPC Deck Tile Colors and Textures
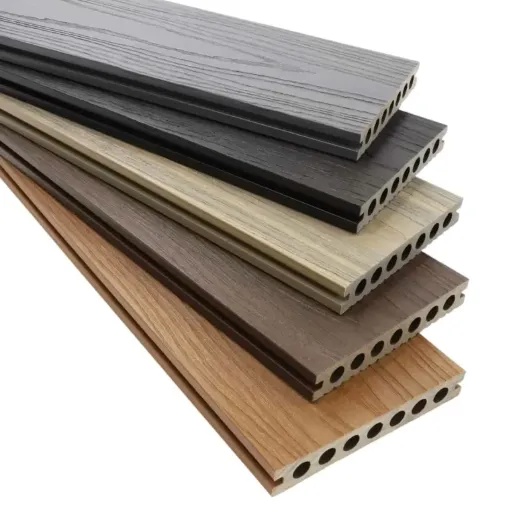
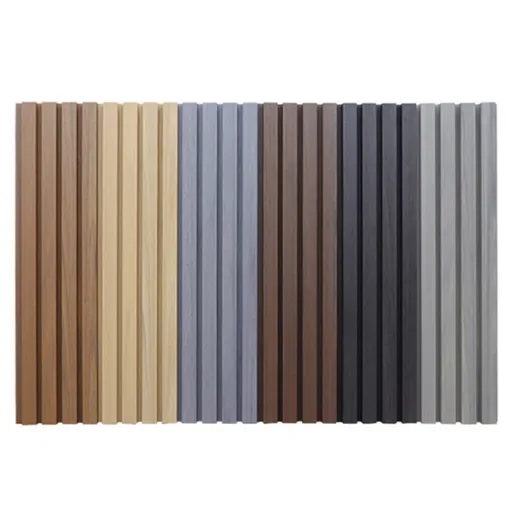
The pattern carries the design, but color and texture decide whether it feels premium or budget. In 2026, the strongest trends in the industry are architectural grays, warm natural wood tones, and deep espresso browns.
- Architectural gray tones (ash, smoke, charcoal) pair with minimalist concrete, glass railings, and stone facades, and they hide dirt well.
- Natural teak and warm hardwood tones suit resort, poolside, and hospitality settings and pair with lush landscaping.
- Deep walnut and coffee browns read as high-end and work with cream walls, bronze details, and warm outdoor lighting.
Texture matters as much as color. A 3D-embossed surface replicates wood grain more deeply, improves slip resistance, and hides scratches, which is why capped, 3D-embossed tiles are the premium choice for wet areas. Grooved and brushed textures are the lighter, lower-cost alternative. If the deck is exposed to rain or sits near a pool, choose a surface rated R10 or R11 for wet traction.
Here’s a quick pairing guide to match color to setting:
| Tile color family | Pairs best with | Best settings |
|---|---|---|
| Architectural gray | Concrete, glass, aluminum, stone | Minimalist patios, urban balconies, rooftop terraces |
| Teak and warm wood | Natural stone, greenery, light walls | Pool surrounds, resort gardens, coastal decks |
| Walnut and coffee brown | Cream facades, bronze, warm LED light | High-end residential, dining and entertaining decks |
We offer 300-plus stock colors and custom Pantone matching, so the palette for your design doesn’t have to be limited by what’s on the shelf. Request a free sample to see colors and textures in your actual outdoor light before you commit.
How Many Deck Tiles Do You Need for a Pattern?
Before you design, get the tile count right. Most interlocking WPC tiles cover about 1 square foot each, so the math is straightforward:
- Multiply the length by the width of the space to get the square footage.
- Add 10 percent for a straight or staggered pattern.
- Add 15 percent for diagonal, herringbone, borders, or heavy cutting.
For example, a 10 by 10 foot patio is 100 square feet. A straight pattern needs about 110 tiles. A diagonal pattern needs about 115 to 120. If you’re mixing accent colors, split the extra percentage across both finishes so you don’t run short on the color that finishes the edge.
Always dry-lay the first few rows to confirm the count before you open every box, because returns on cut tiles are rarely possible. The extra tiles aren’t wasted, since you can keep them for future repairs or a seasonal layout change.
Design and Installation Tips That Protect Your Pattern
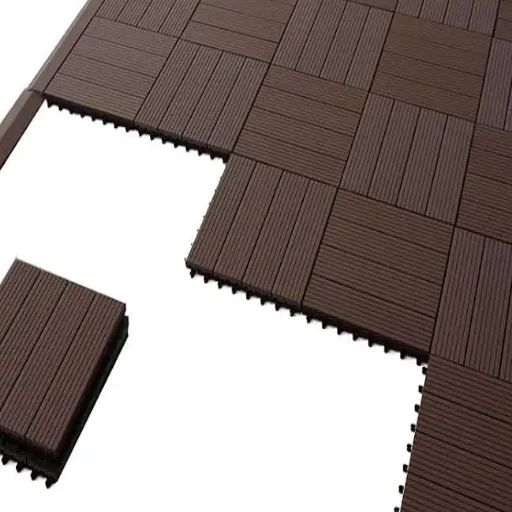
A good pattern fails fast if the base work is wrong. Follow these checks so your design stays crisp.
- Start from the most visible corner. Place the first tiles where you enter the space and work outward, so cut pieces end up at the edges nobody sees.
- Acclimate the tiles. Let them sit in the installation area for 48 to 72 hours so they adjust to local temperature and humidity before you snap them together.
- Leave expansion gaps. WPC expands slightly with heat, so keep 10 to 12 mm of clearance around walls, posts, and fixed structures.
- Level the substrate. Over concrete, the slab should be clean and reasonably flat. Over grass or soil, dig out the sod, lay a weed barrier, and build a compacted gravel or paver-panel base first. See our floating deck guidance for the full base checklist.
- Cut face-down. Use a jigsaw or circular saw with a fine-tooth blade and cut from the back to avoid chipping the cap.
- Finish the perimeter. Edge trim and ramps give a professional finish and reduce trip hazards where the deck meets another surface.
Balcony and Small-Space WPC Deck Tile Design Ideas
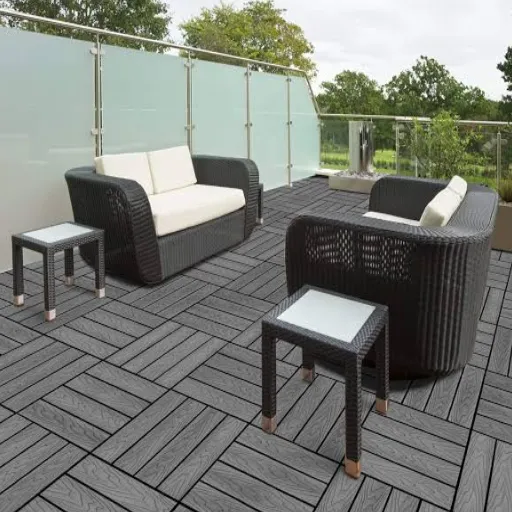
Small spaces reward a focused plan. On a balcony, the pattern does more work than almost anywhere else, because the whole deck is visible at once.
- Lay tiles lengthwise so the pattern elongates the room and makes the balcony feel longer.
- Use light, neutral colors to reflect light and keep the surface cooler underfoot.
- Add one accent runner along the door-to-railing path instead of a full two-tone field, which can overwhelm a small area.
- Pair tiles with a single outdoor rug to define the seating zone without adding flooring.
- Use vertical planters on the railing so the design draws the eye up, not just across the floor.
Because balcony tiles are loose-laid and removable, they’re the easiest decking option to get approved by landlords and building management. Keep a removable section over the drain so you can clear debris without tearing the deck apart. Renters can lift the whole system and leave the balcony exactly as they found it.
How to Clean and Maintain WPC Deck Tiles
Every design in this guide will stay fresh with minimal care. WPC deck tiles are low maintenance, but they’re not no-maintenance.
- Sweep regularly to remove leaves and grit that can dull the surface.
- Wash with warm soapy water and a soft brush a few times a year, then rinse.
- Avoid pressure washing on full power, and never use bleach or harsh solvents, which can damage the cap layer.
- Treat stains quickly, especially oil, bird droppings, and food spills.
- Lift tiles occasionally to clean the substrate and confirm drainage underneath is clear.
Choose UV-stabilized, capped tiles for any exposed deck, because the cap is what resists fading and moisture over the long term.
Frequently Asked Questions
What is the best pattern for interlocking deck tiles?
The straight and staggered layouts are the safest and most economical, producing under 10 percent waste. For a more designed look, diagonal layouts make small spaces feel larger, and checkerboards or framed borders add the most visual impact with two colors. If you want more pattern inspiration, Bunnings lists 10 tile patterns worth adapting to a deck.
Can you lay WPC deck tiles diagonally?
Yes. Rotating the field 45 degrees creates a diamond pattern that suits small patios and balconies. Plan for 10 to 15 percent extra tile waste from angled edge cuts, and start from the most visible corner.
Can you mix WPC deck tile colors?
Yes, and mixing two or three finishes is the fastest way to create a custom design. Checkerboards, borders, and accent runners all rely on combining colors. Order roughly equal amounts for a checkerboard, or a smaller accent quantity for borders and runners.
How many WPC deck tiles do I need for a small patio?
Measure the length by the width to get the square footage, then add 10 percent for a straight pattern and 15 percent for a diagonal one. A 10 by 10 foot patio needs about 110 tiles in a straight layout and 115 to 120 on the diagonal.
Are WPC deck tiles better than decking boards?
For small areas, renter situations, and anyone who wants to change the design later, deck tiles are easier to install and fully removable. For large, permanent decks, traditional decking boards offer a seamless board look.
Can WPC deck tiles go directly on grass or concrete?
WPC deck tiles can go over concrete with just a clean, level surface. On grass or soil, they need a proper base, such as compacted gravel with a weed barrier or paver panels, because soft ground causes tiles to rock and shift.
Conclusion
The best WPC deck tile design ideas are the ones you can actually build. Start with a pattern that fits your space, whether that’s a clean straight field, a space-enlarging diagonal, or a two-tone checkerboard. Choose a color palette and texture that work with your architecture, and pair them with accent finishes where you want the most impact. Order 10 to 15 percent extra tiles, protect your pattern with the right base and expansion gaps, and keep a removable section for cleaning.
When you’re ready to turn the plan into a project, explore our WPC outdoor series and contact our team for a tailored quote, free samples, or help selecting the right tile grade and custom color for your space. A well-designed deck isn’t about the most expensive tile. It’s about the right pattern, the right colors, and the right plan, and you now have all three.
Categories:
Blog
Related Articles