How to Install WPC Wall Panels on a Wall: Step-by-Step Guide
To install WPC wall panels on a wall, first confirm the wall is flat, dry, and sound. Bond panels directly with construction adhesive on flat interior walls, or build a batten framework spaced 400 to 600mm apart when the wall is uneven or damp. Cut panels from the back face, fix the first panel perfectly level, then leave 5 to 10mm expansion gaps at every fixed edge.
That is the short answer. The longer answer depends entirely on the wall you are working with, which is exactly where most installations go wrong.
Ask any installer what ruined their last feature wall and you will hear the same story. The panels were fine. The adhesive was fine. The problem was the wall underneath.
Consider Priya, a fit-out contractor who took on a living room renovation in a 1970s apartment last spring. The plaster looked flat enough, so her crew bonded fluted panels straight to it with adhesive and finished the job in a single day. Six weeks later, the client sent photos of ripples running across the wall. The plaster behind the panels had been painted with a silk finish, and the adhesive never achieved a real bond. The panels were pulling away in the middle of the room’s focal wall. Rebuilding it with a batten system cost Priya three extra days and a damaged reputation.
This guide walks you through how to install WPC wall panels on a wall in the order that prevents those failures. You will learn how to read your wall, choose the right fixing method, and execute an installation that still looks sharp after ten years.
Key Takeaways
- WPC wall panels can be bonded directly to flat, dry, sound interior walls, but uneven or damp walls require a batten framework.
- Space battens 400 to 600mm apart for interior walls and 350 to 400mm for exterior use, always perpendicular to the panel direction.
- Leave 5 to 10mm expansion gaps at ceilings, floors, and corners. WPC moves roughly 2 to 2.5mm per metre across a 40°C swing.
- Let panels acclimate flat on site for 24 to 48 hours before installation to prevent post-install buckling.
- Cut panels from the back face with a fine-tooth or carbide blade, and never over-tighten fixings.
Can You Install WPC Wall Panels Directly on a Wall?
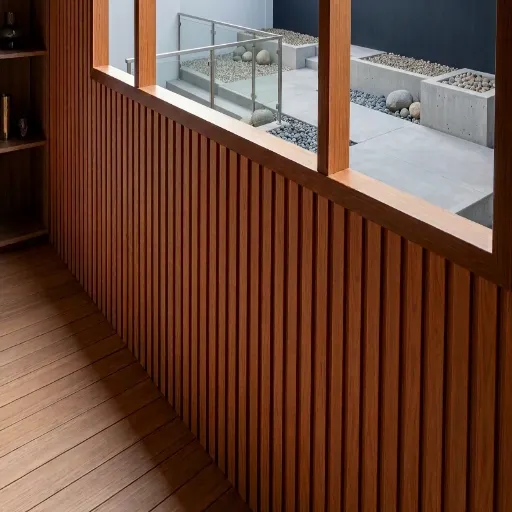
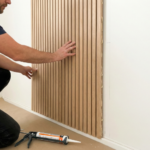
Yes, you can install WPC wall panels directly on a wall when the surface is flat, dry, and structurally sound. Direct bonding with construction adhesive is the fastest method and hides every fixing behind the panel. If the wall is uneven, damp, or friable, you must install a batten framework first, because adhesive cannot bridge movement or moisture.
That single decision, direct bond or batten system, changes your material cost, your labour time, and how long the wall lasts. Everything else in this guide follows from it.
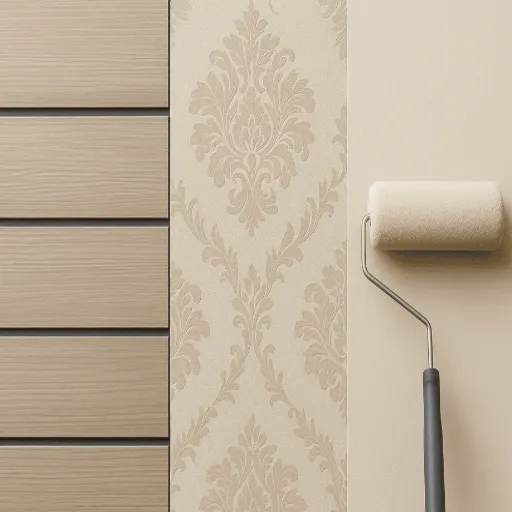
The global WPC wall panel market reached roughly USD 4.5 billion in 2025 and is projected to hit USD 7.2 billion by 2033, according to Verified Market Reports. That growth is driven by homeowners and commercial buyers replacing paint and wallpaper with a surface that wipes clean and resists moisture. If you are still weighing your options, our breakdown of wall panels vs wallpaper vs paint covers the trade-offs in detail.
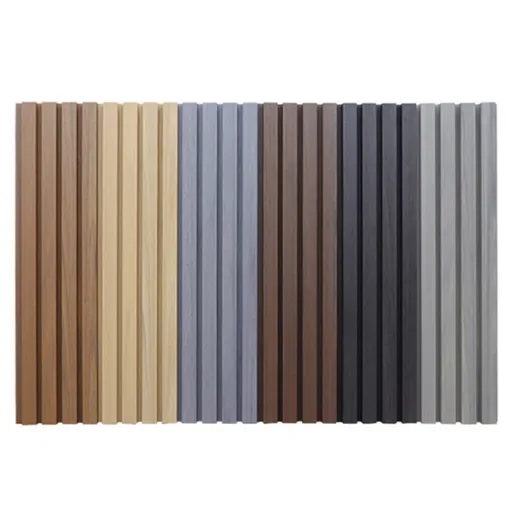
Want to see the finished look before you commit? Browse our WPC wall panels for living room collection for profiles, wood grains, and finishes.
Before You Start: What Your Wall Needs to Pass
Do not buy a single panel until you have assessed the wall. This five-minute check saves far more time than it costs.
The Flatness Test
Hold a 2-metre straight edge or spirit level against the wall in several directions. Any gap larger than about 5mm under the straight edge means a direct bond will telegraph the unevenness through the panel. WPC panels are rigid, so they follow the wall beneath them rather than flattening it.
If the wall fails this test, you have two options. You can fill and sand small defects, or you can install furring strips shimmed level to create a flat plane. For anything beyond minor variation, battens are the faster route.
The Damp Test
Press a moisture meter against the wall in several spots. Readings above roughly 12% mean the wall is not ready. Sealing panels over a damp wall traps moisture and creates the perfect conditions for mould behind your new surface.
Check for rising damp near the skirting, staining around windows, and any musty smell. Damp is the one problem no adhesive or clip system can solve.
The Soundness Test
Tap across the wall with your knuckles. A hollow ring suggests the plaster has separated from the backing, and a hollow section cannot hold a fixing. Friable or crumbling render needs stabilising before anything goes on top.
Once your wall passes all three tests, you are ready to move.
Tools and Materials You Will Need
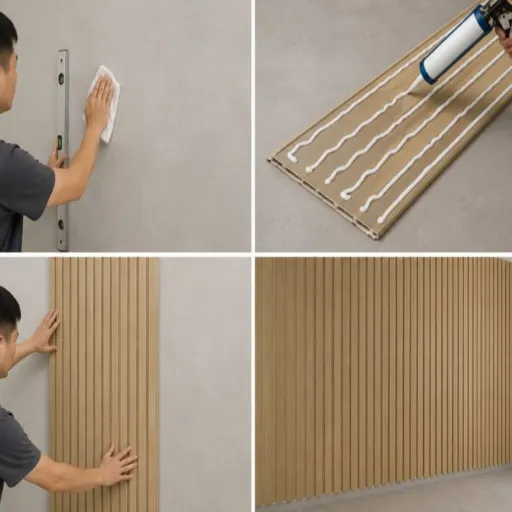
Gather everything before you start. Stopping mid-installation to hunt for a fastener is how alignment errors creep in.
Panels and accessories
- WPC wall panels, plus 5 to 10% extra for cuts and waste
- Matching edge trims, L-profiles, corner profiles, and starter strips
- Battens in treated timber, galvanised steel, or aluminium if you need a framework
- Stainless steel or corrosion-resistant screws, and concealed clips if your profile uses them
- Construction adhesive rated for non-porous surfaces
Tools
- Tape measure, spirit level, and a 2-metre straight edge
- Pencil and chalk line for layout
- Drill with an appropriate bit for your substrate
- Circular saw or fine-tooth handsaw with a carbide blade, 80 teeth or more
- Rubber mallet, caulking gun, and a stud finder
One material note matters more than the rest. Use an adhesive designed for composite or non-porous panels, such as a hybrid polymer or polyurethane formula. Standard water-based wood glue will not bond to WPC, no matter how much you apply. If you are also planning a ceiling treatment, the same prep principles apply to WPC ceiling panels, and it is worth ordering both at once so the finishes match.
Step-by-Step: Installing WPC Wall Panels on a Living Room Feature Wall
Here is the full sequence for a typical interior feature wall. Adapt the fixing method to your wall assessment.
Step 1: Acclimate the Panels
Unpack the panels and lay them flat in the room where they will be installed. Leave them for 24 to 48 hours so they adjust to the local temperature and humidity before you cut anything.
This step is the one most installers skip, and it is the most common cause of post-installation movement. A panel that acclimates on site has already done most of its expanding and contracting before it is locked to the wall.
Step 2: Plan the Layout and Mark Your Lines
Measure the wall and decide whether the panels run vertically or horizontally. Mark a chalk line for your starting edge, and plan where the last panel will land so you do not end up with a thin sliver of a cut at the far end.
Add 5 to 10% to your panel count for offcuts. Allow extra if you are cutting around sockets, switches, or a window reveal. If you are building a media wall, our guide to the WPC TV wall panel walks through cable routing and lighting in detail.
Step 3: Build the Framework (If Required)
For uneven, damp, or exterior walls, fix battens perpendicular to the direction of the panels. Vertical battens support horizontal cladding, and horizontal battens support vertical cladding.
Use these spacing figures as your starting point, then always defer to the panel manufacturer’s stated maximum:
| Panel thickness | Interior batten spacing | Exterior batten spacing |
|---|---|---|
| 8mm | 300 to 400mm | 300 to 350mm |
| 10mm | 400 to 500mm | 350 to 400mm |
| 12mm | 500 to 600mm | 400mm |
Check each batten with a spirit level as you fix it. A 2mm error in the first batten becomes a visible wave across a five-metre wall. The batten framework also creates a ventilated cavity, which lets moisture escape instead of sitting against the panel.
Step 4: Install the Starter Strip
Fix a starter strip or starting clip along the base of the installation, perfectly level. This strip sets the reference line for every panel that follows. Take an extra minute here, because correcting a crooked start halfway up the wall means taking everything down.
Step 5: Cut the Panels
Measure twice and cut once. Mark your dimensions, then cut with the panel back-side up. Cutting from the back face pushes any chipping to the hidden side of the panel, which keeps your visible edge clean.
A carbide-tipped blade with 80 teeth or more gives the cleanest cut. For the best finish, run a strip of masking tape along the cut line first, which holds the surface fibres in place as the blade passes through.
Step 6: Fix the First Panel
Seat the first panel into the starter strip and check it with a level in both directions. The first panel determines the alignment of the entire wall, so this is not the moment to rush.
Apply adhesive in a serpentine or grid pattern across the back rather than in a few edge beads. Even coverage distributes stress and prevents hollow spots where the panel can flex. For mechanical fixing, drive screws into the batten and stop as soon as the panel is secure.
Step 7: Install the Remaining Panels
Slide each panel’s groove into the previous panel’s tongue and press it home. Tap gently with a rubber mallet to close the joint, and check level every two or three panels rather than waiting until the end.
Pre-drill your screw holes with a bit slightly wider than the screw shank. This small step allows the panel to move as it expands, and it is the difference between a wall that stays flat and one that develops stress cracks around every fixing.
Step 8: Leave the Expansion Gaps
WPC expands and contracts with temperature and humidity, typically by around 2 to 2.5mm per metre across a 40°C swing. A 2.9-metre panel can grow by roughly 6mm over the course of a year.
Leave 5 to 10mm at every fixed edge, including the ceiling, floor, and corners, and 2 to 3mm between panels where the profile requires it. Never pack a movement gap with rigid filler or caulk it solid. Cover it with trim so the panel can still move underneath.
Step 9: Fit the Trims and Finish
Install L-profiles, U-trims, and corner profiles to conceal the gaps and give the wall a clean edge. Trim choice affects the final look as much as the panel itself, so order trims that match your panel finish and batch.
Clean up any adhesive residue while it is still soft, and avoid putting pressure on the wall for 24 hours while the adhesive cures.
Adhesive vs. Screws vs. Hidden Clips: Choosing Your Fixing Method
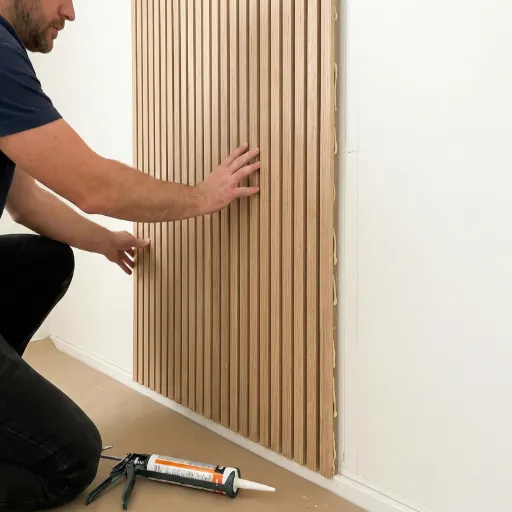
The right fixing method depends on the wall and the environment. Here is how the three main options compare.
Adhesive direct bond suits flat, dry interior walls and delivers the fastest, cleanest finish. Use a hybrid polymer or polyurethane adhesive in a serpentine pattern, and add mechanical fixings as secondary support on walls taller than 2.4 metres.
Mechanical screws suit humid rooms, uneven walls, and any installation you may need to dismantle later. Always choose stainless or corrosion-resistant fasteners in bathrooms and outdoors.
Hidden clip systems combine speed with a clean, fixing-free surface. Clips secure the panel to the batten while leaving the face untouched, which makes individual panel replacement possible without dismantling the wall.
Many professional installations combine two methods. Adhesive plus hidden clips gives you the even contact of bonding and the mechanical security of a fixing, which is worth the extra time on exterior walls and high-traffic commercial interiors.
Common Mistakes and How to Fix Them
Most problems trace back to a handful of avoidable errors.
- Skipping acclimation. Panels move after installation and buckle. There is no fix except removal, so acclimation is non-negotiable.
- Battens too far apart. The panel flexes between supports and develops waviness. Tighten the spacing.
- Forgetting expansion gaps. Panels push against each other in warm weather and lift at the joints. Always leave the gap and conceal it with trim.
- Over-tightening fixings. This restricts movement and causes cracking or denting around the screw. Set your drill clutch low and stop as soon as the panel is secure.
- Bonding to a dusty or painted wall. Adhesive fails and the panel delaminates. Sand glossy finishes and prime dusty surfaces first.
- Cutting from the front face. Chipping appears on the visible surface. Cut back-side up every time.
If a panel does need replacing later, a clip system makes it a twenty-minute job rather than a rebuild.
Cost and Time: DIY vs. Professional Installation
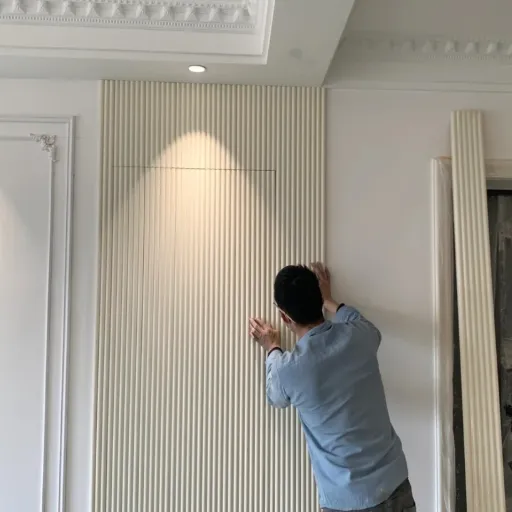
Budgets matter, so here are realistic figures. Professional installation typically runs from around $8 to $23 per square foot for materials and labour, while a DIY installation of the same materials lands between $5 and $15 per square foot, according to Angi. That is a saving of roughly 40 to 60% on labour.
For a standard living room feature wall of about 12 square metres, a confident DIYer can finish the job across a weekend. A professional crew completes the same wall in four to six hours.
The batten system is the biggest variable. If your wall needs battens, add material cost for the framing and roughly a third more time. The upside is a flatter, ventilated, longer-lasting wall. For a full breakdown of what different materials and finishes cost, see our guide to living room wall panelling cost.
Not sure whether your wall needs battens? Send us photos and measurements, and our team will tell you exactly which method to use. Request a free assessment →
Troubleshooting: When the Wall Fights Back
Sometimes the wall reveals a problem mid-installation. Here is how to read the symptoms.
Panels buckling in warm weather. Expansion space is insufficient or fixings are over-tightened. Remove the affected panel, enlarge the gaps, and refit.
Panels pulling away from the wall. The adhesive failed because the substrate was dusty, damp, or glossy. Strip the panel, prepare the surface properly, and switch to a batten system if the wall is not sound.
Waviness across the wall face. Battens are too far apart or out of level. Add intermediate battens to bring the surface back to a flat plane.
Moisture staining at panel joints. Hidden damp is escaping through the joints or the ventilated cavity is blocked. Find and fix the moisture source before sealing anything.
Cracks around fixings. No pre-drill, over-driving, or restricted movement. Pre-drill, reduce torque, and check your expansion gaps.
FAQ: Installing WPC Wall Panels on a Wall
Can WPC wall panels be installed directly on the wall?
Yes, on flat, dry, sound interior walls. Bond them with a composite-rated construction adhesive. Uneven, damp, or friable walls need a batten framework first.
Do I need battens to install WPC wall panels?
You need battens when the wall is uneven, when moisture or ventilation is a concern, or when your system uses mechanical fixing. Flat interior walls can often take a direct bond.
What do you stick WPC panels to the wall with?
Use a hybrid polymer or polyurethane construction adhesive rated for non-porous surfaces. Never use standard water-based wood glue, which will not bond to WPC.
How much gap do you leave when installing WPC wall panels?
Leave 5 to 10mm at fixed edges such as ceilings, floors, and corners, and 2 to 3mm between panels where required. Cover the gaps with trim so the panels can still move.
Do WPC wall panels need acclimating before installation?
Yes. Lay them flat on site for 24 to 48 hours so they adjust to local temperature and humidity. Skipping this step is the leading cause of post-installation buckling.
What is the correct batten spacing for WPC wall panels?
Use 400 to 600mm for interior walls and 350 to 400mm for exterior walls, adjusting by panel thickness and always following the manufacturer’s stated maximum.
How long does it take to install WPC wall panels?
A standard 12-square-metre living room feature wall takes a confident DIYer a weekend. A professional crew finishes the same wall in four to six hours.
Can you install WPC wall panels over tiles?
Yes, provided the tiles are sound and the surface is keyed and clean. Assess moisture first, and use a batten system if the tile face is uneven or the area is wet.
Conclusion
Installing WPC wall panels on a wall comes down to matching your method to your substrate. A flat, dry, sound wall accepts a direct bond and can be finished in a day. An uneven or damp wall needs a batten framework that creates a flat, ventilated plane.
Remember the five points that matter most. Acclimate panels for 24 to 48 hours. Space battens 400 to 600mm apart for interior walls. Leave 5 to 10mm expansion gaps at every fixed edge. Cut from the back face. And never over-tighten a fixing.
Get those right and your feature wall will hold its finish for the full 20 to 25 years these panels are rated for. At Linyi Yuheng International Trading Co., Ltd., we manufacture WPC wall panels for homeowners, contractors, and wholesale buyers across more than 30 countries, and we are always glad to advise on the right profile and fixing method for your project.
Browse our WPC wall panels → or request a quote and we will help you specify everything you need, from panels to trims to fixings, in a single shipment.
Categories:
Blog
Related Articles