How to Install Acoustic Panels in an Office: Complete Commercial Guide (2026)
You install acoustic panels in an office using four main mounting systems: impaling clips for permanent wall mounting, Z-clips for removable professional installs, suspended cables for ceiling clouds and baffles, and keel frameworks for WPC or wood slat panels. The right method depends on your panel material, ceiling type, whether the building is occupied during installation, and whether you need to remove panels at lease end.
David’s crew started installing ceiling baffles at 6:00 a.m. By 9:00 a.m., they realized three panels blocked sprinkler heads. The fire marshal stopped the job. David spent the next two days redesigning the layout and paying a $1,200 re-inspection fee. His mistake wasn’t the mounting hardware. It was skipping the MEP coordination step.
Most installation guides online target home recording studios. They show you how to mount foam tiles above a drum kit. They don’t tell you how to suspend ceiling clouds around HVAC diffusers in a 12,000-square-foot open plan or how to install WPC panels on a keel framework without voiding the fire rating. This guide covers exactly that. For the complete picture on materials, NRC ratings, and costs, see our office acoustic panels buyer’s guide.
By the end, you’ll know how to plan a layout that works with your building’s mechanical systems, which mounting system matches your panel material and project constraints, how to install wall panels, ceiling clouds, and WPC systems step by step, and how to complete the work in an occupied office without shutting down operations.
Key Takeaways
- Impaling clips are fastest for permanent wall installs; Z-clips add removability for leased spaces
- Ceiling clouds and baffles need mechanical suspension — never rely on adhesive alone overhead
- A 2-4 inch air gap behind panels improves acoustic absorption by 15-25%
- Coordinate panel layout with MEP systems (sprinklers, HVAC, lighting) before installation begins
- WPC and wood slat panels install on keel frameworks, not standard clips
Planning: Layout, Reflection Points, and MEP Coordination
Installation quality starts before the first panel leaves the box. A rushed layout plan creates costly problems mid-project. Take time to measure, mark, and coordinate before ordering hardware.
Finding First Reflection Points
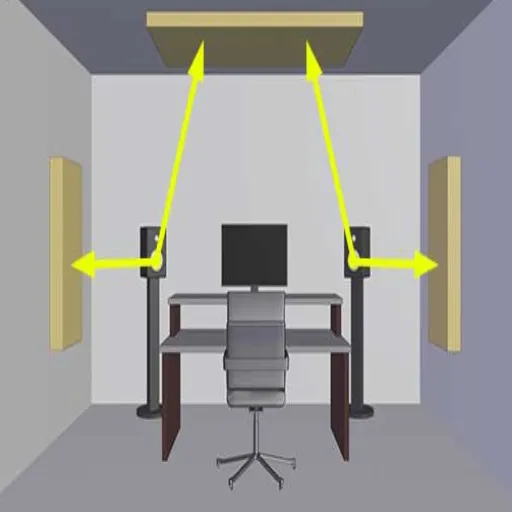
The mirror trick remains the simplest way to identify where panels will have maximum impact. Sit at a workstation or conference table. Have a colleague slide a mirror along the wall. Wherever you see the reflection of the noise source — a colleague’s desk, a speaker, a hallway entrance — that’s a first reflection point. A panel belongs there.
First reflection points matter because direct reflections create the most distracting echo. Sound that travels from source to wall to ear arrives just milliseconds after the direct sound, creating comb filtering and intelligibility loss. One panel at a first reflection point outperforms three panels on random walls.
For open-plan offices, ceiling baffles should be your priority. They intercept upward-traveling sound before it reflects off the ceiling deck and scatters across the floor plate. In conference rooms, treat the rear wall first, then the side walls at reflection points.
MEP Coordination: The Step Most Guides Skip
Commercial ceilings are crowded. Sprinkler heads, HVAC diffusers, smoke detectors, light fixtures, speaker systems, and cable trays all compete for space. Before marking panel locations, overlay your acoustic layout on the MEP (mechanical, electrical, plumbing) drawings.
Key clearance requirements:
- Sprinkler heads: Maintain full spray pattern coverage. Panels must not obstruct sprinkler discharge within the required coverage radius (typically 8-12 feet, depending on head type)
- HVAC diffusers: Panel placement downwind of diffusers can block conditioned air or create turbulence noise. Maintain 3-4 feet of clearance
- Smoke detectors: Panel density around detectors must not impede smoke entry. Check local fire code for specific restrictions
- Emergency lighting: Exit signs and emergency luminaires must remain visible and unobstructed
- Access panels: Ceiling access to electrical junction boxes, fire dampers, and control valves must be preserved
Professional acoustic layout drawings that coordinate with MEP plans cost $500-1,500 but prevent the costly rework David experienced. For commercial acoustic projects, always verify ceiling panel placement against local fire codes and NFPA 13 sprinkler clearance standards.
Coverage Percentages by Room Type
| Room Type | Wall Coverage | Ceiling Coverage | Priority Locations |
|---|---|---|---|
| Open plan office | 10-20% | 50-60% | Ceiling baffles first, then rear walls |
| Conference room (small) | 25-35% | 25-35% | Rear wall, ceiling cloud above table |
| Conference room (large) | 20-30% | 30-40% | Rear wall, side walls, ceiling |
| Private office | 15-20% | 20-30% | Rear wall, ceiling |
| Call center | 15-20% | 50-60% | Ceiling baffles, desk dividers |
| Reception/lobby | 30-40% | 20-30% | Feature walls, behind the desk |
Need help calculating panel quantities for your floor plan? See our guide on how many acoustic panels you need for your office for a room-by-room coverage calculator.
Mounting Systems Compared: Which One for Your Project?
Not all mounting systems work for all panels or all spaces. The system you choose affects installation speed, removability, acoustic performance, and cost.
Impaling Clips: Fastest for Permanent Wall Installs
Impaling clips are metal brackets with sharp teeth that screw to the wall. Construction adhesive is applied to the panel back, and the panel presses onto the teeth, which impale the core material. The adhesive bonds while the teeth provide mechanical hold.
Best for: Fiberglass and mineral wool panels on permanent installations where removal is unlikely.
Installation speed: A two-person crew installs 150-200 square feet per day.
Cost: $0.50-1.00 per square foot in hardware.
Removability: Poor. Impaled panels are difficult to remove without damaging the core.
Air gap: None. Panels mount flush to the wall.
Z-Clips (French Cleats): Removable and Professional
Z-clips are interlocking aluminum or steel brackets. One-half screws to the wall. The mating half attaches to the panel back. The panel lifts above the wall clip and drops down to engage.
Best for: Commercial spaces, leased offices, and any installation where panels may need removal for cleaning, relocation, or building access.
Installation speed: 120-150 square feet per day (slower than impaling clips due to precision alignment).
Cost: $1.00-2.00 per square foot in hardware.
Removability: Excellent. Panels lift off for access to the wall behind them.
Air gap: Minimal, approximately 3/16 inch.
Suspended Cable Systems: Ceiling Clouds and Baffles
Aircraft-grade cable runs from eye bolts in the structural ceiling to attachment points on the panel. Adjustable cable grippers or turnbuckles allow precise leveling. Most clouds suspend 12-24 inches below the ceiling, creating an air gap that significantly improves low-frequency absorption.
Best for: Ceiling clouds, acoustic baffles, and any overhead treatment.
Installation speed: 200-300 square feet per day for clouds; 300-400 square feet per day for baffles in rows.
Cost: $1.50-3.00 per square foot in hardware.
Removability: Good. Panels are lowered on cables for maintenance.
Air gap: 12-24 inches (excellent for acoustic performance).
Keel Framework Systems: WPC and Rigid Panels
Aluminum or galvanized steel rails mount horizontally to the wall at 16 or 24 inches on center. WPC or wood slat panels clip, slide, or screw onto the rails. This system creates a consistent air gap, allows for thermal expansion, and supports panel removal without tools.
Best for: WPC perforated panels, wood slat systems, and any rigid panel that can’t be impaled.
Installation speed: 100-150 square feet per day (more complex alignment).
Cost: $2.00-4.00 per square foot in hardware.
Removability: Excellent. Individual panels unclip for replacement or access.
Air gap: 1-2 inches (adjustable by rail standoff depth).
Adhesive and Damage-Free Methods
Construction adhesive in a zigzag pattern on the panel back can mount lightweight panels to smooth drywall. Command strips and velcro systems work for very lightweight PET felt tiles in home offices or temporary setups. Never use adhesive alone for ceiling panels. The consequences of a falling panel in a commercial space include injury liability and fire code violations.
| Mounting System | Best For | Speed (sq ft/day) | Hardware Cost/sq ft | Removable? | Air Gap? |
|---|---|---|---|---|---|
| Impaling Clips | Permanent wall, fiberglass/mineral wool | 150-200 | $0.50-1.00 | No | None |
| Z-Clips | Commercial walls, leased spaces | 120-150 | $1.00-2.00 | Yes | Minimal |
| Cable Suspension | Ceiling clouds and baffles | 200-400 | $1.50-3.00 | Yes | 12-24 in |
| Keel Framework | WPC, wood slat, rigid panels | 100-150 | $2.00-4.00 | Yes | 1-2 in |
| Adhesive Only | Lightweight walls only (not ceiling) | 200+ | $0.30-0.60 | No | None |
Planning a commercial acoustic project? Request a free installation hardware kit matched to your panel material and ceiling type.
Step-by-Step: Installing Wall Panels
Tools and Materials Checklist
- Tape measure, laser level, and chalk line
- Stud finder (deep-scan mode for commercial walls)
- Cordless drill with masonry and wood bits
- Appropriate anchors (toggle bolts for drywall, wedge anchors for concrete)
- Mounting hardware (impaling clips, Z-clips, or adhesive)
- Construction adhesive (if using impaling clips)
- Caulk gun
- Utility knife or panel saw for trimming
- Clean gloves (to protect fabric-faced panels)
- Drop cloths and painter’s tape for protection
Installing on Drywall
- Mark the layout using a laser level to project horizontal and vertical reference lines. Mark stud locations with a stud finder.
- Install mounting hardware at marked locations. For impaling clips, space them approximately 4 inches inside the panel perimeter. For Z-clips, install wall brackets level at the top and bottom of each panel position.
- Apply adhesive (for impaling clips) in an S-pattern across the panel back. Do not apply adhesive within 2 inches of edges to prevent squeeze-out.
- Mount the panel by pressing it firmly onto the impaling clip teeth or engaging the Z-clips by lifting the panel above the wall bracket and lowering it into position.
- Check alignment with a level after every third panel. Adjust before the adhesive sets.
Installing on Concrete or Masonry
Concrete and CMU block walls require different anchors than drywall. Use wedge anchors or sleeve anchors rated for the panel weight plus a safety factor. Drill pilot holes with a masonry bit, insert anchors, and attach mounting hardware. For very hard concrete, a hammer drill is essential. Standard cordless drills will overheat and produce inadequate holes.
Creating an Air Gap for Better Absorption
A panel mounted flush to the wall absorbs 15-25% less sound than the same panel with a 2-4 inch air gap behind it. The gap allows sound to pass through the panel, reflect off the wall, and pass back through the panel a second time, effectively doubling the absorption path.
To create an air gap with Z-clips, use standoff brackets or spacers behind the wall clip. For impaling clips, add 1-inch standoff spacers between the clip base and the wall. The improvement is measurable: a panel with NRC 0.80 mounted flush performs like a panel with NRC 0.60. The same panel with a 2-inch air gap performs closer to NRC 0.85.
Step-by-Step: Installing Ceiling Clouds and Baffles
Locating Structural Support
Ceiling panels must attach to structural elements, not ceiling tiles or finishes. Use a stud finder in deep-scan mode to locate joists, beams, or the structural deck above. Mark their direction and spacing. Most commercial buildings have joists at 16 or 24 inches on center. If no structural support is available at your desired panel location, use toggle bolts or expansion anchors rated for overhead loads.
Critical safety note: Ceiling anchors must be rated for the panel’s dead load plus a minimum 2x safety factor. A 20-pound panel needs anchors rated for 40 pounds minimum. Never use drywall anchors for overhead loads.
Cable Suspension Installation
- Install eye bolts into structural ceiling elements at each panel corner. Use eye bolts with shoulders (not screw eyes) for overhead applications.
- Run aircraft cable from each eye bolt to the panel attachment point. Most panels have pre-installed grommets or brackets for cable attachment.
- Attach cable grippers to the panel end. These allow micro-adjustment of cable length for leveling.
- Level each panel using a laser level projected across the bottom surface. Adjust cable grippers until all panels in a row are perfectly aligned.
- Trim excess cable and crimp cable ends to prevent unraveling.
Ceiling clouds typically suspend 12-24 inches below the structural ceiling. This creates an air gap that improves low-frequency absorption while maintaining access to MEP systems above. For open-plan offices with exposed ceilings, baffles hung vertically in rows are often more practical than horizontal clouds because they don’t require precise leveling and they add visual rhythm to the ceiling plane.
Direct-Mount Ceiling Methods
In spaces with limited ceiling height where suspension isn’t practical, panels can mount directly to the structural ceiling using Z-bar systems or threaded rod. Z-bars are essentially Z-clips oriented for ceiling application. The panel slides horizontally into the ceiling-mounted track. Threaded rod systems use vertical rods with panel attachment plates at the bottom, creating a small fixed air gap of 2-4 inches.
Step-by-Step: Installing WPC and Wood Slat Panels
WPC and wood slat panels are rigid. They can’t be impaled. They don’t flex around irregular walls. They require a different installation approach entirely.
Keel Framework Assembly
- Mark horizontal rail locations at 16 or 24 inches on center, depending on panel width. Use a laser level to ensure rails are perfectly horizontal. Even a slight tilt becomes visible across a full wall of slat panels.
- Install wall brackets at each rail location. Brackets attach to studs or use appropriate anchors for the substrate. Standoff depth determines air gap — typically 1-2 inches.
- Clip rails onto brackets and verify level. Shim behind brackets if the wall surface is uneven.
- Install vertical alignment clips at panel edges if the system uses them. These keep adjacent panels aligned at seams.
Panel Clip-On Installation
WPC panels with integrated clip profiles slide horizontally onto the rail from one end. Wood slat panels typically hang on hooks or brackets that engage with the rail. The installation is methodical rather than fast. Each panel must be level, properly spaced, and securely engaged before moving to the next.
Expansion Gap Management
WPC expands and contracts with temperature and humidity changes. Leave a 3-5mm expansion gap at panel edges where they meet walls, ceilings, or other fixed surfaces. The keel framework’s rail system accommodates this movement. Without expansion gaps, panels can buckle in summer heat or pull away from rails in winter dryness.
Multi-Panel Seam Alignment
Wood slat panels are often installed in continuous runs. Seam alignment between panels is critical for visual continuity. Most manufacturers ship panels with pre-aligned slat patterns and matching edge profiles. Verify panel sequence before installation. Number panels on the back in installation order to avoid mixing up the sequence mid-project.
Installing in Occupied Offices: Minimizing Disruption
Most commercial acoustic installations happen in buildings where people are working. Closing the floor for three days isn’t an option. Here’s how experienced contractors handle occupied installations.
Phased Installation Strategy
Divide the floor plate into zones. Treat one zone at a time, moving furniture in the morning and returning it by evening. A two-person crew can complete 300-500 square feet of wall panels per day or 200-300 square feet of ceiling clouds. Plan zones accordingly.
For ceiling work, use sectioned scaffolding or lifts that occupy minimal floor space. Work from the center of the room outward so completed sections are immediately usable. Leave exit paths clear at all times.
After-Hours and Weekend Work Protocols
Wall panel installation generates moderate noise from drilling anchors. Ceiling work is quieter once drilling is complete, but requires ladder or lift movement that can be distracting. The most effective strategy is to schedule drilling and anchor installation during off-hours, then complete panel mounting during business hours if the noise level is acceptable.
When Maria, a facilities director in Miami, managed acoustic treatment for a 12,000-square-foot law firm, she negotiated a phased after-hours schedule with her contractor. The crew worked from 6:00 p.m. to 2:00 a.m. over twelve nights, treating one department per night. Employees arrived each morning to a completed zone. The client never lost a workday. Maria’s contractor charged a 20% after-hours premium, but the firm gladly paid it to avoid business disruption.
Dust and Noise Containment
Drilling anchors in drywall or concrete creates dust. Use HEPA vacuums with drill attachment shrouds to capture dust at the source. Place plastic sheeting around the work zone to contain debris. For occupied spaces, schedule the dustiest work (drilling, cutting) during the lowest-occupancy hours.
Working Around Employees and Equipment
Protect desks, monitors, and equipment with plastic sheeting. Use floor protection boards where ladders or lifts will roll. Communicate the schedule to employees so they know which zones are affected on which days. Post signs indicating work zones and alternate routes.
Professional vs. DIY: When to Hire a Contractor
Small projects under 500 square feet with standard wall panels and accessible ceilings are manageable for experienced maintenance staff. Anything larger, higher, or more complex justifies professional installation.
Project Size Thresholds
| Project Size | Recommendation | Rationale |
|---|---|---|
| Under 500 sq ft | DIY possible | Standard wall panels, accessible ceilings, minimal cutting |
| 500-2,000 sq ft | Professional recommended | Coordination complexity, ceiling work, MEP integration |
| 2,000-10,000 sq ft | Professional required | Phased scheduling, multiple systems, code compliance |
| Over 10,000 sq ft | Professional required | Project management, warranty, safety protocols |
Building Type Considerations
High-rise buildings often require hot work permits for drilling, after-hours access badges for contractors, and freight elevator reservations for material delivery. Historic buildings may have plaster and lath walls that require special anchors and careful handling. Healthcare facilities have strict infection control requirements that limit dust-generating work to specific hours and zones.
Ceiling Height and Access
Ceilings over 12 feet require scaffolding or aerial lifts. Most facilities teams don’t have this equipment. Ceiling work at any height in occupied spaces requires safety protocols that professional contractors have established. The risk of a falling tool or panel in a populated office justifies professional handling.
Cost Comparison
Professional installation costs $1.25-3.50 per square foot, depending on region and system complexity. For a 2,000-square-foot project, that’s $2,500-7,000 in labor. DIY saves that cost but adds risk: improper mounting reduces acoustic performance by 5-10 dB, and failed anchors create liability exposure.
Common Installation Mistakes and How to Avoid Them
Even experienced contractors make these errors. Avoiding them saves time, money, and acoustic performance.
Ignoring the Air Gap
The most common and most costly mistake is mounting panels flush to the wall when an air gap would significantly improve performance. For wall panels, add 1-2 inches of standoff. For ceiling clouds, suspend rather than direct-mount when possible. The acoustic improvement is free — it only requires slightly longer fasteners or suspension hardware.
Using the Wrong Fasteners for the Substrate
Drywall anchors fail in concrete. Wedge anchors crack drywall. Toggle bolts spin in a hollow CMU block. Match the anchor to the substrate. When in doubt, use a contractor-grade anchor rated for the load with a 2x safety factor.
Inconsistent Spacing
Panels that aren’t aligned look unprofessional and perform unevenly. Use a laser level for every row. Check alignment after every third panel. It’s much easier to adjust a freshly mounted panel than to reposition one after the adhesive has cured.
Blocking Sprinklers or HVAC
Always overlay acoustic layouts on MEP drawings before installation. Post-installation relocation of panels that block building systems costs 3-4 times more than getting it right the first time. When David’s crew blocked those sprinkler heads, the rework cost exceeded the original installation labor for that zone.
Forgetting Expansion Gaps (WPC)
WPC panels without expansion gaps will buckle in heat or pull away from rails in cold. The gaps are hidden at panel edges where they meet walls or other fixed surfaces. A 3-5mm gap is invisible but essential.
Tools and Materials Checklist
Essential Tools
- Tape measure (25-foot minimum)
- Laser level or chalk line reel
- Stud finder with deep-scan mode
- Cordless drill with drill and driver bits
- Hammer drill (for concrete/masonry)
- Masonry bits (appropriate diameter for anchors)
- Caulk gun
- Utility knife and panel saw
- Safety glasses and work gloves
- Drop cloths and painter’s tape
Mounting Hardware by System
Impaling Clips:
- Metal impaling clips (4 per panel up to 4’×4′, 6 per panel up to 4’×8′)
- Construction adhesive (1 tube per 1.5 panels)
- #10 screws and appropriate anchors
Z-Clips:
- Z-clip wall brackets (2 per panel top, 2 per panel bottom)
- Z-clip panel brackets (matching wall brackets)
- #10 screws and appropriate anchors
Cable Suspension:
- Eye bolts with shoulders (4 per cloud panel)
- Aircraft cable (7×19 strand, 1/16-inch minimum)
- Cable grippers or turnbuckles (4 per panel)
- Wire cutters and cable crimps
Keel Framework:
- Aluminum or galvanized steel rails (length per wall)
- Wall brackets with standoffs (1 per rail end, 1 per 4 feet of rail)
- Panel clip hardware (integrated or separate)
- Expansion gap spacers
Frequently Asked Questions
How do you attach acoustic panels to an office wall?
Use impaling clips for permanent installations of fiberglass or mineral wool panels. Use Z-clips for removable installations in leased spaces. Apply construction adhesive to the panel back and press onto the impaling clip teeth, or engage Z-clips by lifting the panel above the wall bracket and lowering it into position.
Can you install acoustic panels without drilling?
Lightweight panels under 10 pounds can be mounted with heavy-duty adhesive or Command strips on smooth drywall. However, adhesive-only mounting is not recommended for ceilings or panels over 15 pounds. For commercial offices, mechanical fastening with minimal drilling (Z-clips leave only small screw holes) is the standard. Tension-mounted cable systems for ceilings can attach to structural elements without penetrating visible ceiling surfaces.
How far apart should acoustic panels be spaced on a wall?
Space panels with consistent gaps of 2-4 inches between edges for a structured grid appearance. For staggered layouts, maintain equal spacing both horizontally and vertically. In conference rooms, treat the rear wall fully (minimal or no gaps) for maximum echo control. In open plans, spacing is less critical than placement at first reflection points.
Do acoustic panels need an air gap behind them?
Yes. A 2-4 inch air gap behind a panel improves absorption by 15-25% compared to flush mounting. The gap allows sound to pass through the panel, reflect off the wall, and pass through again. For ceiling clouds, the suspension system naturally creates this gap. For wall panels, use standoff brackets or Z-clip spacers.
What is the best way to hang acoustic panels from a ceiling?
Use aircraft cable suspension with eye bolts anchored to structural ceiling elements. Adjustable cable grippers allow precise leveling. Never use adhesive alone for ceiling panels. Direct-mount Z-bar systems work for spaces with height constraints but provide less air gap and acoustic performance.
How do you install acoustic panels on concrete?
Use a hammer drill to create pilot holes, then install wedge anchors or sleeve anchors rated for the panel load. Attach mounting hardware (impaling clips or Z-clips) to the anchors. Concrete installation is slower than drywall but creates a more secure mount. Allow extra time — a two-person crew on concrete installs roughly 30% less area per day than on drywall.
Can I install acoustic panels myself or should I hire a professional?
DIY is feasible for projects under 500 square feet with standard wall panels and accessible ceilings. Hire a professional for ceiling work over 12 feet, projects over 2,000 square feet, occupied buildings where disruption must be minimized, or any installation involving MEP coordination. Professional installation costs $1.25-3.50 per square foot.
What tools do I need to install acoustic panels?
Essential tools include a tape measure, laser level, stud finder, cordless drill, appropriate anchors for your substrate, mounting hardware, construction adhesive, and a caulk gun. For concrete walls, add a hammer drill and masonry bits. For ceiling clouds, add aircraft cable, eye bolts, cable grippers, and wire cutters.
Conclusion
Installing acoustic panels in a commercial office isn’t complicated, but it is specific. The right mounting system depends on your panel material, your wall or ceiling type, and whether you need removability. The right layout depends on reflection points, coverage percentages, and MEP coordination. And the right schedule depends on whether you’re working in an occupied building.
The mistakes that cost time and money are almost always planning errors, not installation errors. Blocking a sprinkler, forgetting an expansion gap, or skipping the air gap are all preventable with a thorough layout plan before the first anchor is drilled.
For wall panels, match the mounting system to your lease situation and substrate. For ceilings, suspend rather than direct-mount when possible. For WPC and wood slats, use the manufacturer’s keel framework and respect expansion requirements. And for every project, coordinate with the building’s mechanical systems before you start.
A well-installed acoustic system reduces noise by 12-15 dB, improves speech clarity, and creates an environment where focus and collaboration can coexist. The installation quality determines whether you achieve those results or end up with expensive wall decorations.
Planning an office acoustic installation? Request a free installation hardware kit matched to your panel material, or send us your ceiling plan for a detailed mounting system recommendation and contractor referral.
Categories:
Blog
Related Articles